How To Hide Or Remove Windows 10 Start Button?
Summary: Windows 10 changed the Start Menu layout so that users can access the installed apps listed on the Start Menu. However, some people who used to launch apps by keyboard shortcuts may want to disable the Start Menu. So today, this how-to post will offer practical ways to hide or remove the Start Menu.
Table of Contents
What Is The Windows 10 Start Menu?
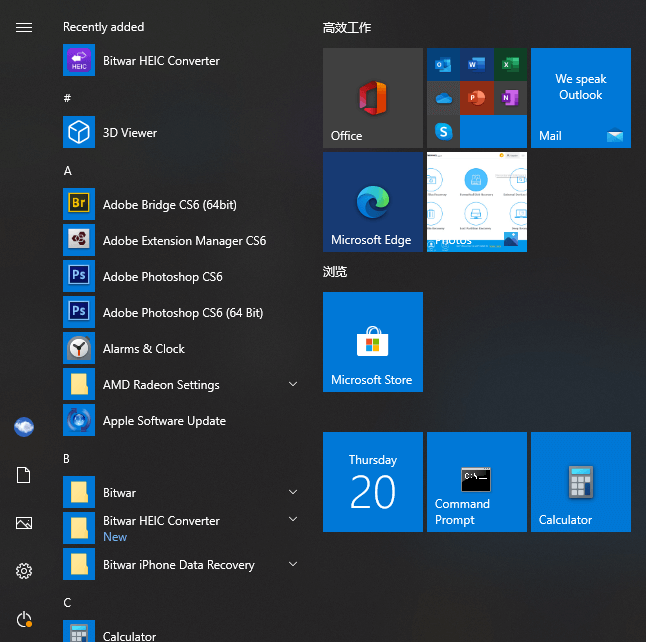
The Win10 Start menu is a directory of all the programs, folders, and contacts that you frequently use. It is the primary point to access the applications on your PC. Users can click the Start button or press the Win logo key to access the Start Menu.
There are two panes and a Search box in the Windows 10 Start Menu. Users can find all apps on the left pane and the corresponding live titles of the apps on the right pane. Any app in the “All Apps” list on the left pane can be copied as a tile on the right.

How to Hide Windows 10 Start Menu?
Hide the Start Menu Using StartIsGone
StartIsGone is a portable program that helps users to hide the Start Menu on the taskbar. It is fully native to Win 8.1 and Win 10.
- You should first download and run StartIsGone. Then its icon will appear in the system tray.
- Right-click its tray icon to access the load at startup and hide system tray icon options. It requires a paltry 1.7 MB of memory.
- If you want to show or bring back the Start Menu, close the SatrtIsGone program.
Hide the Start Menu With Start Killer
Start Killer is a free program to hide or disable the Start menu. It’s easy to hide the Start button with the Start Killer.
- First, you should download and install the Start Killer.
- Run it from Start Menu and right-click its icon to open or exit the “Setting”.
- If you’d like to run the Start Killer automatically, you can turn on the “Load on system start” option.
- Just like StartIsGone, you can close Start Killer to bring back the Start Menu.
Hide the Start Menu With Registry Editor
- Open a Run command dialog box by pressing Win + R keys on your keyboard, then type regedit and press the Enter key to open Registry Editor.
- Choose the Yes button for UAC (User Account Control) prompt.
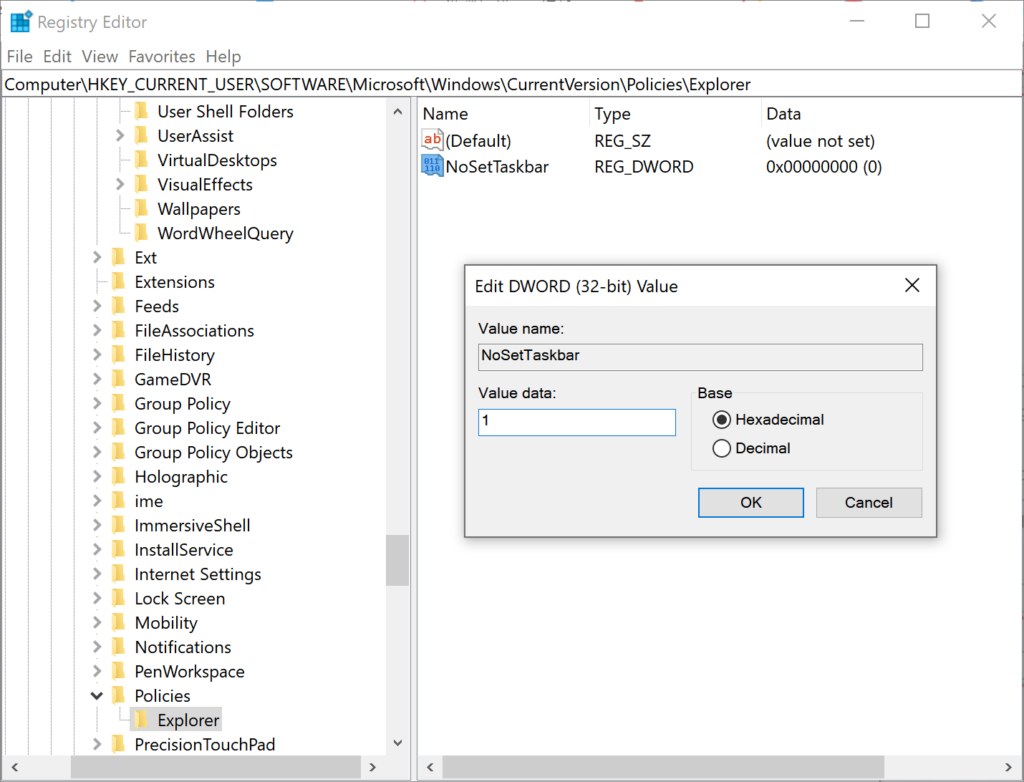
- In the Current User hive, navigate to the following key: HKEY_CURRENT_USER\Software\Microsoft\Windows\CurrentVersion\Policies\Explorer
- In the Explorer key, right-click on the right pane and choose the New > DWORD (32-bit) Value option. Name this newly created value as NoSetTaskbar.
- Double-click on the NoSetTaskbar value to open it and then change Value data to 1.

- Lastly, you need to restart your system to apply the changes to the system.
- If you want to enable it back, you need to open the NoSetTaskbar value again and change Value data to 0.
Conclusion
The Start Menu provides a way to start apps or programs, adjust Windows settings, ask for help for sticky situations, turn off Windows, and leave your PC for a while. Users can hide or remove it easily if they don’t need it. They can also bring it back with ease.
Previous Article
Safe Way To Convert PDF Document to Other Format! Summary: Windows 10 changed the Start Menu layout so that users can access the installed apps listed on the Start...Next Article
3 Solutions to Fix Unable to Read File in Excel Summary: Windows 10 changed the Start Menu layout so that users can access the installed apps listed on the Start...
About Bitwar Data Recovery
3 Steps to get back 500+ kinds of deleted, formatted or lost documents, photos, videos, audios, archive files from various data loss scenarios.
Learn More

