Learn More About the Scanning Interface
Summary: In this article, we will walk you through getting familiar with the scanning interface of Bitwar Data Recovery for Windows.
Table of Contents
Select All Types
After you have selected the scanning mode, you will be redirected to the stage three: Select All Types, where offers different data types to be selected. Please note that if you have selected Deep Scan mode, here in this page has a Range Setting that allows for selecting the different range of the drive volume to be scanned.
Note: Select the specific date types can help shorten the scanning time. For example, if you lost images only, simply select Images/Photos.
About Pop-ups
After clicking on the Scan button, and if it’s the first time of running the Bitwar Data Recovery to the scanning interface stage, there are instructions presented on brief and animated pop-ups.
For Quick Scan:
For Deep Scan:
No matter the Quick Scan or Deep Scan interface, they contain two panels. However, there are some differences between them; Here, for better understanding, we name them the left panel and the right panel.
The Left Panel
Quick Scan
On this panel, there are three ways to filter the scan result: Type, Path, and Time. Ticking each section of the data types will help sort the scanned data quickly according to the selected type. For instance, we click on the Picture section, so the right panel only shows images.
Note: The quick scan interface displays the lost data ONLY. E.g., if you have lost the Word processing documents with the suffix: .doc but not .docx, after the quick scan starts, Bitwar Data Recovery displays only .doc in Document Sections. Likewise, in Path section, the program shows only the original file paths that contain the lost data.
Deep Scan
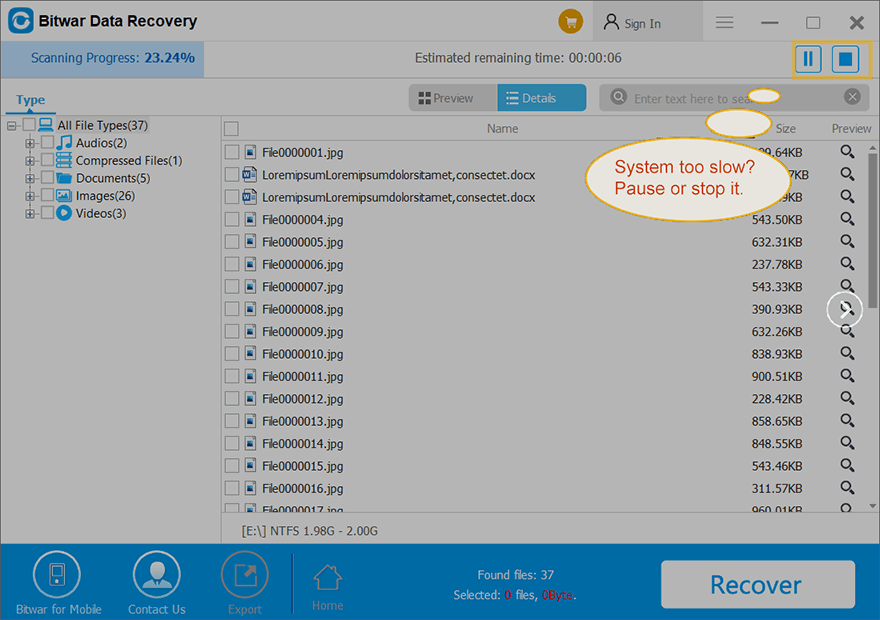
Deep Scan mode runs to search each sector of the hard drive, where has no file meta info can be retrieved, hence, filename will be generated with the word of File at the front. However, this mode finds more files than Quick Scan!
The Right Panel
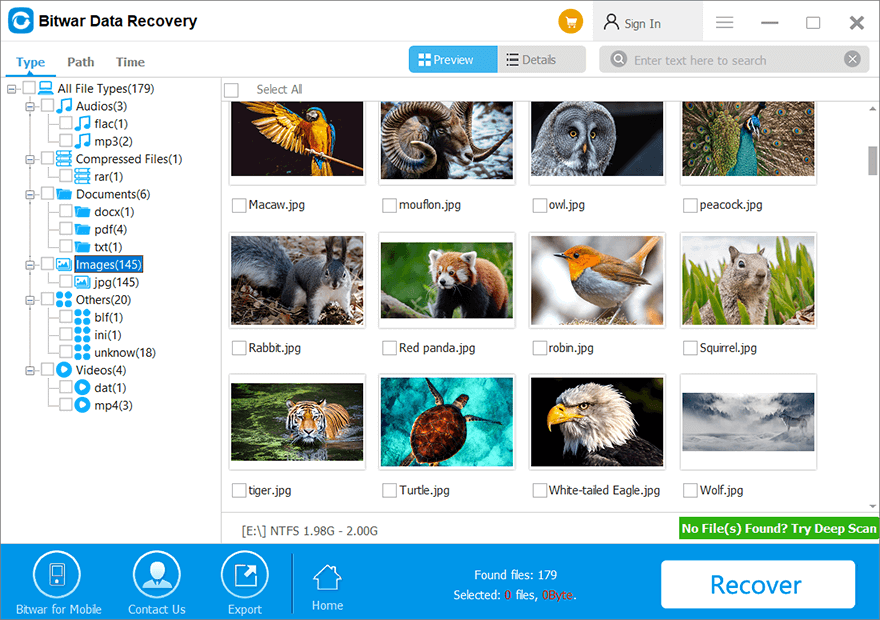
Preview
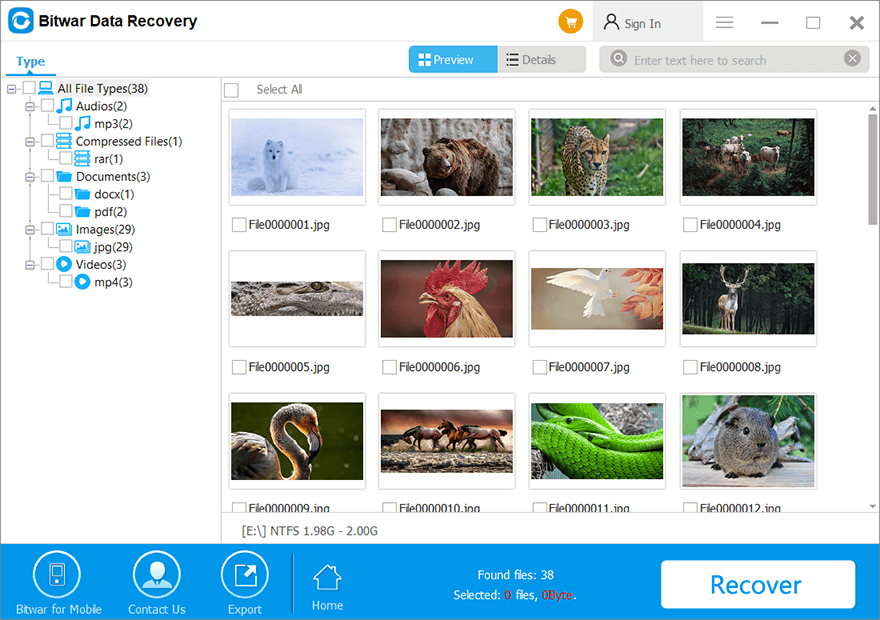
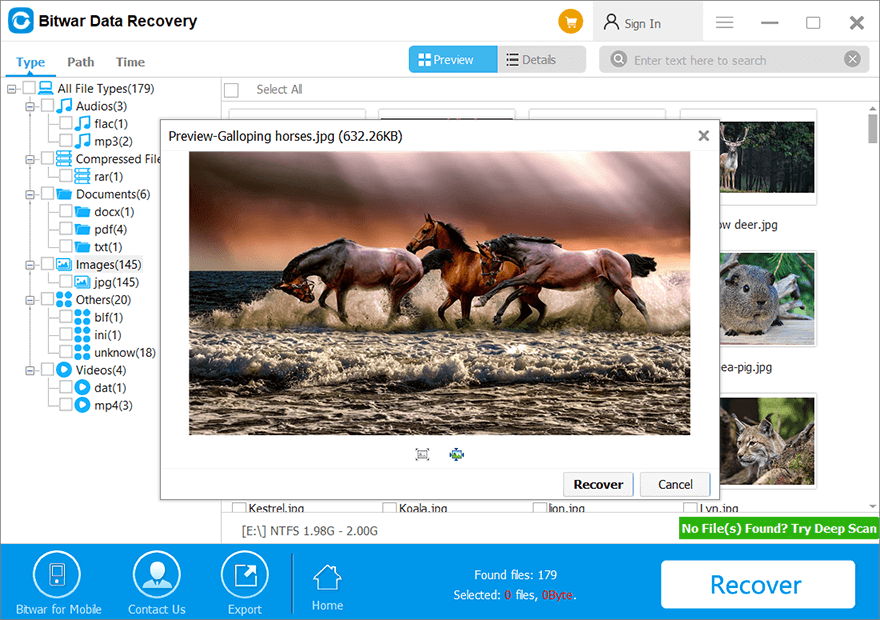
Here we take the scanning interface of Quick Scan as an example. There are two ways to present your files. By clicking on the Preview tab, you will see the generated thumbnails for each data type, such as those in the image below. Click on each thumbnail shows a large preview window.
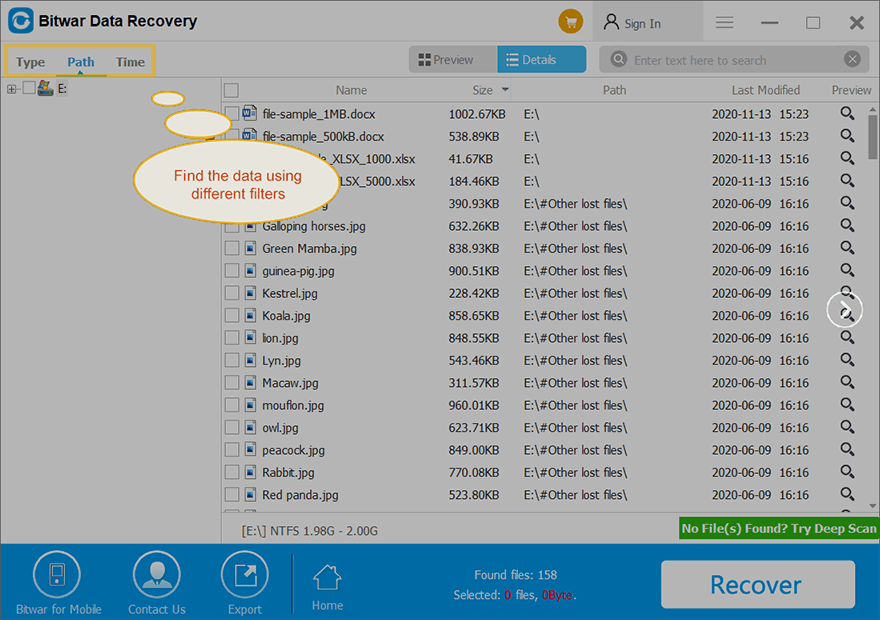
Details
Whereas by clicking on Details, you will see files in a more specific way, which also enables you to sort them in four different manners, Name, Size, Path, and Last-Modified.
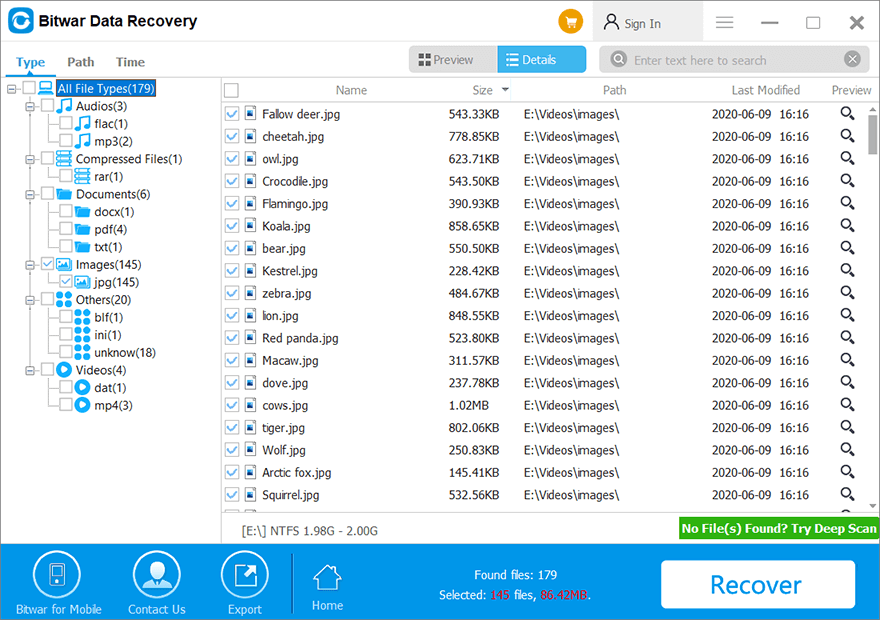
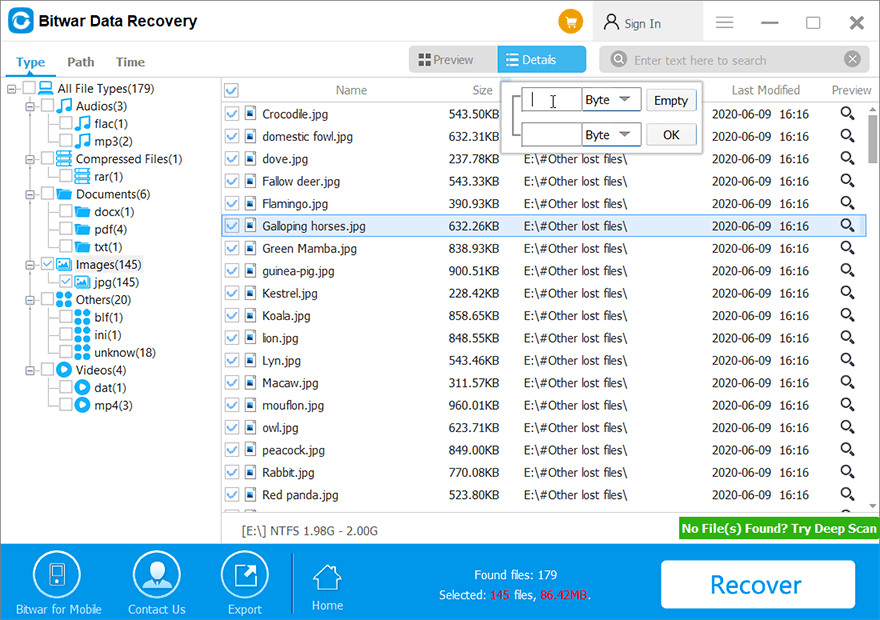
There is an arrow beside Size that you can click to set the exact range for the files, which will filter files outside the limits.
More on Details List
- Ways to Preview: Double-click on the file, right-click on the file and choose Preview, click the magnify icon.
- Search Bar: Use the Search Bar and enter a specific text to find your files quickly.
- Multiple File Selections: Mouse Drag or use the Shift key.
Note: Preview is a crucial step to check whether your lost data is still in good condition; Please dont’ forget to preview the desired data before the data recovery.
Export
If you want to stop the current scanning but worry about scanning the lost data again, here you can click on the Export button to save your scanned result for later use. When you return, you can click on the Import button at the home page of the software and load your scanned result to shorten your precious time.
Recover
After previewing the data, the final step is to Recover the wanted data. There are two ways to save your files.
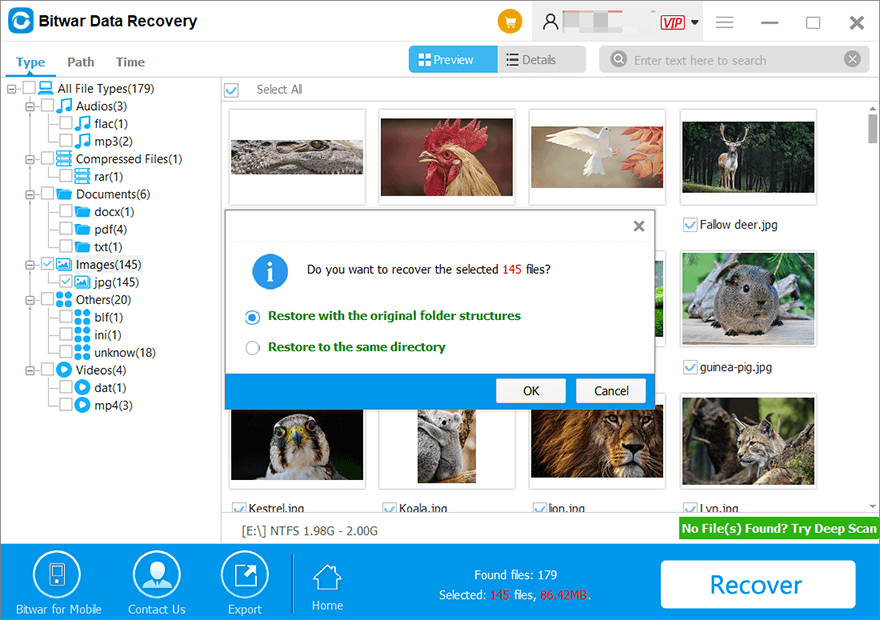
- Recover while maintaining the original directory structure means you will have the lost data saved with its original file name, directory structure.
- Restore to same directory means that all your recovered files will be saved into the same folder.
Note: Don’t save the files to the disks in which you had stored them before deletion. Save them to other devices for safety.
If you still don’t know how to use Bitwar Data Recovery, please check this tutorial to learn How to Recover Lost Data Using Bitwar Data Recovery step by step.


