Solved: The Request Failed Due To A Fatal Device Hardware Error
Summary: In this article, we will introduce you to some of the best ways to fix the request failed due to a fatal device hardware error and recover all your essential data using powerful data recovery software.
The issue request failed due to a fatal device hardware error is one of the common problems that happen to Seagate and Western Digital hard drives, making them inaccessible. At times, this request is coupled with some other error codes such as 0x800701E3 which certainly makes this situation a critical one and, therefore, calls for a need to resolve the concern as soon as possible.
When the request failed due to a fatal device hardware error takes place, it implies that the operating system is unable to access the hard drive or SSD or unable to perform any read or write operation. Some of the factors that might cause this concern are:
- Faulty or loose USB connection
- Presence of bad sectors in the drive
- Hardware or system fault.
Nevertheless, if you ever encounter this error, don’t panic. This article will present several time-tested methods for solving it. On top of that, for users who are experiencing the data loss problem triggered by this error, we also introduce a powerful and user-friendly recovery tool, Bitwar Data Recovery, which can help you get back lost files effortlessly.
Table of Contents
Solutions to the Request Failed Due to a Fatal Device Hardware Error
Solution 1: Check the Status of the Connection
At times, any loose connection can lead to such errors. Therefore, the first step you should take is to check for them. Once you are done checking the connections, connect the hard drive to the USB port of the motherboard to get a stable power supply. Then, move to find a matched yet different USB cable. If this solution doesn’t work, move on to the next solution.
Solution 2: Update the Disk Driver
It’s reported that an outdated disk driver can hamstring the normal functioning of a disk drive. Although whether this is the cause of the faultiness of your drive is hard to prove, it does little harm to the disk to update the disk drive. So, before trying to use other more complicated solutions, this one is a simple fix we would like to recommend.
Step 1: Press Win + Q, type in Device Manager and open it.
Step 2: Expand the Disk drives entry.
Step 3: Right-click on the entry of the faulty drive.
Step 4: Click on Update the drive.
Step 5: In the new window, select Search automatically for drivers.
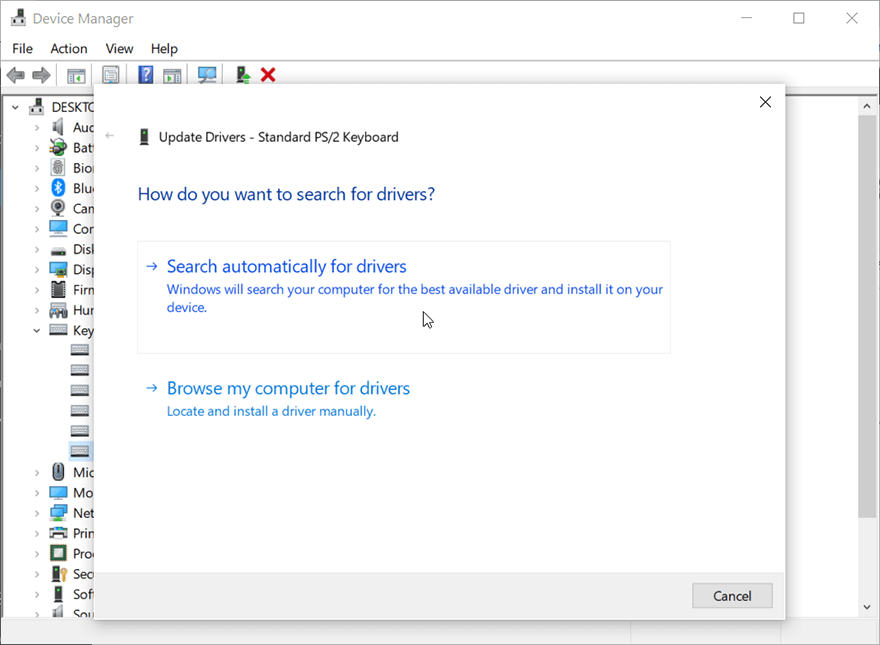
Step 6: Wait for the process to finish and then check if the issue persists.
Solution 3: Run SMART Attributes
SMART, an acronym for Self-Monitoring, Analysis, and Reporting Technology serve as a system that monitors the basic information of drives. It’s a widely used tool for checking the health status of a drive. Refer to the following steps to learn how to run it.
Step 1: Launch the Command Prompt as an admin by pressing Windows+X keys simultaneously.
Step 2: Type the command and press Enter to execute.

Step 3: Now, the window will present one of the below-mentioned statuses.
- Unknown, Bad: High probability of facing error even after getting it fixed. Needs urgent data recovery.
- Caution: Hard drive gravely affected, need data recovery immediately to reduce the risk of permanent data loss.
- OK: Fair chances of a hard drive to get restored to its original status. Follow the below-given solution to do so.
Get Your Data Back Using Bitwar Data Recovery
From this point on, later solutions can involve data loss when you try using them to solve the request that failed due to a fatal device hardware error. Since the drive is inaccessible, you had better recover those valuable data to other safer drives with help from some reliable tool.
We choose Bitwar Data Recovery Software for any type of data recovery as this software is quite easy to use, works efficiently, and delivers in-time results. It can recover many kinds of data such as doc, Xls, audio files, video files, etc. from storage devices like memory cards, hard drives, flash drives, and USBs. Refer to the following steps to learn how to use the software.
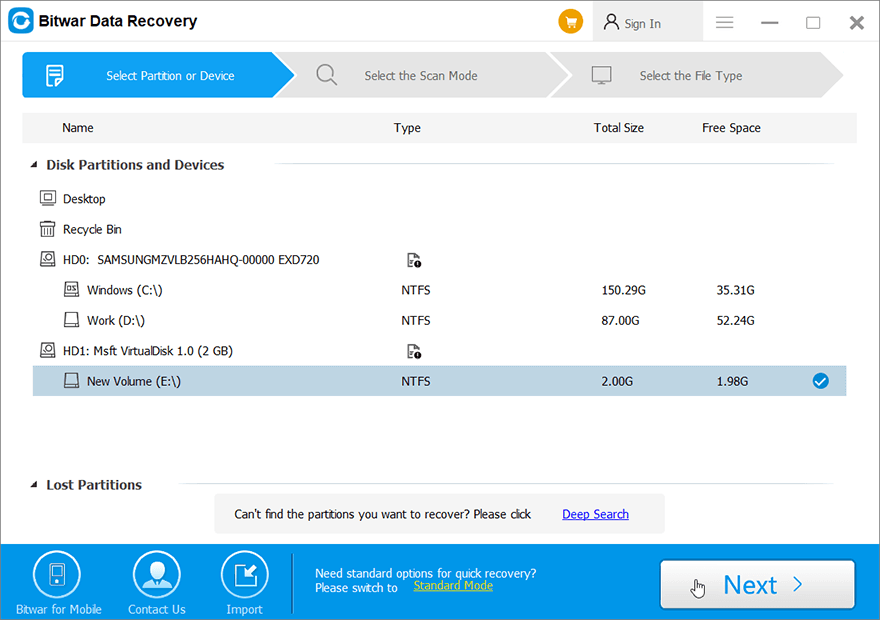
Step 1: Download Bitwar Data Recovery software from the official website.
Step 2: After that, launch the recovery software and select the drive from which you want to retrieve data, and then press the next button to proceed.
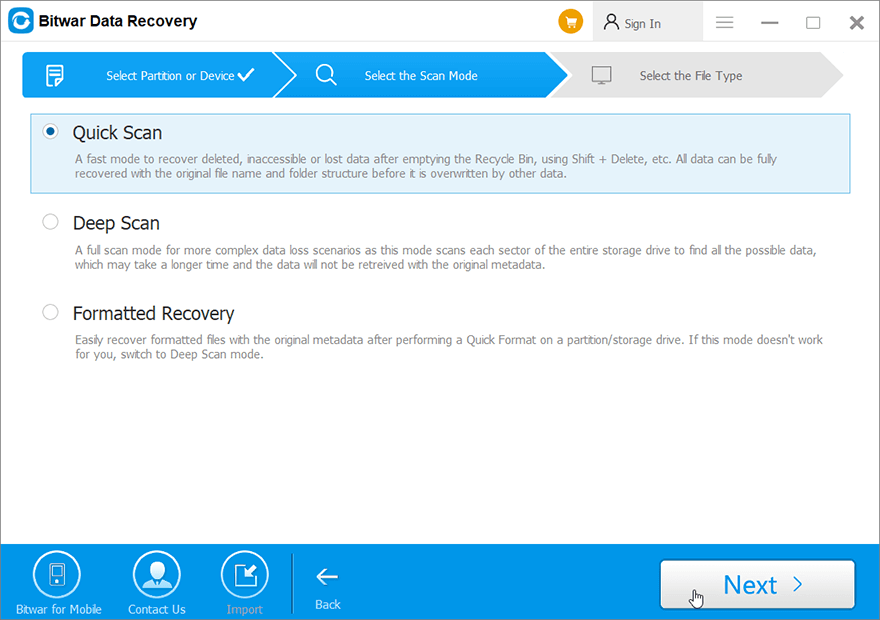
Step 3: Choose the scan mode. To beginners, we recommend Quick Scan, which can recover lost files. If it doesn’t serve you well, you can try Deep Scan next time.
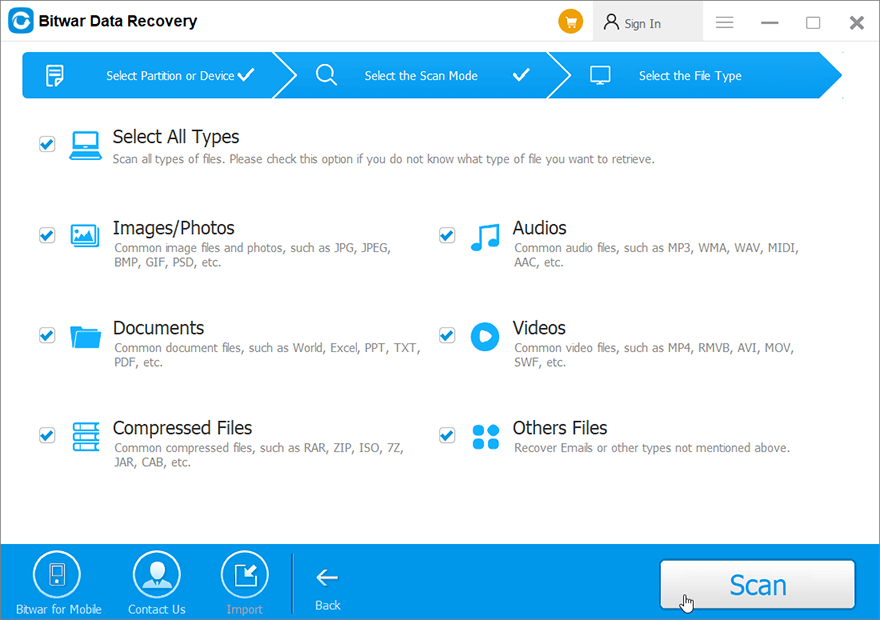
Step 4: Now choose the file types you wish to retrieve and then press the Next button.
Step 5: Preview all the selected data.
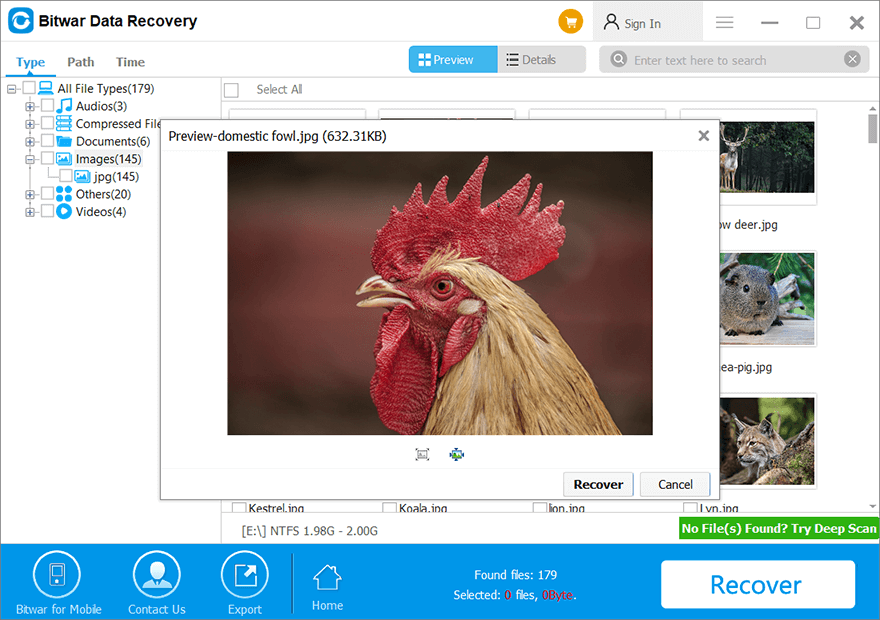
Step 6: Lastly, after choosing and previewing the files you want, click on the Recover button to begin the data recovery process.
On successful recovery of all the data, save it at some safe place. Do not save it back on the same drive from which the deleted files get lost.
Advanced Solutions
Solution 4: Use Error Checking
Error checking is a tool offered by Windows that can be used in Windows 10/8/7/Vista/XP. Users often run it to solve computer issues and improve the performance of a computer after encountering disk problems resulting from potential causes, like corrupted software, improper or sudden shutdowns, or metadata corruption.
Step 1: Press Win + E to open File Explorer.
Step 2: Right-click on the faulty disk drive and then select Properties.
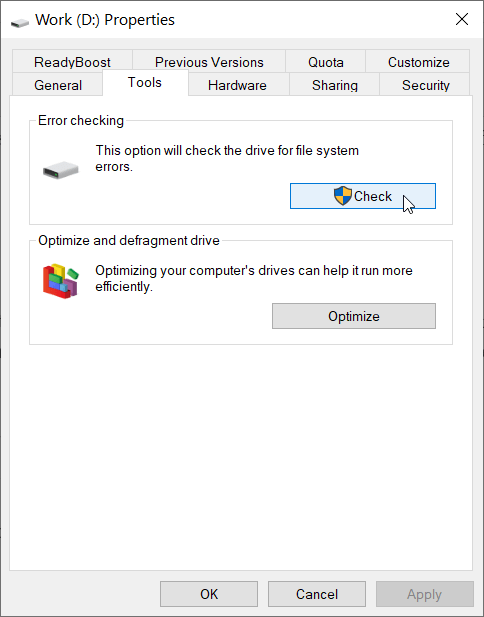
Step 3: Switch to the Tools tab and then click on the Check button within the Error Checking box.
Step 4: Click on Scan Drive to confirm your operation.
Solution 5: Run CHKDSK
On top of Error-checking, Windows provides users with another system tool, CHKDSK, which can be considered as an advanced version of Error Checking.
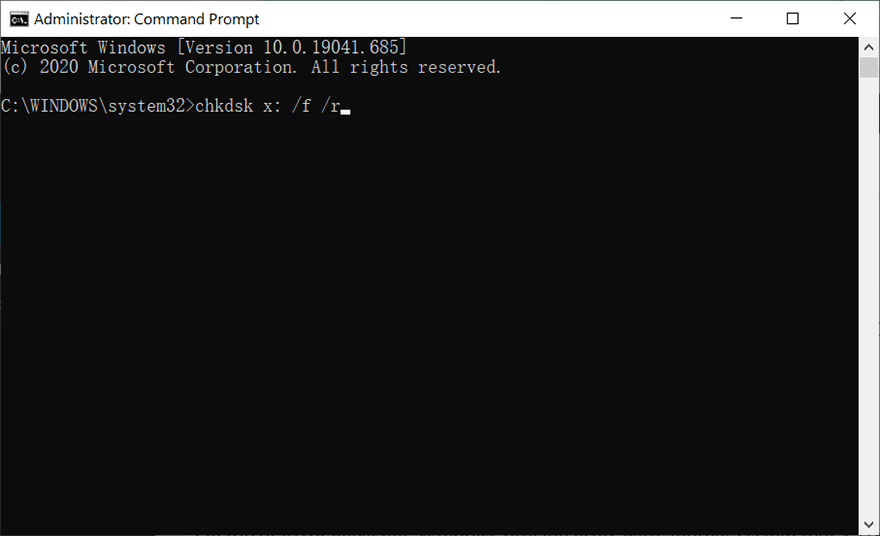
Step 1: Open Command Prompt by pressing Windows+X keys at the same time and run it as an admin.
Step 2: Now, type the command given below and press Enter.
Solution 6: Initialize the Hard Drive via Disk Management
Several system errors that trigger the Request Failed Due To A Fatal Device Hardware error may also result in a faulty drive needing to be initialized. If this is the symptom of your problematic drive, use the following steps to initialize it.
Step 1: Type in Disk management in the Search bar and open it.
Step 2: Right-click on the faulty hard drive and then click on Initialize Disk.
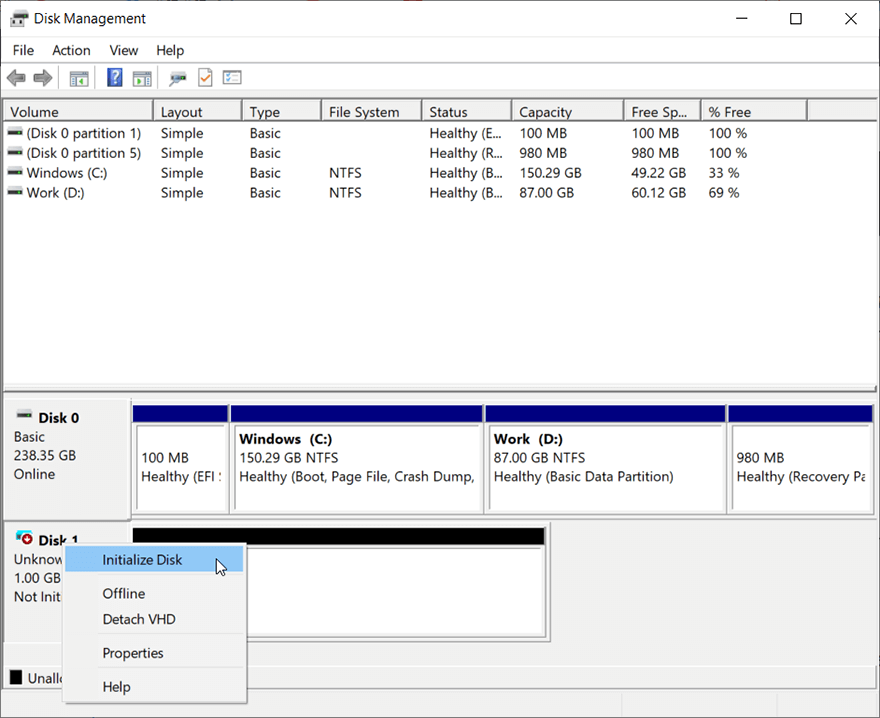
Step 3: Select a partition style to initialize the drive.
Solution 7: Format the Drive
If the above-mentioned solutions fail to solve the request failed due to a fatal device hardware error, you can try formatting the drive. It’s effective, but like the previous one, it wipes out all the data on a drive. Remember to make sure that you have a backup of the data on the drive before proceeding with the following steps to format it.
Step 1: Press Win + E to open File Explorer.
Step 2: Right-click on the faulty drive and then select Format.
Step 3: Select a file system you want and then click on Start.
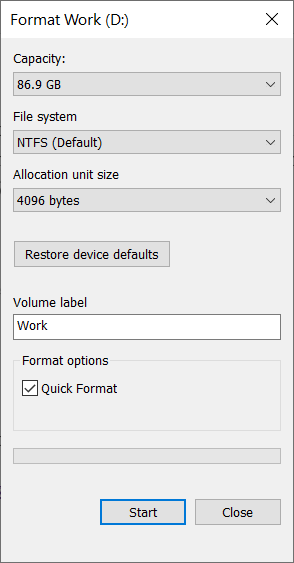
Step 4: Check whether the issue persists after the formatting has finished.
Conclusion
Anyone can witness the request fail due to a fatal device hardware error, and the probable reasons for this error to occur are bad sectors, faulty connections, and faulty hard drives.
Well, there is no need to worry if you ever come across this error as the above simple solutions will help you to fix it. However, before using those effective but destructive solutions, consider recovering all your important data using Bitwar Data Recovery software to prevent any permanent data loss.
Previous Article
[Fixed] The Application Was Unable to Start Correctly (0xc0000005) Summary: In this article, we will introduce you to some of the best ways to fix the request failed due...Next Article
[Solved] Blue Screen of Death 0xc0000428 Error Summary: In this article, we will introduce you to some of the best ways to fix the request failed due...
About Bitwar Data Recovery
3 Steps to get back 500+ kinds of deleted, formatted or lost documents, photos, videos, audios, archive files from various data loss scenarios.
Learn More


