15 Ways on How to Free up Drive Space in Windows 10/8/7
Summary: This article will walk you through every possible method of how to free up disk space in Windows 10/8/7 and the best hard drive data recovery software – Bitwar Data Recovery when you have accidentally deleted the vital data no matter on the internal & external hard drive, USB flash drive, SD memory card, etc.
As storage technology develops, the hard drive storage capacity will reach 20 TB or even 40 TB soon. However, we may agree that no matter how large the storage capacity of your hard drive is, the computer turns too slow if you have stored too many files on it. We’ve known that how to free up drive space has been asked many times on Microsoft Community. Hence, we’ve already worked out the 15 best ways to help free up tons of undesired files/programs stored on your hard drive without affecting your current state.
Please note that cleaning up the data on your hard drive may also cause vital data to lose; it is suggested that you need to back up your data before starting to use any of the solutions below.
Table of Contents
Quick Solutions for Free Up Drive Space
Way 1: Use Built-in Disk Cleanup Utility
As your PC ages, it’s going to be fraught with undesired files stored day by day on the hard drive that can cause the computer to slow. Fortunately, Windows has offered a built-in tool named Disk Cleanup. No matter the downloaded program files, temporary internet files, system error reports, thumbnails, etc. can be removed entirely with the help of this cleanup utility. Ideally, it would get more disk space that amounts to several gigabytes.
Step 1: Type in Disk Cleanup in the search bar to open it.
Step 2: Choose which drive you want to clean.
Step 3: Select the file types you want to delete. There is a Description section with every file type you select. If you want to learn more precisely what files you will delete, you can click on View Files.
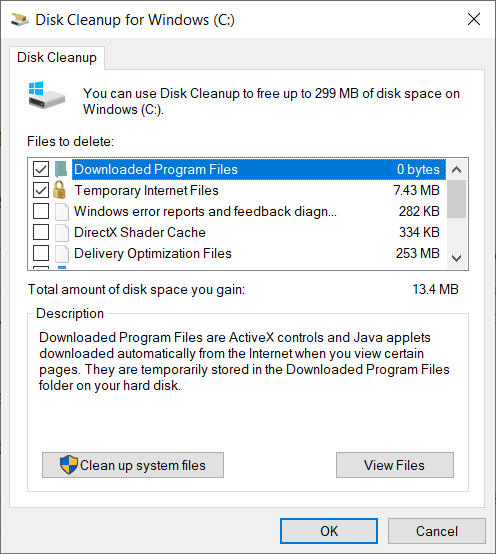
Step 4: Click on OK. Now you can check the total hard disk space in Windows 10.
Way 2: Empty the Recycle Bin
After you have sent the undesired files to the Recycle Bin but without emptying it, generally, the files will stay in the Recycle Bin for a while, and they undoubtedly take up the disk spaces and consequently impairing the PC’s responsiveness. Use the steps below to get more drive space:
Step 1: Go to the desktop right-click on the Recycle Bin.
Step 2: click on Empty Recycle Bin. A warning will pop up and ask for confirmation.
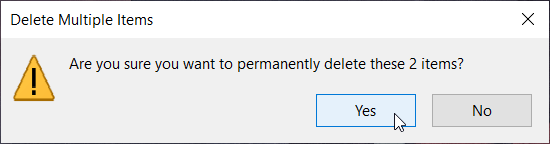
Step 3: Click on Yes to proceed.
Way 3: Uninstall Rarely Used Programs
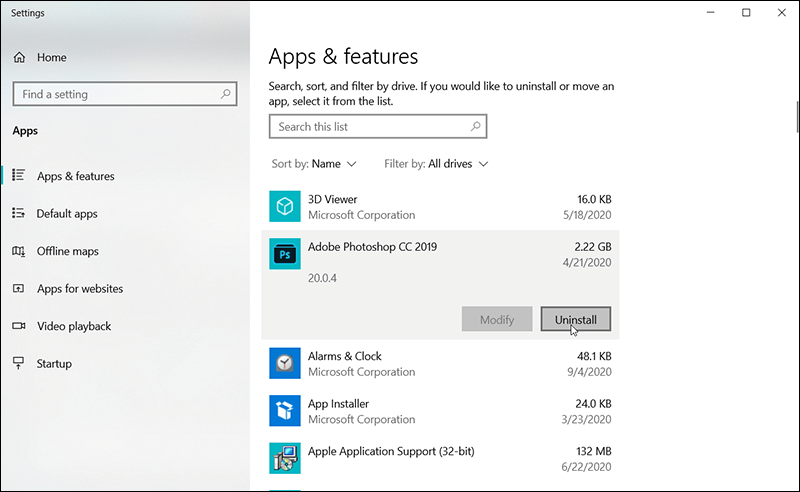
There might be some programs that are lurking in your PC and rarely used. However, Windows has offered us the utility to uninstall them. Refer to the following steps to learn how to do:
Step 1: Right-click on the Start Menu, and then choose Apps and Features.
Step 2: On the right page, under the Apps & features title, there is a list containing programs installed on the PC.
Step 3: Sort the list, click on an unwanted program, and then click on Uninstall to get rid of it.
Way 4: Remove Temporary and Download Files
Besides Disk Cleanup, there is another way you can clear up disk space by deleting temporary files that you downloaded but are not needed anymore. It can be done via Settings.
Step 1: Search Storage Settings in Windows Search Bar.
Step 2: Find and click on Temporary files on the list of the right page.
Step 3: Check off unwanted files, and then click on Remove files to get rid of those files.
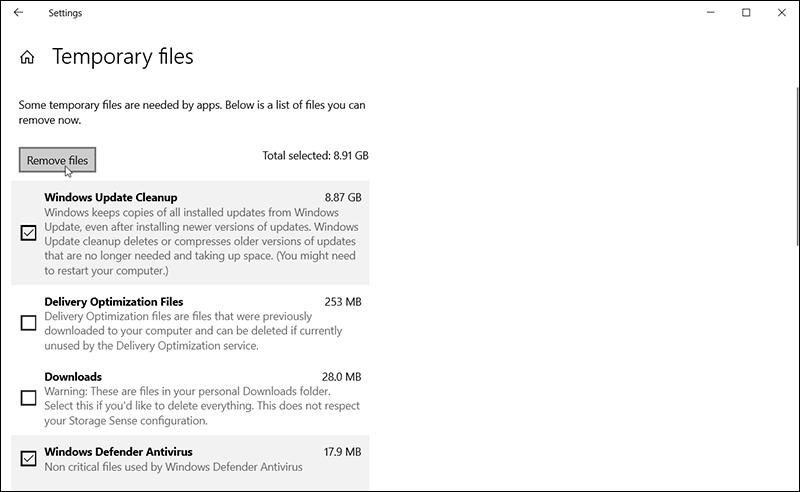
Now you can check the total hard disk space in Windows 10 to see if it has been freed up.
Way 5: Rebuild the Database and Modify the Index Item
Sometimes users notice that their PCs can be glutted with the growing search indexing database. If that’s the problem facing you, it may serve you well to rebuild the database and modify the index items. In this way, users can reclaim appreciable storage space easily with the following steps:
Step 1: Type in Indexing Options in the Windows Search bar.
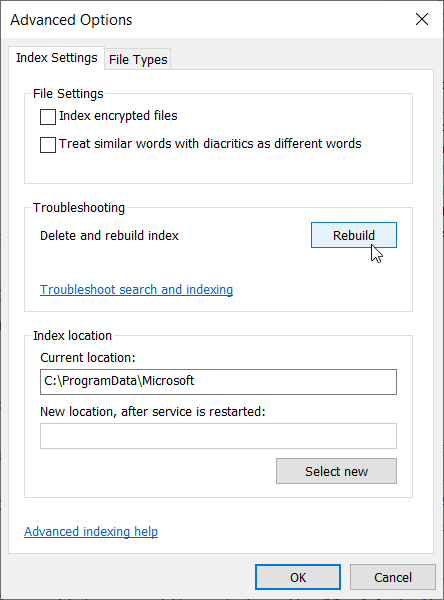
Step 2: Now, click on the Advanced button and then click on the Index Settings tab.
Step 3: Click on the Rebuild button under the Troubleshooting section to apply the rebuilding.
Step 4: After that, return to the first page of the Indexing Options and then click on the Modify button.
Step 5: Click on the Show all locations button and then uncheck the options for apps you don’t want to index.
Step 6: Expand the C drive and deselect the folder you want to index.
Step 7: After all, close all the windows.
Way 6: Delete Unwanted Users
If other people have shared the PC with you and are no longer in need of it, you can delete their accounts to clear up drive space. To do so, use the steps:
Step 1: Click on the Start icon and then hit on the Settings.
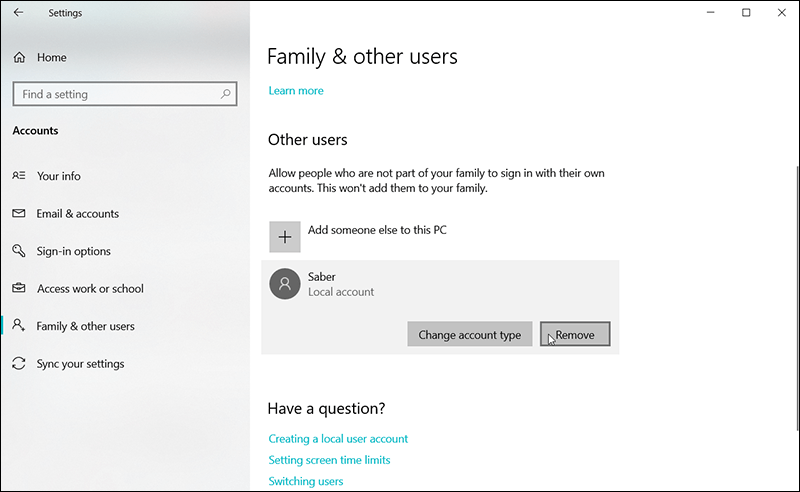
Step 2: Navigate to Accounts > Family & other users.
Step 3: On the right page, select all the unwanted accounts under Other users and then click on the Remove button.
Step 4: Now, click on the Delete account and data button to erase.
Way 7: Use NTFS Compression
Windows 10 offers a quick way for the user to compress files, folder saved on a disk drive with “Compress this drive to save disk space feature.” This feature saves a large amount of storage space too:
Step 1: Press Win + E to open File Explorer and then right-click on a drive, select the Properties option.
Step 2: Check off Compress this drive to save disk space.
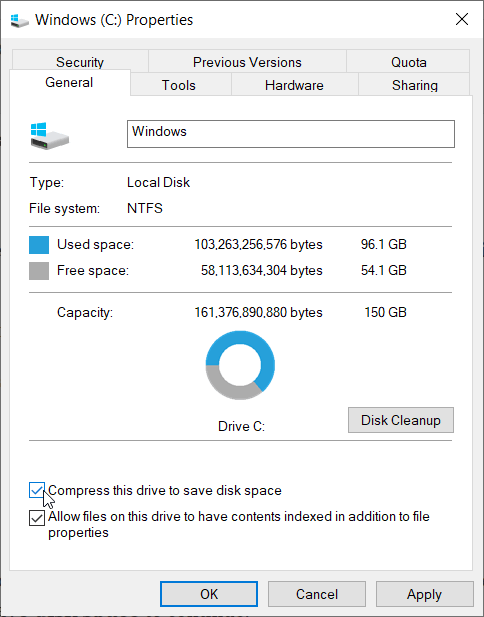
Step 3: Click on OK and then the Apply button.
Step 4: Wait for the NTFS compression to complete.
Note: If you would like to apply the NTFS compression to a specific folder only. Just right-click on the desired folder and click on Advanced > Check off Compress contents to save disk space to continue.
Way 8: Stop Using the System Restore Points
Windows 10 set the System Protection to ON by default after the system installation, and this will take at least 3% drive space of your current storage for saving the restore points; hence, by disabling the system restore, you will have a luck to free up drive space for approximately 1 – 3 GB (It should depend on how large of your storage drive is):
Step 1: Type Control in the Run dialogue box after pressing Win Logo + R.
Step 2: Click System and Security option, and then navigate to System, click on it.
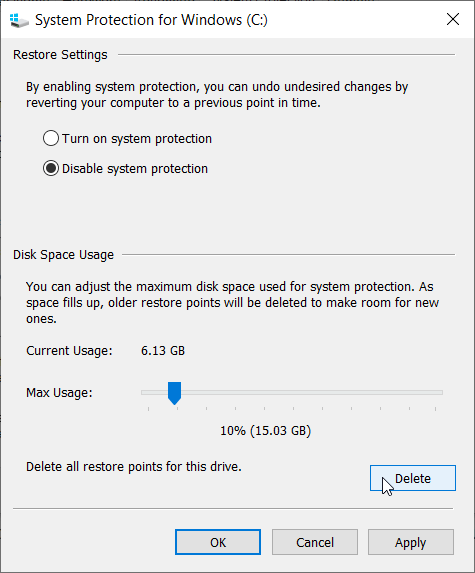
Step 3: On the left panel, find the System Protection and then Configure.
Step 4: Select Disable system protection and then click on the Delete to delete all restore points for this drive.
Step 5: Return back and then repeat step 4 if you have other partitions.
Note: System protection is created to automatically save the system changes that allow you to restore to the previous points once in need. If you are happy with this feature, skip it to the next method.
Way 9: Use Free Up Space Now
Starting with Windows 10, Storage Sense is a feature that devoted itself to optimizing your storage. It monitors your system for old and unused files, and then actively removes them on a regular schedule. You can also use the “Free up space now” feature in Storage Sense with the following steps:
Step 1: Navigate to Settings > Systems and click on Storage on the left panel.
Step 2: Click on Configure Storage or run it now.
Step 3: Scroll down and find Free up space now > Clean Now
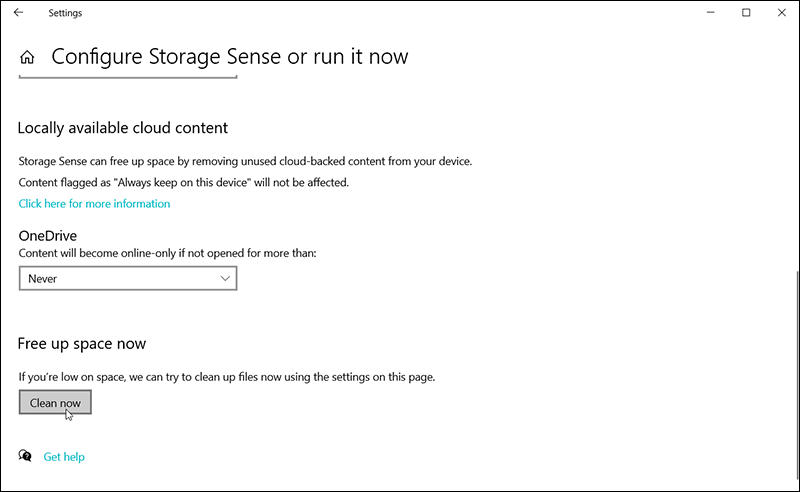
Step 4: Click Clean Now to save the storage space if you are low on disk space.
Note: The Storage Sense task can be enabled automatically on Every day, Every week, Every month, or during low free disk space. Select one of the schedules if you don’t like to do it on your own.
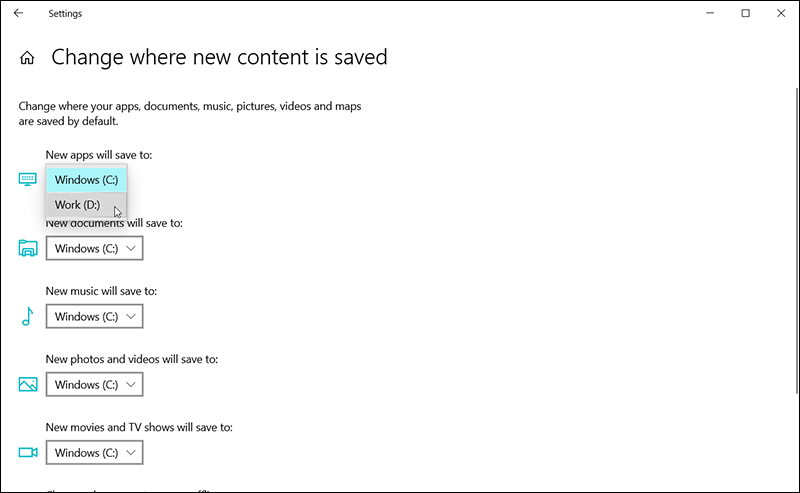
Way 10: Change File Storing Destination
As Windows 10 set the file storing destinations to the first partition of your hard drive by default, which means you will have all of your new apps, documents, music files, photos, movies, and TV shows, offline maps being saved to the partition C. Hence, if you want to change the file storing destination to free up space for partition C, use the following steps:
Step 1: Navigate to Settings > Systems and click on Storage on the left panel.
Step 2: On the right page, scroll down to the More storage settings, and then click on Change where new content is saved.
Step 3: Click on a drop-menu of an option, choose a different drive, and then click on Apply.
Generally, if you have processed all of the above methods, you might be satisfied with the cleanup result as tons of the undesired/temporary files have been wiped out and a large enough free drive space has been claimed; however, if you are still willing to get more free drive space. Here are the five advanced solutions that can be selected.
Advanced Solutions for Free up Drive Space
Solution 1: Disable Hibernate
Hibernation is a mix between a traditional shutdown and sleep mode designed for laptops. When you put your PC to hibernate, open programs and documents will be saved to the hard disk before turning off the PC. Then when it’s time to restart it, all your previous work is ready and waiting for you. However, if a quick way to start up your computer doesn’t matter to you, by disabling it, you can free up drive space allocated to the hibernate-saved files.
Step 1: Press Win + Q, type in Command Prompt, right-click on it and select Run as administrator.
Step 2: In the Command Prompt window. Enter: powercfg /hibernate off and then hit Enter.
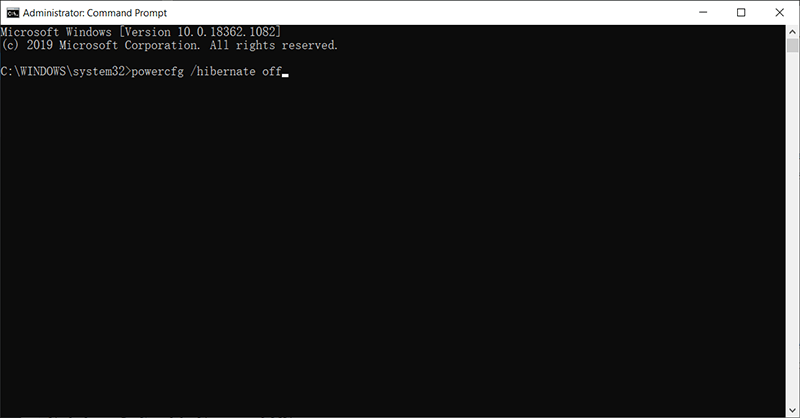
Note: By disabling hibernate you will free up a large amount of the drive space according to how big hibernate files have been saved; However, if you would like to enable Hibernate some times later, enter this command:powercfg /hibernate in the command prompt window.
Solution 2: Enable Compact OS
Compact OS is a built-in tool offered by Windows 10. Although it is usually used for a device with limited storage capacity, it could be helpful if you are in immediate need of extra space. You should be noted that the alteration of system files could put the computer at risk of severe damage, and you need to make sure that you have made a temporary backup of your PC before proceeding this solution:
Step 1: Press Win + Q to open Search, Type in Command Prompt, right-click on it and select the Run as administrator option.
Step 2: To compress the installation of Windows 10 and its apps, type in the following command, and press Enter: compact.exe /compactOS:always

Note: To revoke the command, follow the same steps, but on step 2, use another command: compact.exe /compactOS:never.
Solution 3: Disable Reserved Storage on Windows 10
Since the May 2019 Update, Windows 10 adds a new feature named as Reserved Storage, which allocates gigabytes of space for system caches, updates, and temporary files. Although disabling it can reclaim the storage space, it’s not a preferred method since it may put the computer at risk. But if you are well-informed about the feature, you can use the following steps to disable it.
Step 1: Type in PowerShell in the Search Bar, right-click on it and select the Run as administrator option.
Step 2: To confirm if the feature is enabled, type in the following command and press Enter: Get-WindowsReservedStorageState
Step 3: To disable the feature, type in the following command and press Enter: Set-WindowsReservedStorageState -State disabled

Solution 4: Store Local Files to Onedrive
Windows 10 has embedded OneDrive automatically for the first installation of the system, and each user will have at least 5 GB storage space for free. Then the users can choose to store files to OneDrive and make them available online manually. We can use the following steps:
Step 1: Click on the OneDrive in the lower-right corner of the taskbar.
Step 2: Sign up for a Microsoft account, and then log in to the OneDrive.
Step 3: Send all of the desired files to OneDrive. After that, delete the local files to clear the drive space.
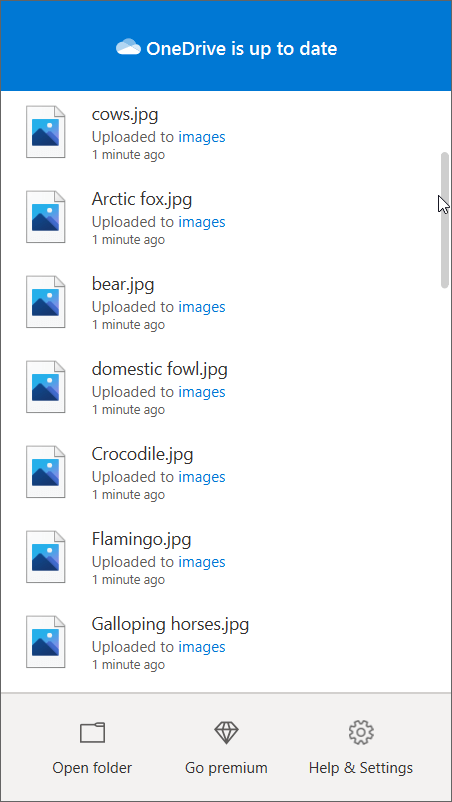
Note: After storing files to OneDrive using this solution, you are able to access the files via OneDrive and view them anywhere you like. However, there’s only 5 GB for free, and if you want to get more free cloud storage, you should buy from Microsoft.
Solution 5: Use Third-Paty Cleaning Utility
There are many third-party cleaning utilities out there in the market, but you should be noted anywhere on the Internet or by your friends, colleagues that CCleaner is the king; CCleaner is a powerful drive space cleaning software that developed by Piriform, it can clean up all the potential unwanted files or Windows registry entries from your computer, and it’s easy to be used with the following steps:
Step 1: Download the software from its official website, and then install it.
Step 2: Launch the software, and then click on the Custom Clean on the left panel.
Step 3: Under the two tabs, Windows and Applications, select the type of data you want to delete.
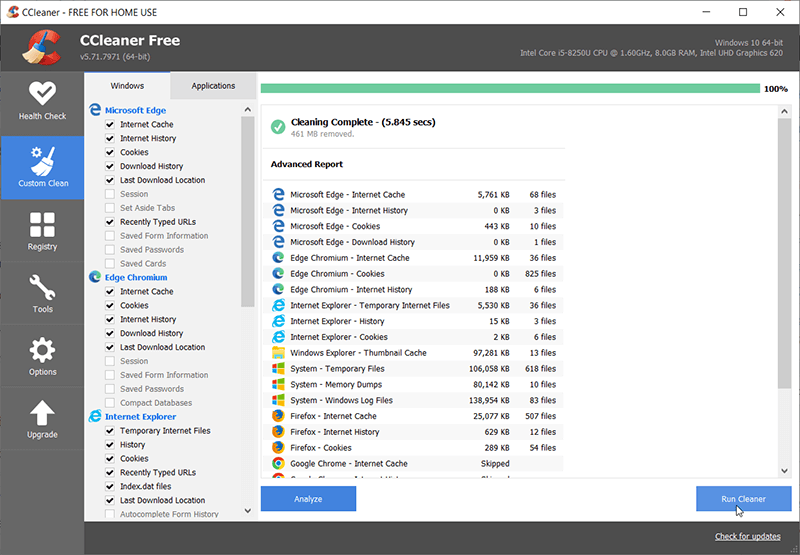
Step 4: Click on Run Cleaner at the lower-right corner.
What if your vital photos, videos, documents, or any types of the files might have been cleaned up accidentally after using the Shift+delete key or the third-party cleaning utility; don’t worry, accidental deletion isn’t a final command to completely wipe the data up, as the file system still keeps the file contents saving on the hard drive and it just marks the disk space for the deleted files as free for later overwriting.
Hence, we need to hurry up by using the third-party data recovery software – Bitwar Data Recovery before the desired files are getting lost permanently.
Recover Deleted Files Using Bitwar Data Recovery
Bitwar Data Recovery has a straightforward and step-to-step interface that anybody can use it to find the lost data back without skilled techniques; however, we also include the necessary steps for you to take as a reference:
Step 1: Download Bitwar Data Recovery from the Download Center and install it. After that, launch the program.
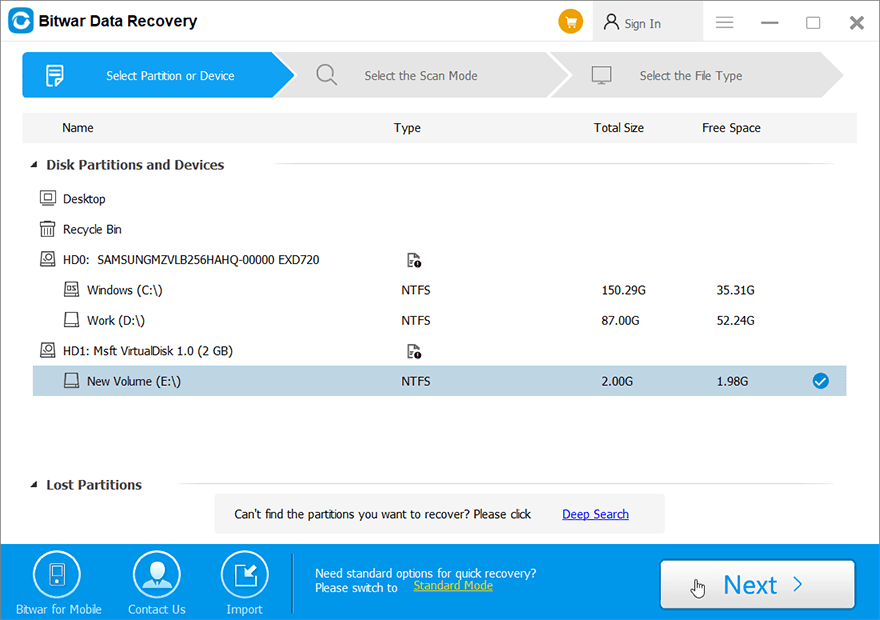
Step 2: Check off the drive/partition in which your lost files were deleted. Click on Next.
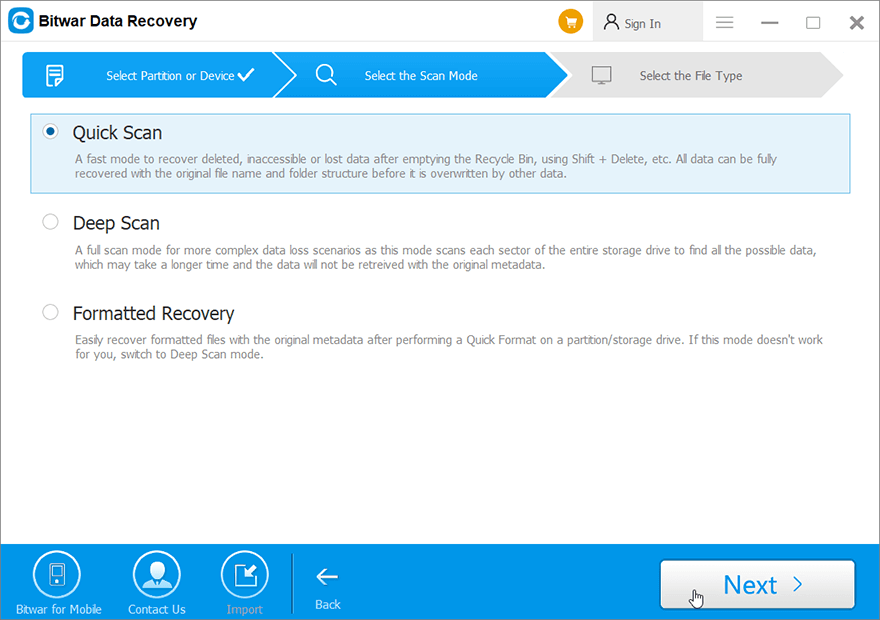
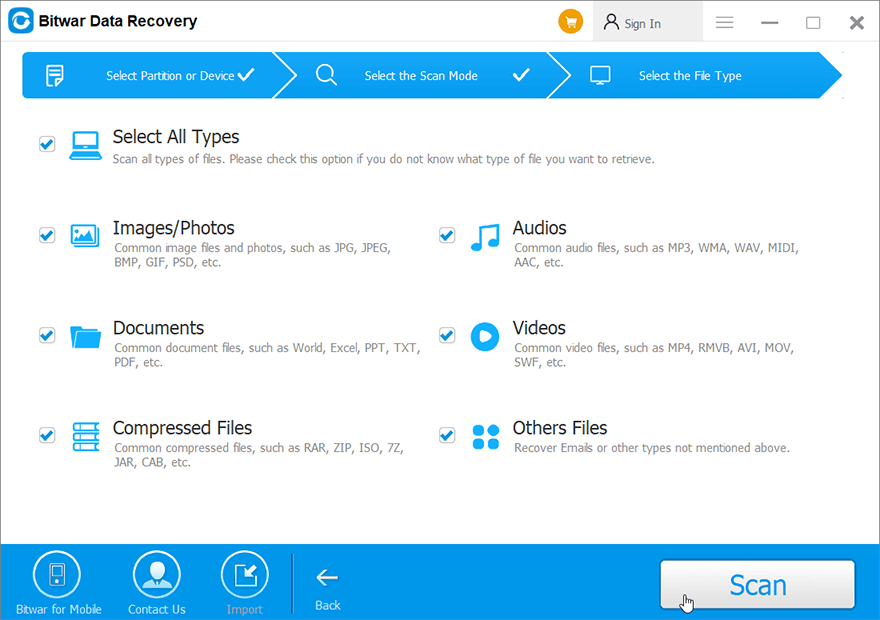
Step 3: Now, select the Quick Scan. Click on Next, and then select the file types you want to scan.
Note: Select only the Images/Photos or other single or multiple data types that will help shorten the scan time.
Step 4: Click on the desired types on the left panel to filter the files, and then click on the needed file to Preview it.
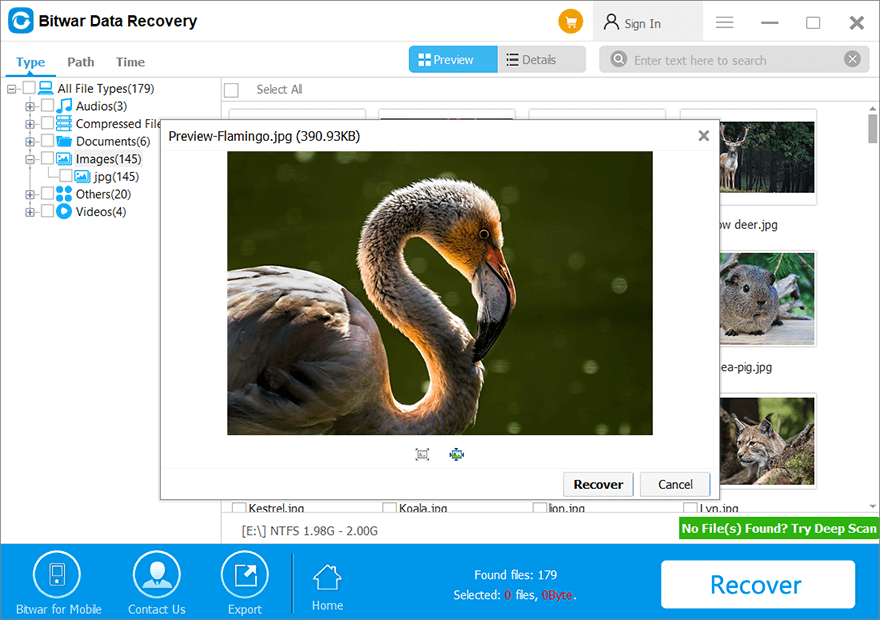
Step 5: Select the needed data and hit on the Recover button to save the data in a safe directory.
Note: Try with the Deep Scan mode when you couldn’t find the data using Quick Scan mode, and also please note that you can’t save the files back to the original drive/partition that contains the lost data since this is a way to prevent your lost data from being overwritten again.
Conclusion
Regular cleaning is a good habit that we recommend you develop to free up disk space and boost PC’s performance. The methods written above are those easy and quotidian ones that almost every Windows user can use.
We also explored Bitwar Data Recovery, a simple and effective tool designed to help users retrieve lost, deleted, formatted documents, videos, photos, audio files, archive files from any of the storage drive such as internal & external hard drives, USB flash drives, SD memory cards, etc.
If you want to learn more about how to free up disk space on MAC, please click on the link to read: How to Free Up Purgeable Storage Space on Mac.
Previous Article
How To Add Pages To A PDF? Summary: This article will walk you through every possible method of how to free up disk space in Windows 10/8/7...Next Article
How To Download WhatsApp For Windows 10? Summary: This article will walk you through every possible method of how to free up disk space in Windows 10/8/7...
About Bitwar Data Recovery
3 Steps to get back 500+ kinds of deleted, formatted or lost documents, photos, videos, audios, archive files from various data loss scenarios.
Learn More


