How to Fix the 0xc000014c Error on Windows
Summary: The 0xc000014c error sends a signal that a part of the Registry in your PC is corrupted. In the case that one or more file structures containing registry data become corrupted and there is an error at the first booting sector, the error 0xc000014c is highly likely to pop up. The error code also indicates that important booting information is either corrupted or missing in the area of the HDD. In this article, we will help you deal with the error code, and in the case of data loss issues caused by this problem, explain how to use Bitwar Data Recovery to bring your lost files back.
Table of Contents
What Causes the 0xc000014c Error?
Several problems can cause the 0xc000014c error on your computer. They can be as follows:
- corrupted BCD (Boot Configuration Data)
- system file corruption
- Newly Installed Hardware
- Bad Sectors
How to Fix the 0xc000014c Error
Method 1: Use a System Restore Point
You could start the fixing process by doing a system restore that makes your computer revert to a previous point. In general, your system has previously created a restore point when the system was running properly. If you have a restore point in place, this method can allow you to restore the PC to a working state.
Based on your Windows version, the steps you need to take to access the System Restore menu will vary. But no matter whether you’re on Windows 7 or Windows 10, the prime prerequisite is the installation media that allows you to access the System Recovery Options.
If your system doesn’t tell you to press a key to boot from the installation media, you’ll need to use the on-screen instructions to enter the boot setup. Besides, you can enter your BIOS settings and make a change to the boot order so that the installation media is first. The exact steps for users to make changes to the boot priority in BIOS will vary, depending on the manufacturer of your computer.
After you have successfully booted from the installation media, use the following steps according to your Windows version:
For Windows 7 Users
Step 1: Once you see the Install Windows screen, click on Next, then click on Repair your computer.
Step 2: Make sure that your operating system is selected and select Next.
Step 3: Wait for the Startup Repair to perform a scan on your OS. Click on the Restore button if the computer asks you to do so.
Step 4: The repair tool might well try additional repair strategies at this point. Even if it takes time, do not rush to restart or shut down your computer during this phase.
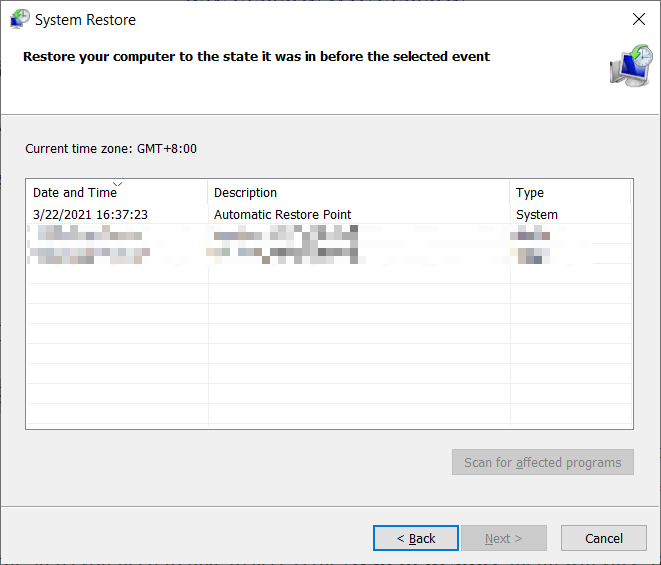
Step 5: System Restore should pop up, if you see the System Recovery Options window, select System Restore.
Step 6: In the System Restore window, check the box next to the Show more restore points option and then select a restore point when your system was functioning perfectly. Click on Next and then Finish.
Step 7: Finally, click on Yes and wait for the repair tool to make your computer revert to a previous version.
For Windows 10 Users
Step 1: Right after you see the Windows Setup screen, click on Next, and then click on Repair your computer.
Step 2: Go to Troubleshoot, click on System Restore, and then select your operating system.
Step 3: After the System Restore window has popped up, click on Next. Then, select a restore point when your system was functioning without error and click on Next once again.
Step 4: Click on Finish, confirm that you want to use the restore point and wait for your device to revert to the selected point.
Method 2: Rebuild the BCD Files
There are many mishaps that may cause your Boot Configuration Data to misbehave. However, in most cases, we would like to recommend that you try to repair the BCD file with a series of Command Prompt commands.
After you have successfully managed to boot from the installation media, use the following steps according to the Windows version:
For Windows 7 Users
Step 1: After you see the Install Windows screen, click on Next and then click on Repair your computer.
Step 2: Make sure that your operating system is selected and then click on Next.
Step 3: The repair tool will perform additional scans at this stage. If a message pops up asking whether you want to use System Restore, click on No. After that, click On Command Prompt.
Step 4: Next, type in the following commands and then press Enter after each one.
Bootrec /FixBoot
Bootrec /ScanOS
Bootrec /RebuildBcd
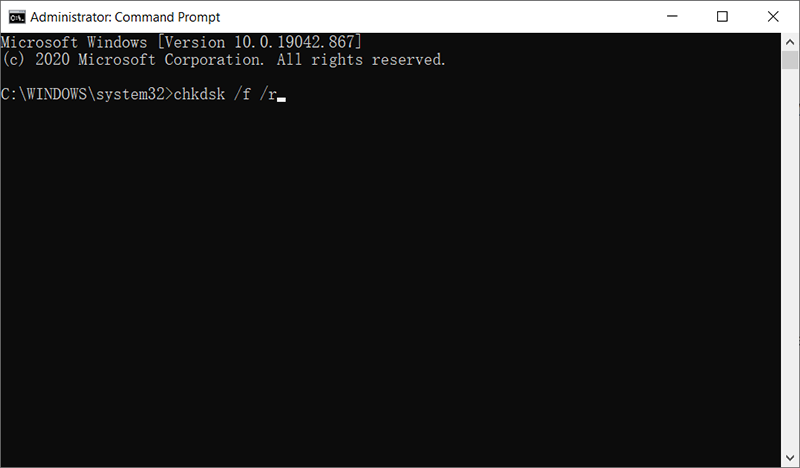
Step 5: After the commands have been successfully executed, type in chkdsk /f /r and then press Enter. This tool is used to scan for any bad sectors on your hard drive and repair them automatically.
For Windows 10 Users
Step 1: After you see the Windows Setup screen, click on Next, and then click on Repair your computer.
Step 2: Select Troubleshoot and then click on Command Prompt.
Step 3: Next, type in the following commands into Command Prompt and then press Enter after each one.
Bootrec /FixBoot
Bootrec /ScanOS
Bootrec /RebuildBcd
Step 4: After the commands have been successfully executed, type in chkdsk /f /r and then press Enter. This tool is used to scan for any bad sectors on your hard drive and repair them automatically.
Method 3: Restore the Registry Files From the Regback Folder
If all the aforementioned methods fail to work, you can resort to this method. But bear in mind that you will need to disconnect your HDD and connect it to another computer.
All Windows versions store a copy of your principal registry files in a folder named RegBack. If the issue is indeed associated with a registry issue, backing up the folder to the regular directory will get rid of the 0xc000014c error. The steps you need to follow are the same in every Windows version.
Step 1: Remove the hard drive connected to the PC troubled by the 0xc000014c error and connect it to a working computer as a secondary drive.
Note: Make sure that the working computer can be normally booted and is not having the 0xc000014c error.
Step 2: Boot the working computer, open the HDD that you’ve just connected and then navigate to /Windows / system32 / config / RegBack
Step 3: Copy the contents of the Regback folder and then backtrack to navigate to the config folder.
Step 4: Paste the contents you have just copied over the files in config. When the computer asked whether you want to override the files in config, Click on Yes to All.
Step 5: Power off the working PC, disconnect the HDD and reconnect it to the faulty computer with the 0xc000014c error. Allow it to boot from the HDD, and then check whether the issue is solved.
How to Recover lost files using Bitwar Data Recovery?
As we have mentioned before, besides an unexpected BSOD brought about by the 0xc000014c error, Another issue that may come close on its heels is data loss. The 0xc000014c error could cut short your current work, making the works you were working on go mysteriously. To help you deal with this problem, we would like to recommend our user-friendly and effective recovery tool, Bitwar Data Recovery. With the help of it, you can easily recover your lost data.
Step 1: Download Bitwar Data Recovery from our official website.
Step 2: After installing the software, open it, choose the drive where the lost files were stored, followed by clicking the Next button.
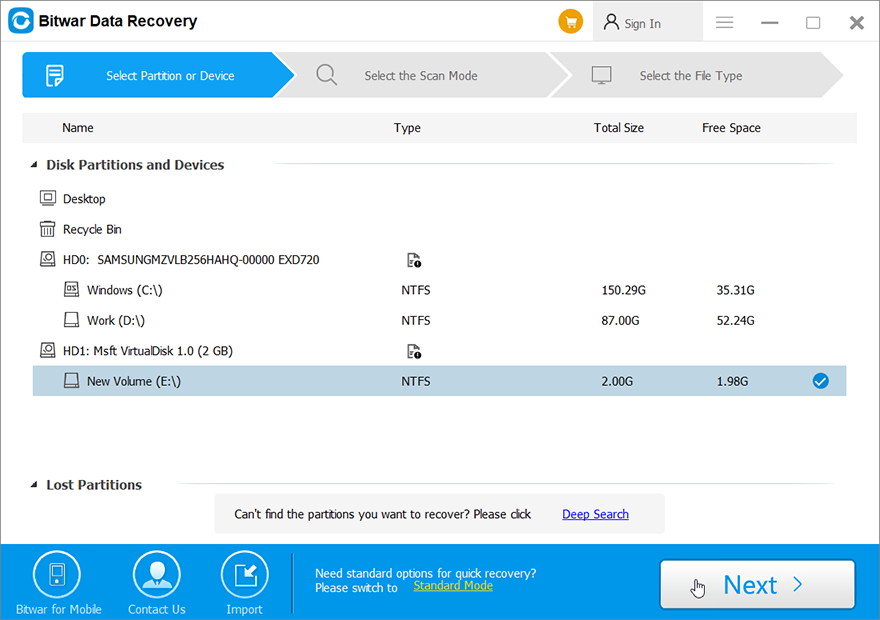
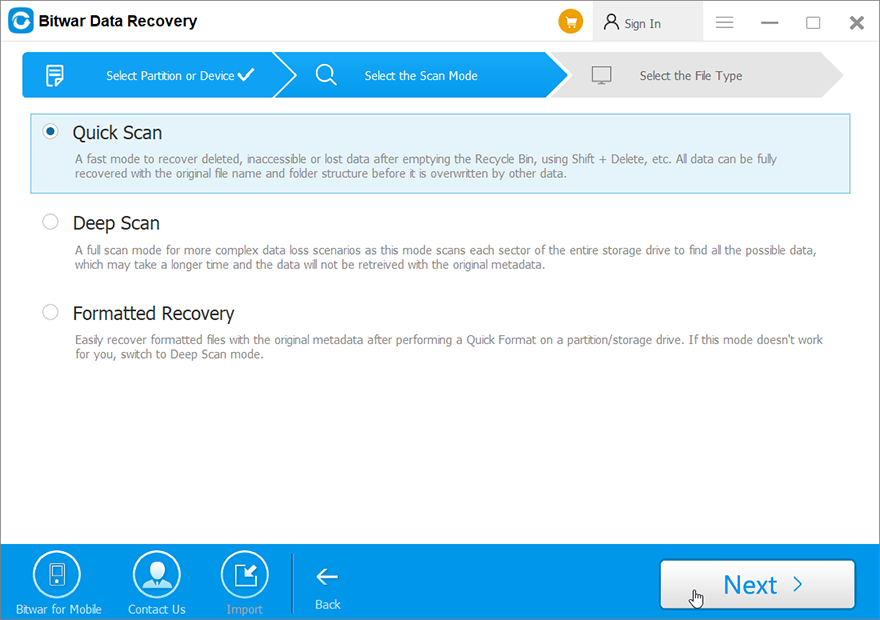
Step 3: Now, you can select a scan mode in this stage. We would like to recommend Quick Scan, which is capable of retrieving most of the lost files. If it fails to work, you could come back to this stage and then select Deep Scan.
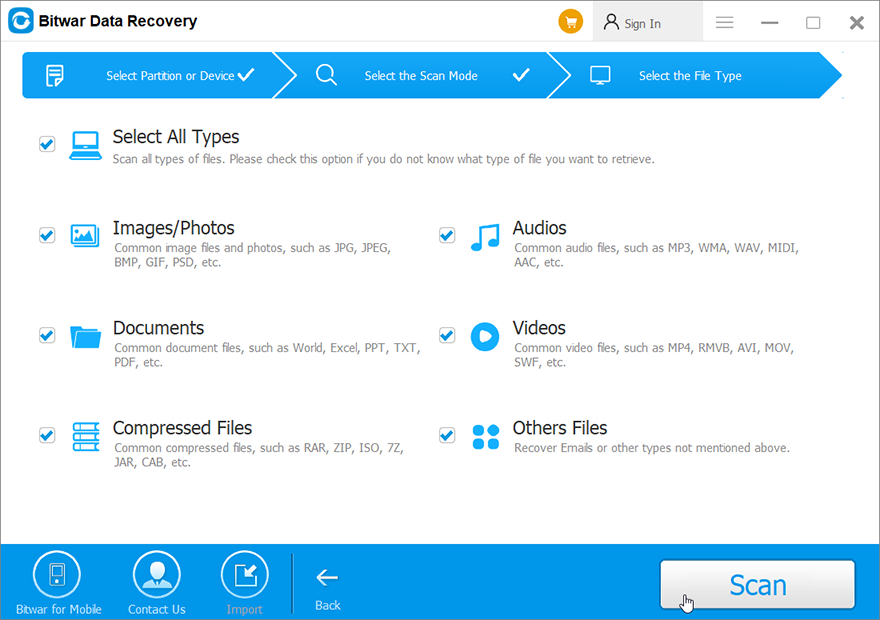
Step 4: Select the file types you want to recover and then press the Next button.
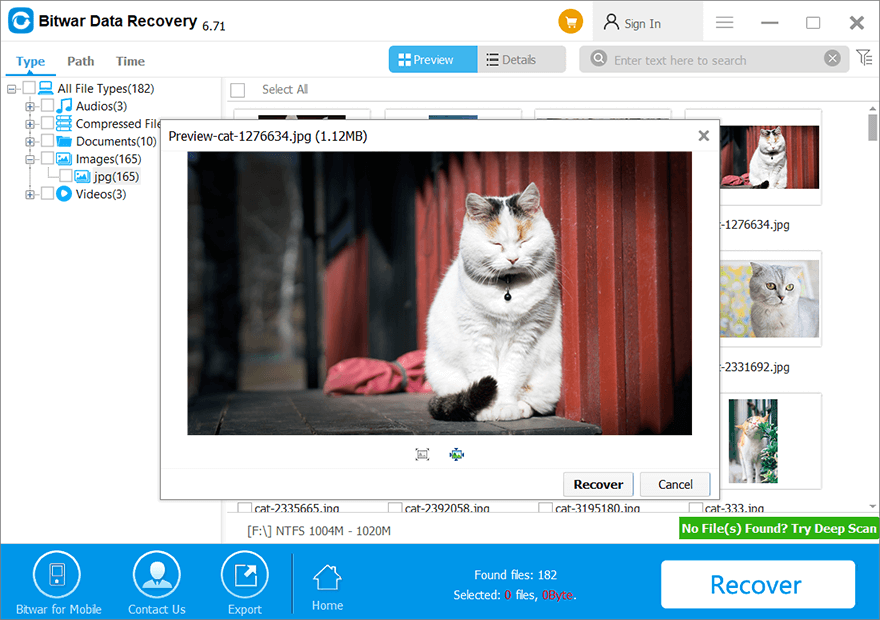
Step 5: At the end, preview the files you want and then press the Recover.
Conclusion
0xc000014c error is one of those tricky Blue Screen of Death issues that users might well face when using a computer. In this article, we have introduced 3 commonly used methods to help users fix it. Like other BSOD errors we have discussed before, such as kernel data inpage error and 0x0000007f, this error may well lead to data loss issues. Hence, on top of those methods, we also explain to users how to use our effective and reliable recovery tool, Bitwar Data Recovery, to recover lost files.
Previous Article
7 Detailed Solutions to the 0x80070005 Error Summary: The 0xc000014c error sends a signal that a part of the Registry in your PC is corrupted. In the case...Next Article
6 Best Solutions To Solve Double Click Folders Won’t Open On Windows Summary: The 0xc000014c error sends a signal that a part of the Registry in your PC is corrupted. In the case...
About Bitwar Data Recovery
3 Steps to get back 500+ kinds of deleted, formatted or lost documents, photos, videos, audios, archive files from various data loss scenarios.
Learn More


