7 Detailed Solutions to the 0x80070005 Error
Summary: The 0x80070005 error, also known as access denied error, is associated with Windows updates. It pops up when the computer lacks the files required to make changes to settings in the process of Windows update. Consequently, the installation of the Windows update is brought to a halt. And to cap it off, the user is more likely to experience issues like system slow down, abrupt system reboot, and Blue Screen of Death issues. By the way, for users who encounter data loss issues due to this particular error, we would like to recommend you to use Bitwar Data Recovery to recover your lost files.
Table of Contents
What Causes the 0x80070005 Error?

There can be various reasons behind the 0x80070005 error. We have listed the common ones below:
- Administrator privileges
- Update service
- Outdated update files
- Interference from Antivirus software
- PC in a faulty state
- Wrong Windows installation
How to Fix the 0x80070005 Error
Solution 1: Run Windows Update Troubleshooter
Your Windows system has an in-built tool intended to detect issues affecting the operating system and fix them automatically. If there are corrupted files, the troubleshooter will download a fresh copy to replace the corrupted ones. Refer to the following steps to learn how to use the update troubleshooter to fix any issues with the update process.
Step 1: Press the Windows key + Q to launch the search bar. Type in troubleshoot and then click on the first result which comes forth.
Step 2: In the troubleshoot menu, select Windows Update and then click the button Run the troubleshooter.
Step 3: Windows will start the troubleshooting process and look for any errors. A message may well pop up saying that the troubleshooter requires administrator access. Click on the Try troubleshooting as an administrator option.
Step 4: After the fixes are completed, reboot your computer and check whether the problem still persists.
Solution 2: Power Cycling Your Computer
Before we try more involved technical solutions, we should leave out the prospect of the computer in an error state. If any of your PC’s modules fails to work properly and requires a jump-start, you can try fixing them by power cycling. Power cycling is the act of restarting your computer completely, erasing all the temporary configurations. And when you start the computer again, it will revert to its previous state with default values.
Step 1: Turn off your computer and the router. Take out the power supply, press and then hold the power button for around 2-3 minutes.
Step 2: Wait for around 5-8 minutes before you reconnect the power supply to the computer and then power on your devices.
Step 3: Try connecting to the network and check whether the issue is solved.
Solution 3: Remove Extra Devices
Another cause is that extra devices (if connected) might cause several problems with the update mechanism. this is a very common scenario seen with various Windows versions. Hence, we recommend that you disconnect all the extra devices, such as webcams and consoles.
Also, there are a few rare cases when removing (disconnecting) non-essential hard drives from the computer may help a lot. It seems that the update mechanism has trouble deciding which drive it should install. Make sure that you turn your PC off before deciding to remove the drives.
Solution 4: Disable Your Antivirus
Antivirus software is intended to monitor services, processes, and downloads on your computer. When the update mechanism starts off, there is a prospect that your Antivirus software will block updates even though there is no sign of any virus or malware.
In this solution, you should try uninstalling your Antivirus software instead of just disabling it because even if the anti-virus software is disabled, there are still some settings that are so entrenched in your registry that may well deter the updating process.
Refer to the following steps to learn how to uninstall the anti-virus software.
Step 1: Press Windows + R, type in appwiz.cpl in the dialogue box and then press Enter.
Step 2: In the application manager, scroll down the menu to look for the antivirus software. Right-click on it and select Uninstall.
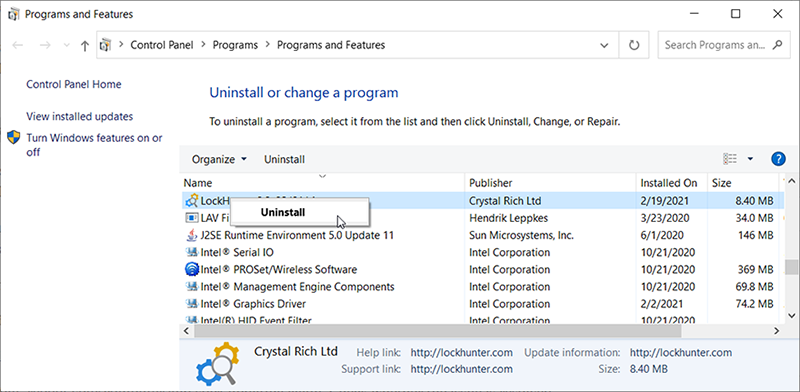
Step 3: After uninstall, reboot your computer and start updating again. Check whether the issue is resolved.
In some cases, the update files downloaded and stored on your computer are either incomplete or corrupt. The reasons for this kind of error are various, ranging from bad internet to module corruption.
The solution we suggest is to disable the update service, delete all the downloaded content and then re-run it. In this way, the computer will reinitialize the update process and download components from scratch. Ensure that you are logged in as an administrator before using this solution.
Method 1: Disable Update Service
Step 1: Press Windows + R to open the Run box. In the dialogue box, type in msc.
Step 2: Browse through the list to find a service named Windows Update. Right-click on the service and then select Properties.
Step 3: Click on Stop under Service Status.
Method 2: Delete Downloaded Files
Now you should navigate to Windows Update directory and delete all the updated files in that place.
Step 1: Open your file explorer by presssing Win + E.
Step 2: Navigate to:
C:\Windows\SoftwareDistribution
Step 3: Delete everything in the Software Distribution folder (you can also backup them to another location in case you need them later).
Method 3: Turn Update Service Back On
The next step you have to do is to turn the Windows Update service on and launch it again. Use the following steps:
Step 1: Open the Services tab, navigate to Windows Update and then open its Properties.
Step 2: Start the service again and then launch your update manager.
Solution 5: Set Services as Automatic
If the above method fails to work, you can try executing some commands to restart the update module manually. Make certain that you are logged in as an administrator before using the following steps.
Step 1: Press Windows + Q to launch the search bar. Type in command prompt, right-click on it and then select Run as administrator.
Step 2: In the command prompt, type in the following commands one by one and make certain that each command line is executed before you type in the next command line.
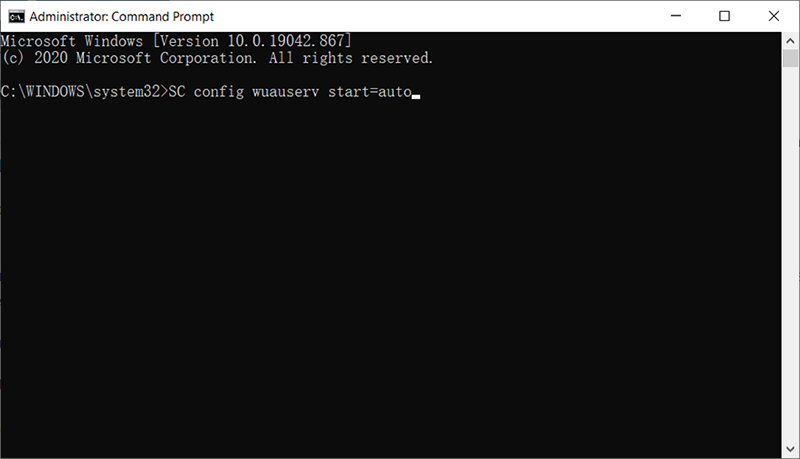
SC config wuauserv start=auto
config bits start=auto
SC config cryptsvc start=auto
SC config trustedinstaller start=aut
By using these commands, you will set all the services to automatic.
Step 3: Exit command prompt and reboot your computer. Now check whether the update can be installed.
Solution 6: Clean Installing Windows
If all the above methods don’t work on your computer and you are still unable to fix the 0x80070005 error, you can try installing a fresh version of Windows on your computer. This solution will fix any problems with the installation files. Bear in mind that you should back up all of your data before using this solution since all your information and installed applications will be wiped out.
How to Recover Data Using Bitwar Data Recovery
Besides some tricky issues in the wake of the 0x80070005 error, it could well induce another tricky problem, data loss. Hence, to help users see off this particular problem, we would like to recommend our reliable and effective data recovery tool, Bitwar Data Recovery.
With the help of it, you can recover files that either got deleted or vanished. Refer to the following steps to learn how the tool works like magic.
Step 1: Download Bitwar Data Recovery from Bitwarsoft Download Center.
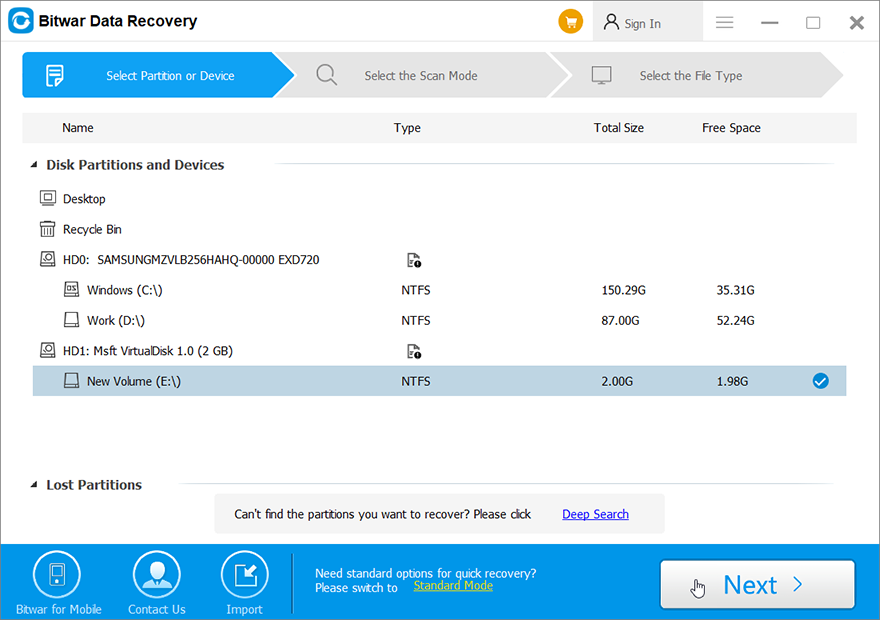
Step 2: After installing the software, open it, choose the drive where the lost files were stored, followed by clicking the Next button.
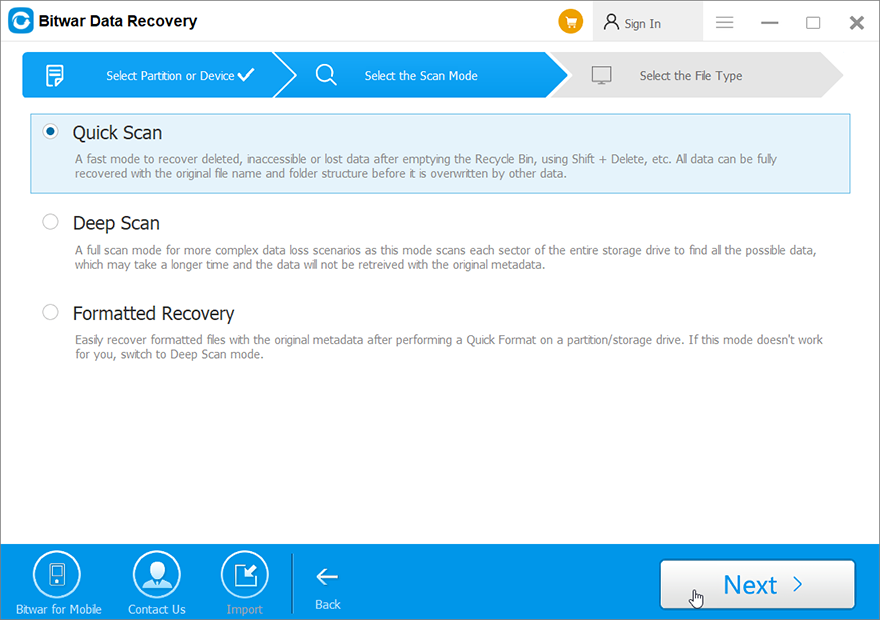
Step 3: Now, you can select a scan mode in this stage. We would like to recommend Quick Scan, which is capable of retrieving most of the lost files. If it fails to work, you could come back to this stage and then select Deep Scan.
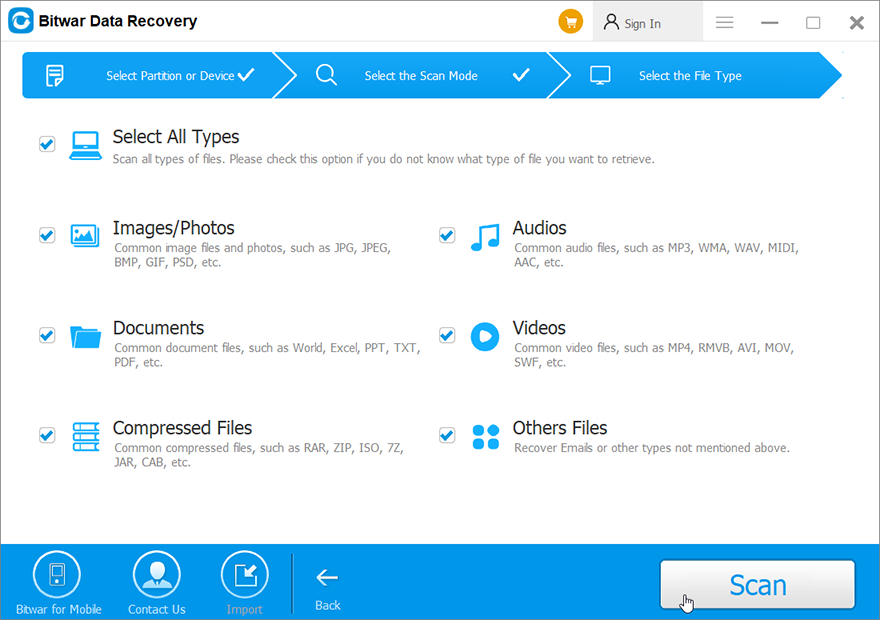
Step 4: Select the file types you want to recover and then press the Next button.
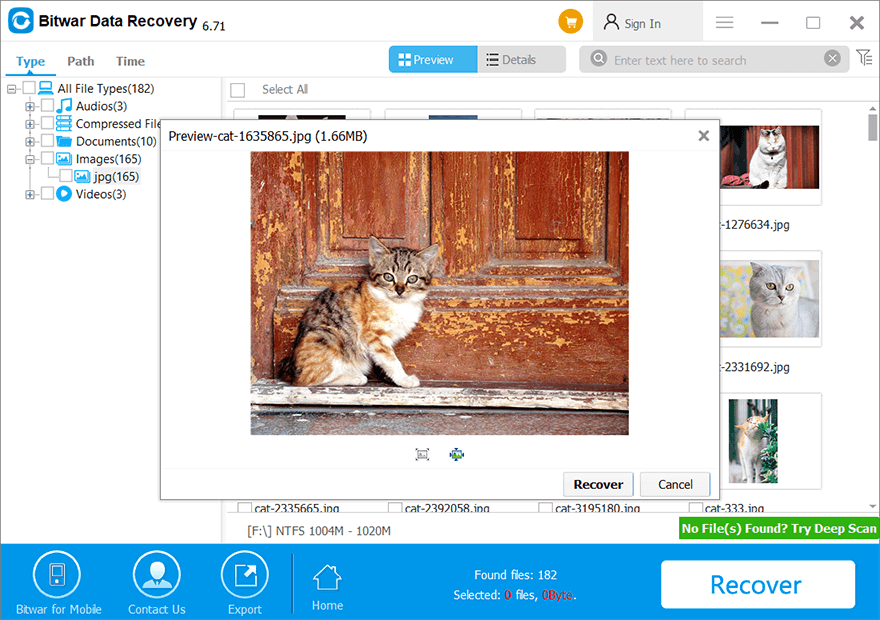
Step 5: At the end, preview the files you want and then press the Recover.
Conclusion
In this article, we have listed solutions to a tricky case of BSOD, the 0x80070005 issue. It’s a vexed problem since the error message doesn’t tell much useful information. So, to cover as many cases as possible, we have tried to explain as many methods as possible.
Furthermore, considering the possibility of data loss, we have also laid out how to use our reliable and effective data recovery tool, Bitwar Data Recovery. Users whose work comes to a grinding halt for the reason of the 0x80070005 issue can use the tool to recover their valuable files.
Previous Article
[Solved] Blue Screen of Error 0x000000f4 Summary: The 0x80070005 error, also known as access denied error, is associated with Windows updates. It pops up when the...Next Article
How to Fix the 0xc000014c Error on Windows Summary: The 0x80070005 error, also known as access denied error, is associated with Windows updates. It pops up when the...
About Bitwar Data Recovery
3 Steps to get back 500+ kinds of deleted, formatted or lost documents, photos, videos, audios, archive files from various data loss scenarios.
Learn More


