[FIXED] Windows 10 Update Stuck Checking for Updates
Summary: The article below will show the efficient steps to fix Windows 10 update stuck checking for updates issue and backup important data with Bitwar Data Recovery Software.
Table of Contents
Overview of Windows 10 Update Stuck at Checking for Updates
Microsoft always releases a different series of updates from time to time on Windows 7, 8, or 10. Then make sure you download and install the new update through Windows Update or Windows Installer, but sometimes users may face some technical issue where Windows update assistant are stuck when they are trying to check for updates.
The process stays at 0% or keep stuck at 99. Nothing will appear even after you wait for a few hours. When this issue happens, don’t worry, as the content below will teach you all the simple steps to fix the Windows 10 update stuck at checking for updates issue on your computer.
Backup Data from Windows 10 with Data Recovery Tool
There are many choices to choose from the Internet, but Bitwar Data Recovery Software is the best software to back up your data on Windows or Mac operating systems. Moreover, it can back up all kinds of data such as photos, pdf, videos, AMV, documents, and others.
Step 1: Go to Bitwarsoft Download Center and download the software on your computer.
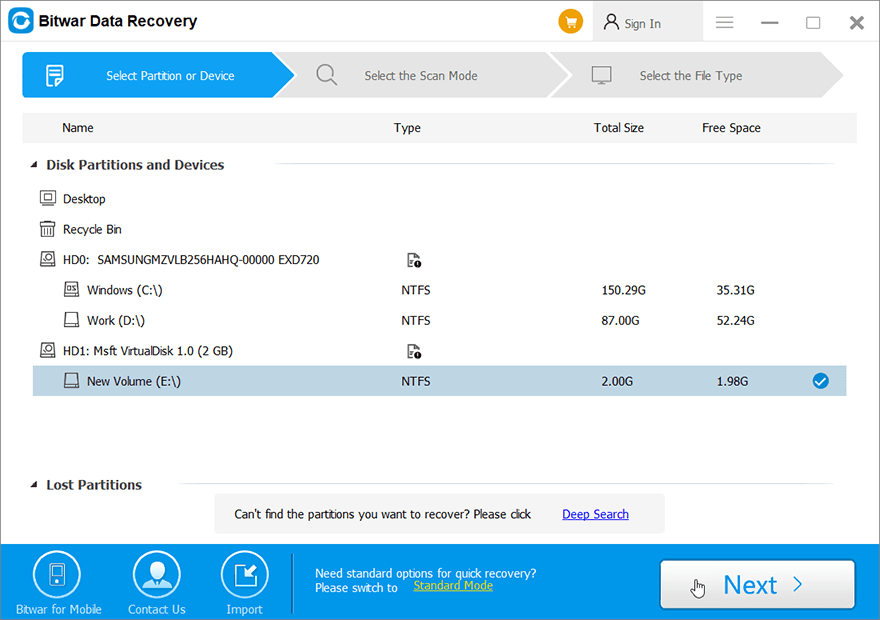
Step 2: Choose the desired partition from the list and click on Next.
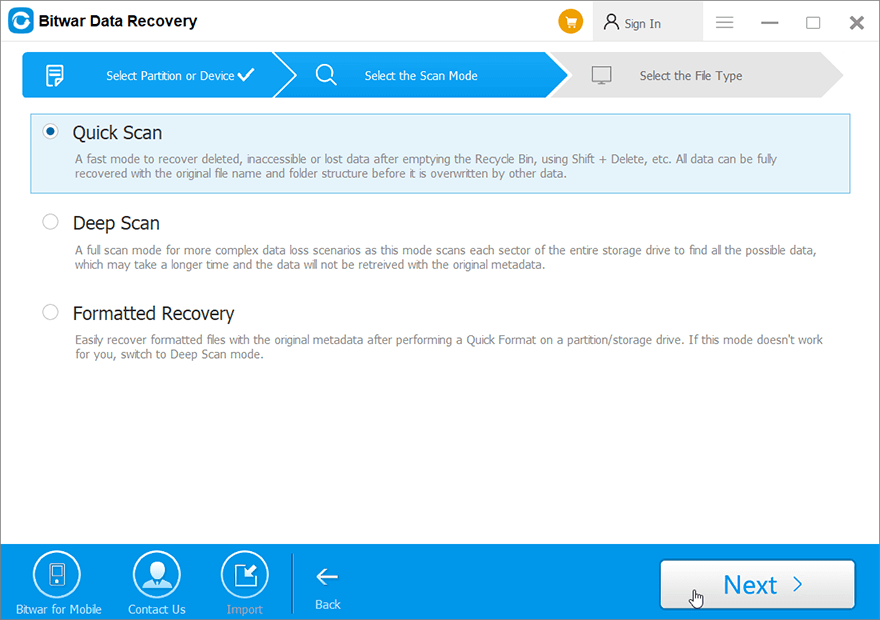
Step 3: Select the Scan Mode and click Next.
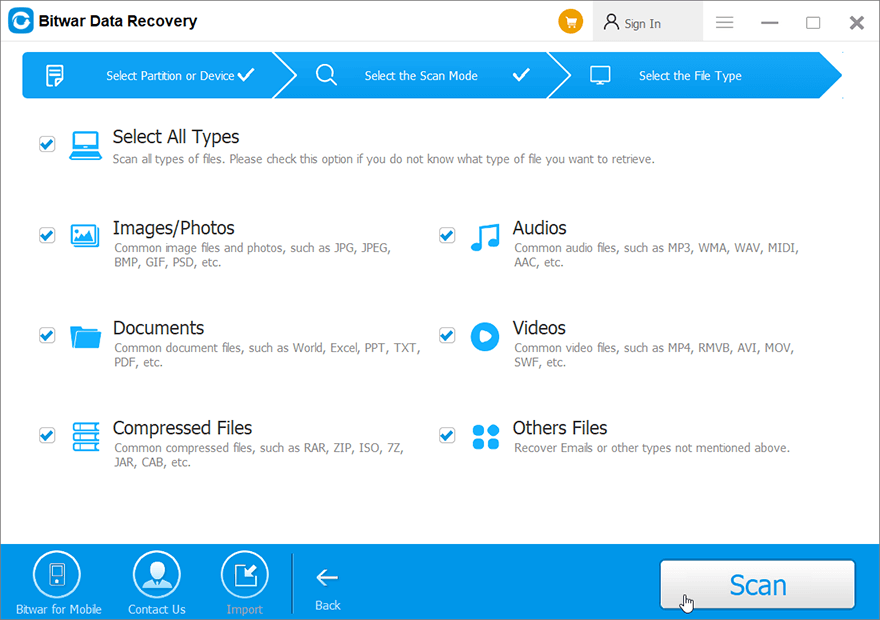
Step 4: Choose the file types you want to backup and click Next.
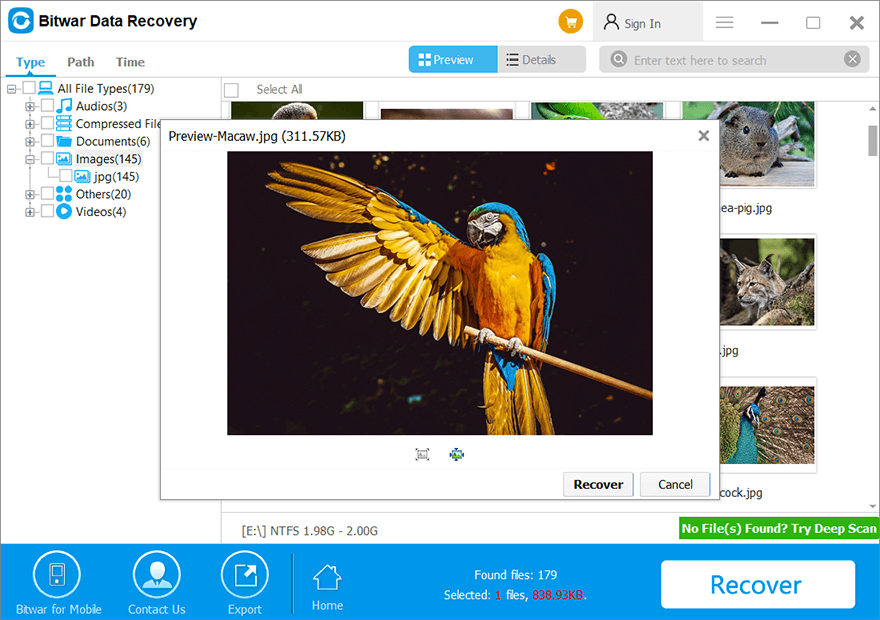
Step 5: Preview the scan results and click the Recover button to backup the data on your computer.
How to Fix Windows 10 Install Stuck at Checking for Updates Issue
Part 1: Stop Windows Update Service
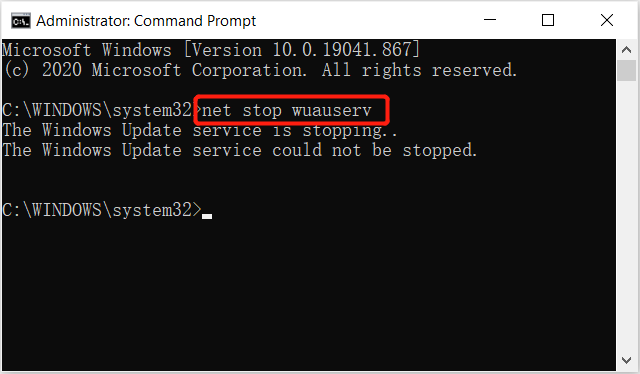
Step 1: Press Wins + S to open the Search menu and type in Command Prompt.
Step 2: Remember to launch the CMD as administrator.
Step 3: Type in the command: net stop wuauserv and press Enter to execute the command.

Please wait patiently for the message: The windows update service was stopped successfully. Then carry on with the second part.
Part 2: Delete Folders
Step 1: Open File Explorer on your computer.
Step 2: Go to C:\Windows\SoftwareDistribution and delete all the data in both DataStore and Download Folder.
Part 3: Clean Windows Update Cache files
Step 1: Back to Command prompt and type the command: cd /d %windir% or cd\windows.
Step 2: Type in rd /s SoftwareDistribution and select all the cache files in the folder.
Step 3: Click delete to remove the useless update cache files.
Part 45: Start Windows Update Service
Step 1: Return to the Command prompt window.
Step 2: Type the new command: net start wuauserv and press Enter.
Finish all the three parts above and reboot your computer again to check for the new Windows updates.
Update Windows 10 Now!
After rebooting your computer, you’ll find the Windows updates will run faster and smoother. Then all you need is to click the Ready to Install button to start the new installer and start the updates as soon as possible. Remember that if you faced any data loss through the process, you can use Bitwar Data Recovery Software to recover any lost data on your computer.
Previous Article
4 Effective Solutions To Fix The Directory Name Is Invalid Error Summary: The article below will show the efficient steps to fix Windows 10 update stuck checking for updates issue and...Next Article
[SOLVED] Can’t Eject External Hard Drive On Windows 10 Summary: The article below will show the efficient steps to fix Windows 10 update stuck checking for updates issue and...
About Bitwar Data Recovery
3 Steps to get back 500+ kinds of deleted, formatted or lost documents, photos, videos, audios, archive files from various data loss scenarios.
Learn More


