How To Split Screen In Windows 11/10?
Table of Contents
Overview Windows Split-screen
Split-screen is a feature that allows you to use multiple apps at the same time. You can divide the screen of your Windows 11 PC or desktop into two or more parts using this feature. Each part of the screen can be used by the app that you want to open. This feature has been available in Windows for a long time, but the number of smaller screens was limited. Previously, dividing your screen into two parts was only possible if you wanted to use two apps at the same time.
There are two ways you can split the screen on your PC. One way is to drag and drop your app windows, and the other one is to use a keyboard shortcut. We’ll explain how to use both of these methods.
Split Screen on Windows 11
Method 1: Use Snap Layouts to Split Screen
One of the new features in Windows 11 is the Snap Layouts. They appear when you hover over the Maximize button in an open window. Some people find them annoying and want to disable Snap Layouts right away. But if you’re going to multitask, it makes using split-screen in Windows 11 much more accessible.
- When the layout appears, click the available zone to snap the window into it. Snap Layouts make splitting your screen straightforward. For example, on Windows 10, the snap assist required dragging each window to the edge of your monitor.
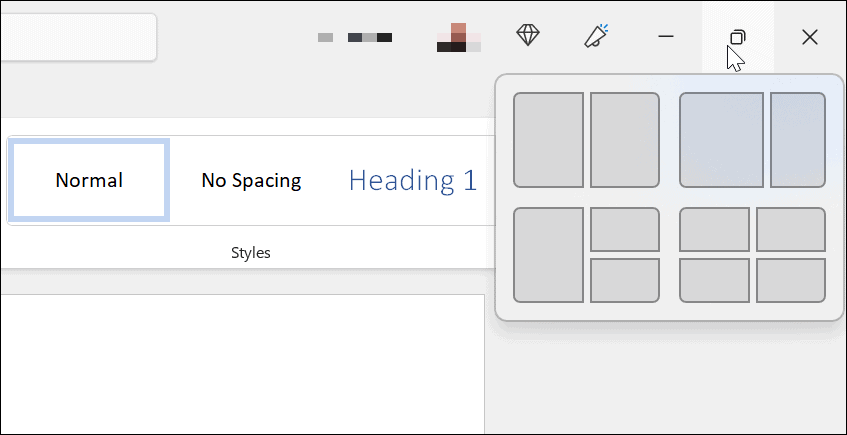
- In this example, we put an app in each zone and resized them slightly. Note that the larger your screen, the more zones it will have.
- If you want to change the layout, hover your mouse over the zone you want the window in and click it.
Method 2: Use Virtual Desktops
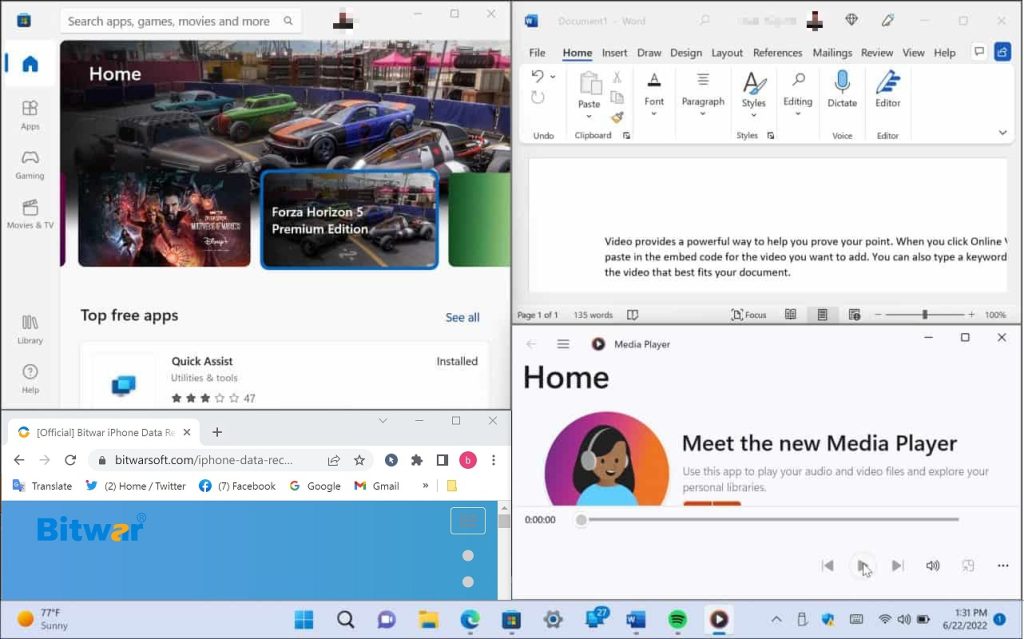
Another method to split your screens into different configurations is to use Virtual Desktops on Windows 11. Virtual desktops are a good option if you want a desktop with open Office apps, another with multimedia, and another with chat and social media, do the following:
- Hover the mouse over the Task View button on the taskbar and click New Desktop
- Open the apps you want on each desktop.
- Hover the mouse over the Task View button, and you’ll have access to the desktop you need to work with.

If you have several virtual desktops, hover over the Task View button and preview what’s happening on each one.
Split Screen on Windows 10
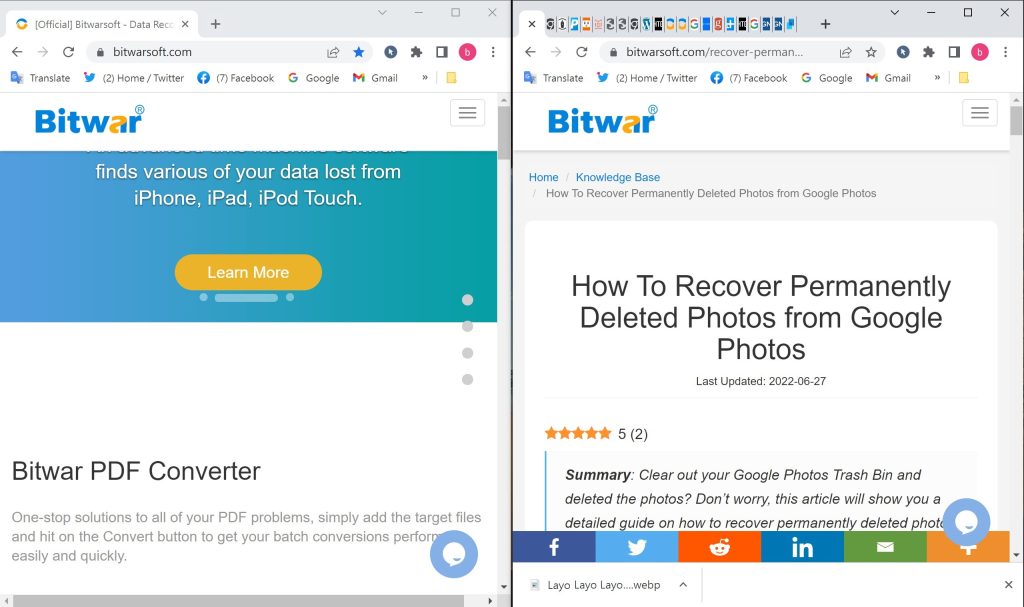
To split the screen in Windows 10, simply drag a window all the way to one side of the screen until it snaps into place. Then select another window to fill the other half of your screen.
Split screen between two windows:
- Drag one of the windows by its title bar to the left or right side of the screen. You’ll see an outline of the window appear — release your mouse and the window will snap into that outlined position.
- You should now see all your other open programs appear in thumbnails on the opposite side of the screen.
- Click one of the other program windows. It will snap to the other side of the screen, so you’ll have two windows side by side.
Split screen between four windows:
If you have a larger display, you can snap up to four windows to the screen – one in each corner. The process is similar to snapping a window to either side of the screen:
- Drag one of the windows by its title bar to a corner of the screen. As the cursor reaches the corner, the screen will flash and you’ll see an outline of where the window will appear. Let go of the mouse button to snap the window into place.
- Drag the next window to another corner in the same way. Again, let go of the mouse to snap it into place.
- In the empty space of your screen, you should see thumbnails of your remaining open windows. Click the program you want and, if you want it to take up a third of the screen, snap it to the entire remaining side of the screen. If you want to pin four windows, drag it by the title bar to snap it into one of the remaining corners, and then select another window to pin to the final corner.

Conclusion
The split-screen feature is really a useful skill, when you often have to switch between several programs, this feature can save a lot of trouble and time. Try it now!
Previous Article
How to Recover Deleted Emails In Mac? Summary: Windows split screen feature can make you use multiple apps on your screen at once. And you can customize...Next Article
Fix: Your PC Ran Into A Problem And Needs To Restart Summary: Windows split screen feature can make you use multiple apps on your screen at once. And you can customize...
About Bitwar Data Recovery
3 Steps to get back 500+ kinds of deleted, formatted or lost documents, photos, videos, audios, archive files from various data loss scenarios.
Learn More


