Tune the Software
Last Updated: 2021-09-18
Summary: This article tells you the advanced settings Bitwar Data Recovery offers and how to configure them.
At the upper-right corner of the primary interface lies a More icon, which has several options. Advanced Settings is what we need for configuration.18
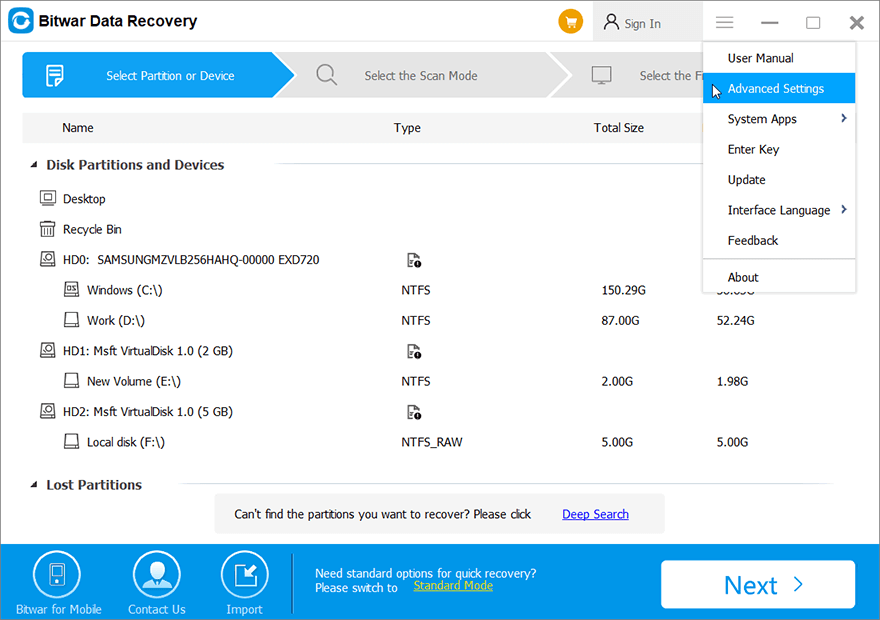
After clicking on it, you will see a setting window appear. It shows three setting parts, Scanning, Interface, and Other.
Table of Contents
Scanning
There are six options on the Scanning part.
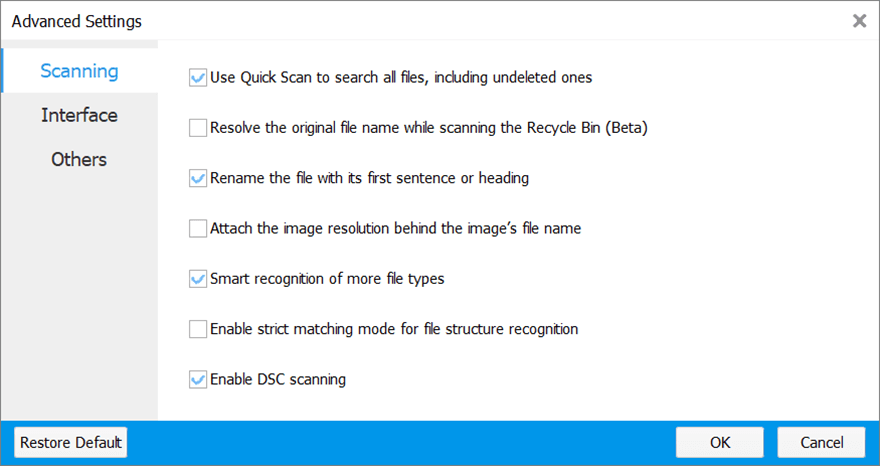
- Enabling it will allow this tool to scan all files. Users unable to find hidden files can check off this option.
- Recovered files will get their original names before deletion. (Only supports Recycle Bin Recovery)
- Recovered files of certain types (such as .txt and .doc) will be renamed with their headings. (Only supports Deep Scan)
- This option will attach image resolutions to images’ file names. You can see it after scanning. (Only supports Deen Scan)
- Enabling it will scan extra files of uncommon types, which may slow down scanning, finding out more files that in most cases are useless.
- Enabling it allows users to find files with more precise sizes. But the number of them will decrease.
- If your disks support DSC scanning, you can enable it. This may prompt second or third scanning, finding out more files.
Interface
There are seven options on the Interface part:
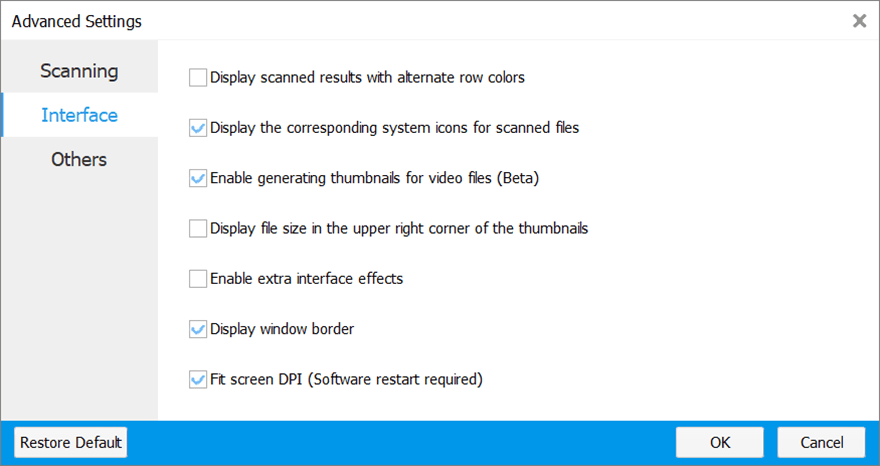
- Enabling this function will apply color to alternative rows of scanned results.
- After scanning, this tool will display files with their default icons.
- This tool will display thumbnails for video files after scanning.
- Scanned image files will have their file sizes displayed in the upper right corner of their thumbnails. Disabling it will speed up scanning progress.
- This option will enable animations in this tool. Disenabling it will improve performance.
- This option will display a black frame around the tool.
- Display this tool according to your screen DPI. (Restart it to take effect)
Other
There are five options on the Other part:
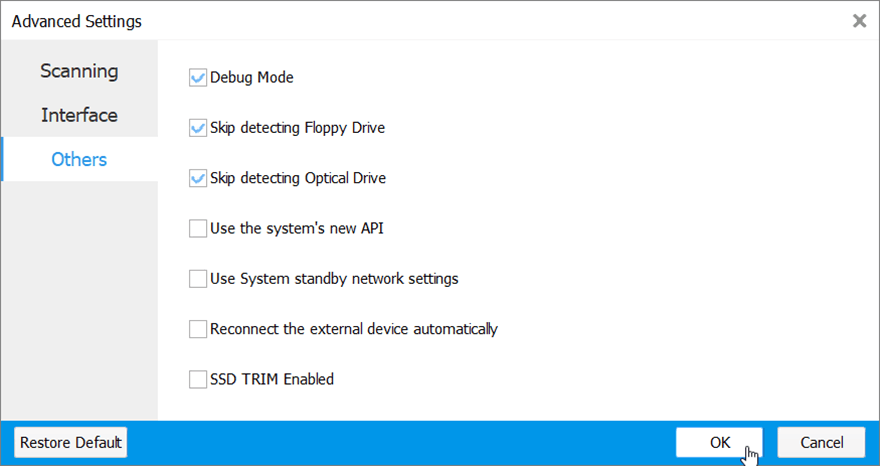
- Enabling it will record bug info, making it possible for this tool to investigate problems. Disabling it will improve performance.
- Enable it to skip detecting Floppy Drive.
- Enable it to skip detecting Optical Drive.
- Enable it when the program wouldn’t open the Save As dialogue after you have clicked on Recover.
- Enable it when you fail to open the Save As window or the web page.
- Enabling it will automatically re-connect external devices.
- Uncheck off the option to disable the TRIM command, which makes a file deletion operation on an SSD capable of wiping out the file completely. Unchecking the option will grant you a good chance of recovering files from an SSD.


