Windows 10에서 카메라 설정을 변경하는 방법
목차
Introduction to Camera Settings on Windows 10
Few Windows users know that there is a camera available in the Windows 10 system. It allows users to capture photos, videos, and make a video call!
The built-in camera is actually attached as an external webcam on your laptop and you will need to change the default setting to improve your video or picture quality.
Tips for Configuring Camera Settings
Tip 1: Windows Camera Settings
For the 21354 and later operating system builds for Windows, users can change the camera settings easily through the Settings app.
Step 1: Press Wins + S to open the Search menu and type in Settings.
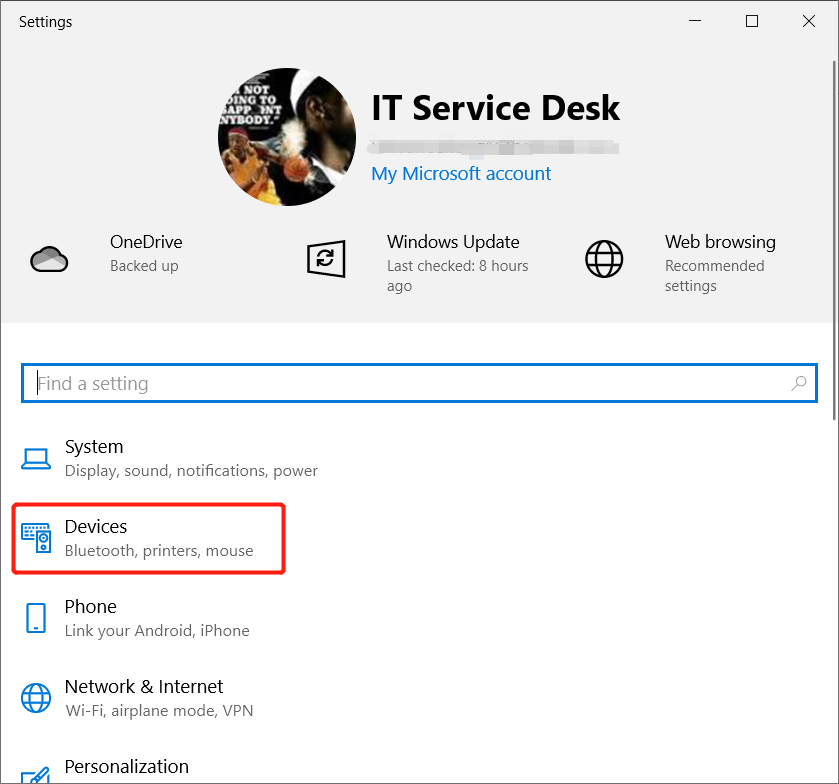
Step 2: Select Devices from the Settings and choose Camera.
Step 3: It will show the camera device and click the Configure button to change the camera setting.
Step 4: Slide the brightness and contrast level to change it manually to your needs.
Tip 2: Camera App
Most other users that are running older 21354 and can’t see the camera settings in the Windows Settings app, don’t worry you still can change it manually through the Camera App.
Step 1: Open the Search menu again and type in Camera.
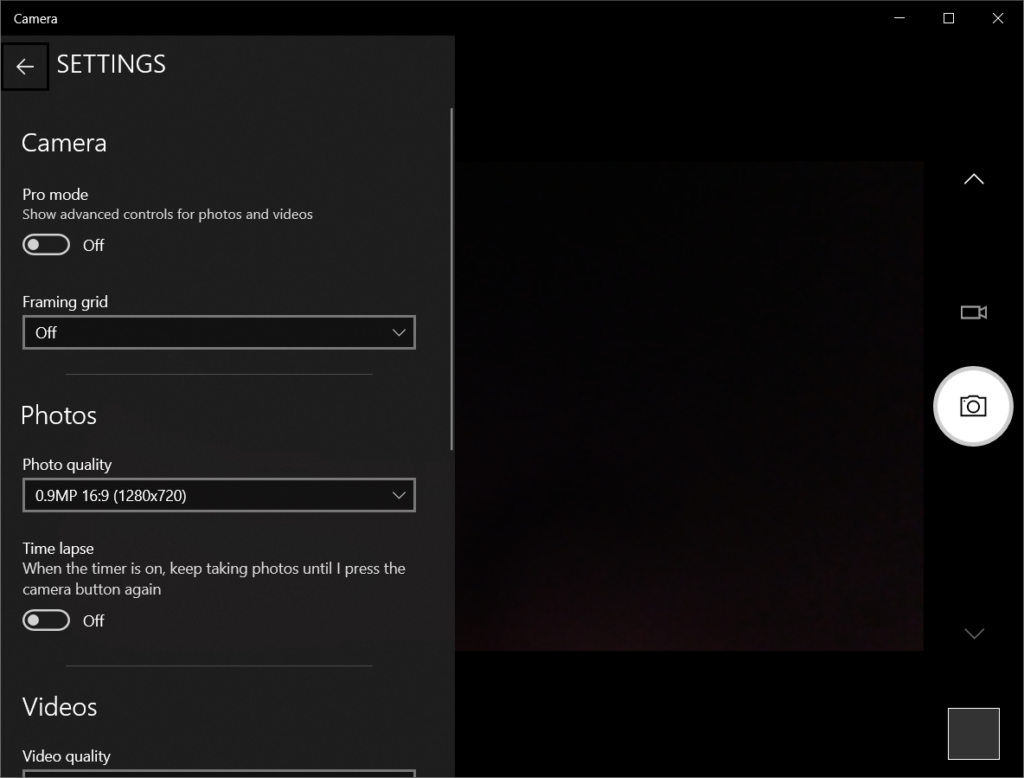
Step 2: Click the Setting icon from the top left side of the Camera app.
Step 3: Configure camera settings to your requirements by changing the Pro mode, Framing grid, Photo quality, Video quality, Filter reduction, and more.
Learn It Now!
Hopefully, after reading this article you can understand the Camera app more and learn how to configure the camera settings manually by yourself on Windows 10 settings or Camera app.
이전 기사
5 Effective Methods To Fix Personal Hotspot Not Working On iPhone Summary: The text below will introduce the camera settings to Windows users and learn how to change camera settings easily...다음 기사
[SOLVED] iPhone Device Keeps Restarting On iOS 14 Issue Summary: The text below will introduce the camera settings to Windows users and learn how to change camera settings easily...
About Bitwar Data Recovery
3 Steps to get back 500+ kinds of deleted, formatted or lost documents, photos, videos, audios, archive files from various data loss scenarios.
더 알아보기


