Use Disk Utility To Format A USB Drive On Mac
Table of Contents
Overview USB Drive Formatting
Formatting is the process of erasing all existing data on a USB and setting up the file system it will use. The file system tells the USB drive how to store, read or delete data. The type of file system required on a USB drive varies depending on the type of computer you will use.
Most computers will alert you if you connect your USB drive to an incompatible file system that needs formatting, including a Mac. So today, we will introduce you to how to format a USB drive on Mac.
Format USB Drive with Disk Utility
Before starting the formatting, you’d better back up all the files of the USB.
Your Mac comes with a handy utility appropriately called Disk Utility, which can be used to format any storage device. The detailed steps are below:
- Connect the USB drive that you want to format.
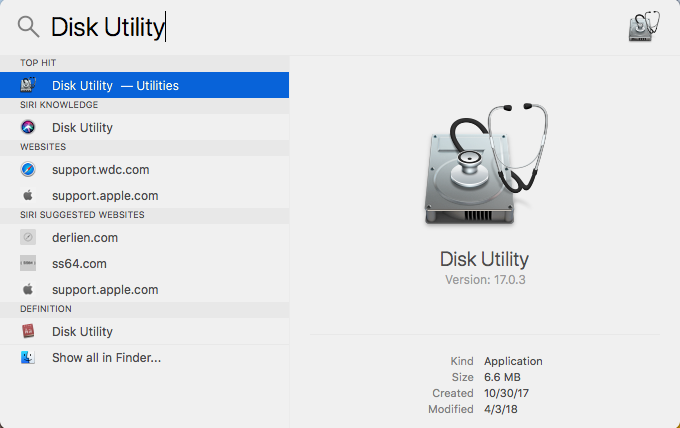
- Enter Disk Utility in the search box and launch Disk Utility.
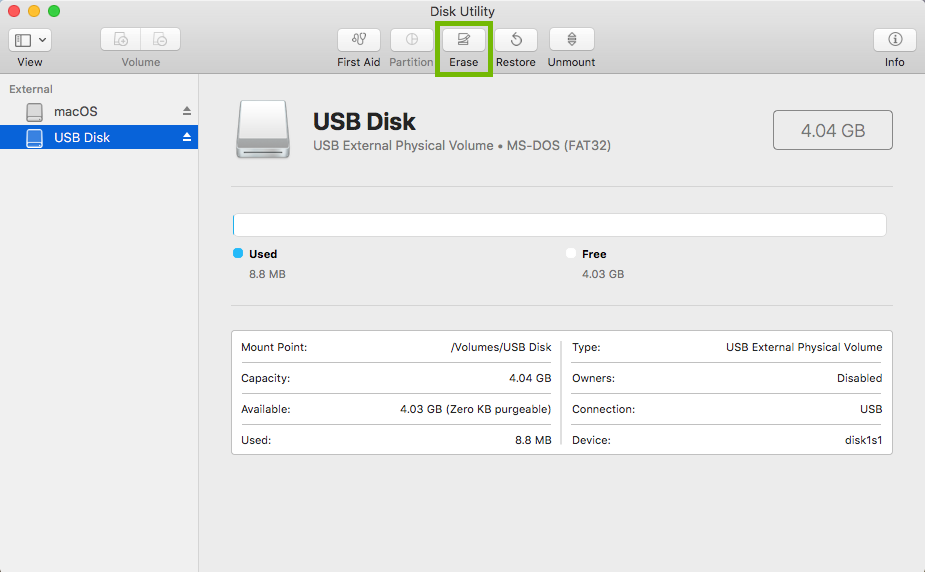
- Choose the USB drive to be formatted on the left and click the Erase button on the top.
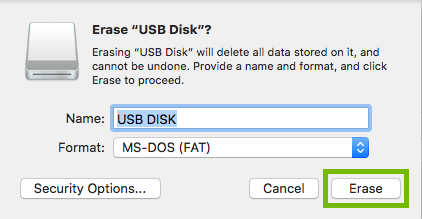
- Enter the name of the drive in the appearing window, then choose format type in the drop-down selection, and tap Erase.
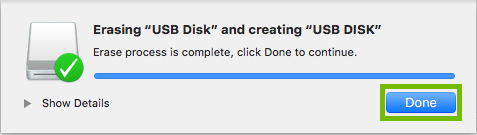
- After the USB formatting is complete, click Done and quit Disk Utility.
Recover Formatted Files with the Best Data Recovery Software
If unfortunately, you forgot to back up the files of the USB, you can use a data recovery tool to get back the files. Here we will recommend you the best data recovery software: Bitwar Data Recovery Software for Mac. This software can retrieve any data from internal or external storage devices on Mac easily.
Right now, you’ll be all set if using Bitwar Data Recovery for Mac with the steps below:
- Go to Bitwarsoft Download Center and download the third-party recovery tool on the Mac system.
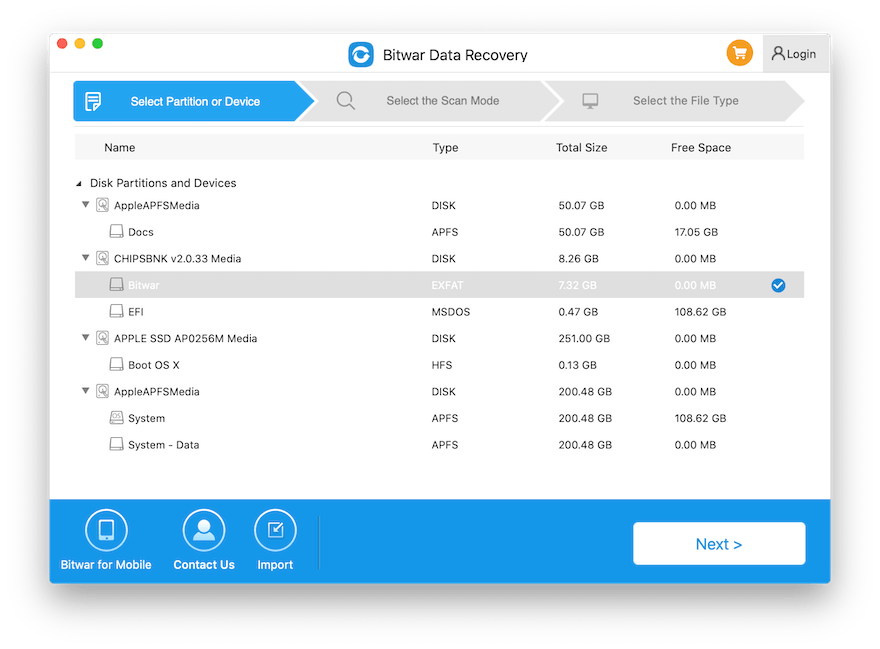
- Launch the tool and choose the file location of the notes. Then click on the Next button.
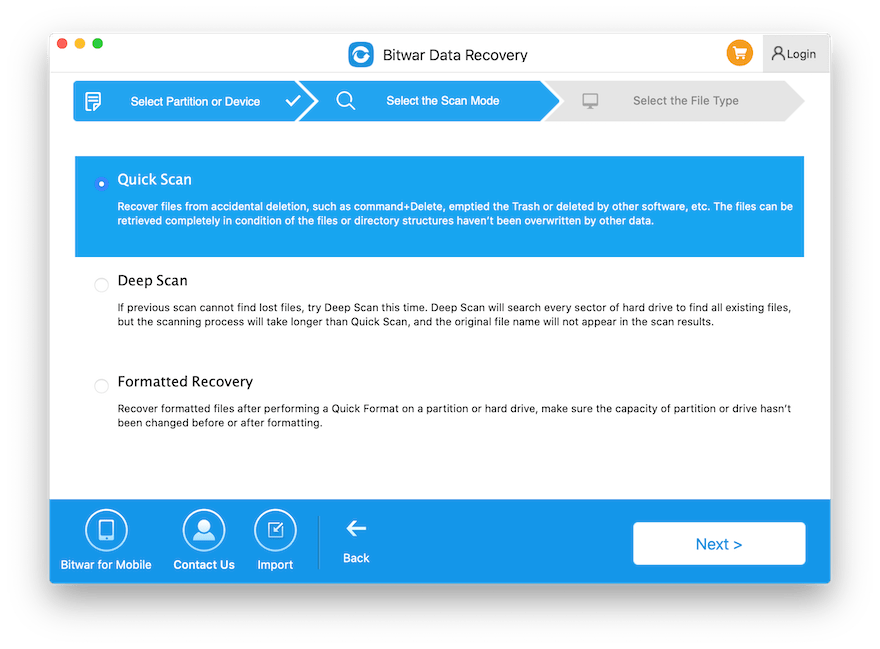
- Choose the scan mode you prefer and click the Next button.
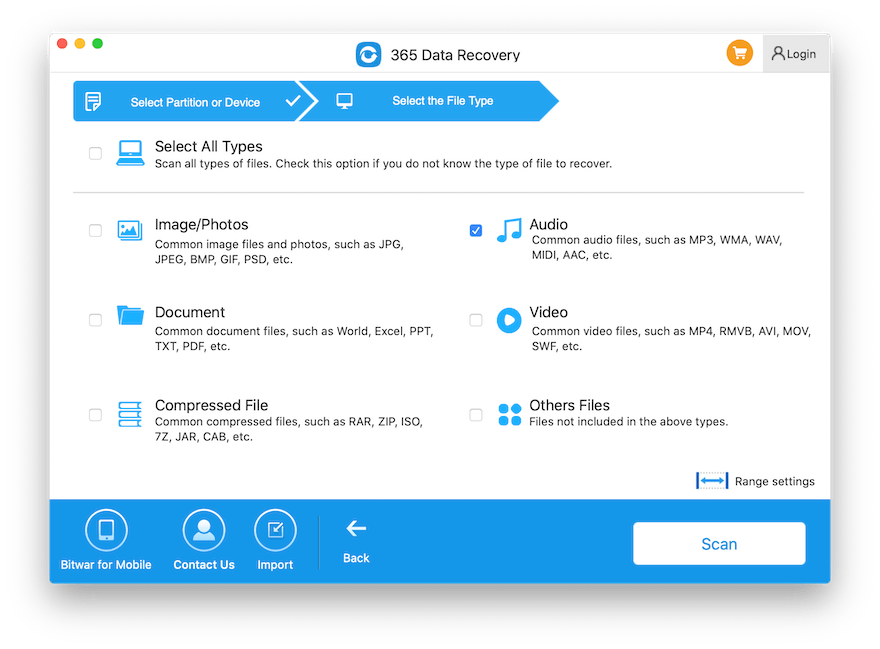
- Select the File type you want to recover and hit on the Next button.
- Preview and click the notes you need. Then click on the Recover button to save the notes back.

Format USB Drive Now!
Many people still talk about formatting USB as if they were deleting their important files. In fact, as long as you follow the steps mentioned in this article, there will be no problem, especially paying attention to backup data. Even if you forget to back up your files, there is the powerful recovery software: Bitwar Data Recovery Software for Mac to help you. So don’t worry, just give it a try!
Previous Article
5 Methods To Solve MacBook Camera Not Working Summary: When using a brand new USB on a Mac, it is crucial to ensure compatibility by formatting the USB...Next Article
What’s New in Bitwar PDF Converter V3.7.5 Summary: When using a brand new USB on a Mac, it is crucial to ensure compatibility by formatting the USB...
About Bitwar Data Recovery
3 Steps to get back 500+ kinds of deleted, formatted or lost documents, photos, videos, audios, archive files from various data loss scenarios.
Learn More


