7 Methods for Fixing the 0x0000017 Error
Summary: The 0x0000017 error on Windows systems sends a signal that there is not enough space on your PC’s hard drive. However, the issue may become worse if the computer pops up this error message while there is still enough vacant space on its RAM. You could refer to the methods laid out in this article to fix the 0x0000017 error. Besides, when you are confronted with some data loss issue that comes hot on this error’s heels, you could try using our Bitwar Data Recovery, a reliable and effective tool, to recover your lost files.
Table of Contents
What Causes the 0x0000017 Error?
To have a better picture of what the 0x0000017 error is, here we will show you the possible causes that may trigger this error.
- Interference from some third-party anti-virus software
- Corrupted system files
- Outdated or damaged drivers
- Insufficient RAM
- Bad memory blocks
Method 1: Disable the Antivirus Software
If you’re running into the 0x0000017 error when trying to upgrade your Windows version to Windows 10, the first method you should try is to eliminate the possibility of 3rd anti-virus interference. Since it’s likely that an overprotective Antivirus suite can halt the upgrading operation to a false positive.
Many antivirus software are reported for causing this error. You can check whether this method is applicable by disabling or uninstalling the antivirus software.
Disabling the real-protection feature before re-launching the upgrading operation is the first step we recommend, yet that method may well end up fruitless because certain antivirus software also includes a firewall feature, which, when enabled, is likely to block the upgrading operation too. Hence, the safest way to test whether your Antivirus brought about this error is to uninstall it.
Use the following steps to learn how to do so:
Step 1: Press the Windows key + R to open a Run dialogue box.
Step 2: Type in appwiz.cpl and then press Enter to open Programs and Features.
Step 3: In the Applications and Features window, scroll down the list of installed applications to locate the anti-virus software you want to uninstall.
Step 4: When you locate it, right-click on it and select Uninstall from the drop-down menu.
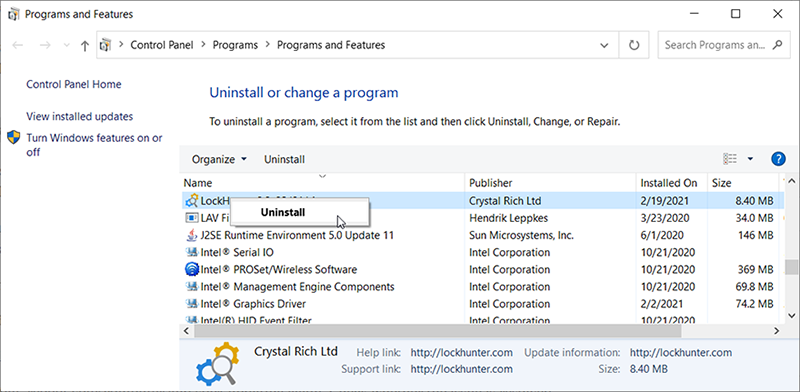
Step 5: Follow on-screen instructions to complete uninstallation, then restart your PC to save the changes.
Method 2: Disconnect External Devices
As we mentioned before, the bad memory problem is likely to bring about the 0x0000017 error. But in most cases, the error occurs because the memory allocation is so high that the system doesn’t have enough memory left to complete the upgrading/installation operation.
This can be solved by adding additional RAM, equipping your PC with the hardware necessary to complete the operation.
But if you don’t want to upgrade your PC’s hardware, you can instead unplug every unnecessary USB drive. Several users have reported that this method worked for them.
Method 3: Upgrade the Motherboard Driver
As it turns out, this error can also be triggered by an outdated motherboard driver that is not compatible with the Windows system you use or want to install. Several users encountering the 0xc0000017 error during the system upgrading operation have reported that the upgrading was finally successful after they had updated motherboard drivers to the latest version.
You could refer to the following instructions to learn how to upgrade your motherboard drivers.
Step 1: Go to the website of your motherboard manufacturer to download the latest driver.
Step 2: Open the downloaded file and follow the on-screen instructions to install the latest driver.
Step 3: After the installation is complete, reboot your computer and see if the error persists.
Method 4: Clean the Bad Memory Entries
It’s confirmed by Microsoft that the 0x0000017 error can also happen when the OS tries to create the RAM space for the Windows PE environment during the boot process.
If bad memory blocks are found in the BCD store during this operation, you may see the error code as a result. In this case, use the following steps to fix the error:
Step 1: Press the Windows key + R to open a Run dialogue box.
Step 2: Type in cmd in the text box and then press Ctrl + Shift + Enter to launch an elevated Command prompt.
Step 3: In the elevated Command Prompt window, type in the following command and then press Enter:
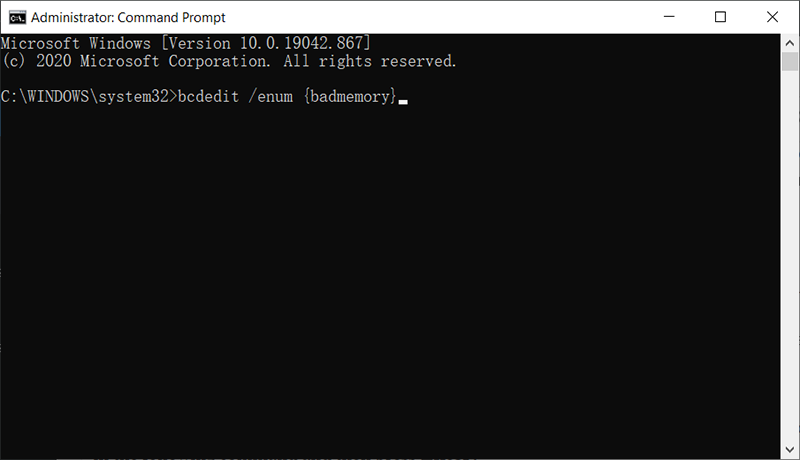
Step 4: If the window shows that the BCD store is indeed containing some bad memory blocks that prevent the creation of the ram disk, type in the following command and then press Enter:
Step 5: After the process is complete, reboot your computer and check whether the issue is solved.
Method 5: Disable Hybrid Graphics From BIOS
As it turns out, this issue may also occur because of a GPU feature of some integrated AMD GPU cards called Hybrid graphics. Several users have reported that after entering their BIOS settings and disabling the Hybrid Graphics feature from the Device Configuration menu, their upgrading operation proceeded successfully with no extra problems.
In this case, you could use the following steps to disable it:
Step 1: Reboot your computer and as soon as you see the loading screen, repeatedly press the BIOS key.
Step 2: After you have managed to enter BIOS settings, use the navigation menu to open the Advanced menu.
Step 3: From the Advanced menu, select the Device Configuration option and then make sure that Graphics Device is set to Discrete Graphics instead of Hybrid Graphics.
Step 4: Confirm the changes you made and then select Save Changes and Exit BIOS.
Step 5: After the next startup sequence is complete, reboot your computer to see whether this method works.
Method 6: Perform a Clean Boot
In addition to the causes mentioned above, there are a lot of other potential culprits that might be accountable for the 0x0000017 error. And it’s not just antivirus software that might thwart the upgrading installation, other software might well cause the error.
If you’re facing the 0xc0000017 BSOD error when you attempt to upgrade an older Windows version to Windows 10, you could try eliminating the possibility of interference from a third-party program by trying the upgrade after a clean boot.
Use the following steps to learn how to perform a clean boot:
Step 1: Launch a Run dialogue box by pressing Windows key + R.
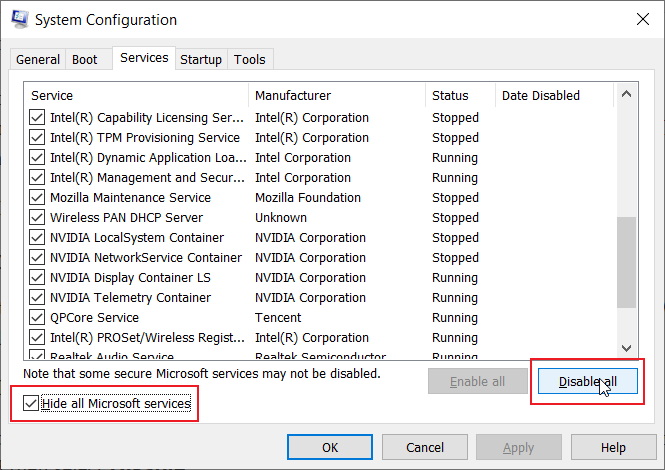
Step 2: Type in msconfig and then press Enter to open the System Configuration menu.
Step 3: In the System Configuration window, click on the Services tab from the top of the menu.
Step 4: Check off the Hide all Microsoft services button. The purpose of this operation is to prevent you from mistakenly disabling any service that’s central to your operating system.
Step 5: Click on the Disable all button to prevent any third-party service from being executing itself during the next startup.
Step 6: Switch to the Startup tab and then click on Open Task Manager.
Step 7: You will see the Startup tab of Task Manager. In this window, select every third-party startup service and then click the Disable button at the bottom of the screen to deter them from being launched during the next startup. Do this until you have made sure that no startup service is allowed to be launched at the next startup.
Step 8: Restart your PC to see whether the error persists.
Method 7: Run SFC/DISM
SFC:
In some rare cases, the 0x0000017 error may be caused by system file corruption. To cope with this particular problem, you could run SFC or DISM, both of which are built-in tools dedicated to searching all of the important system files on your PC for faulty system files and replacing them with healthy ones. Refer to the following steps to learn how to run SFC:
Step 1: Press Win + Q, type in Command Prompt, right-click on it and select Run as administrator.
Step 2: In the command prompt window, type in the following command line and press Enter.
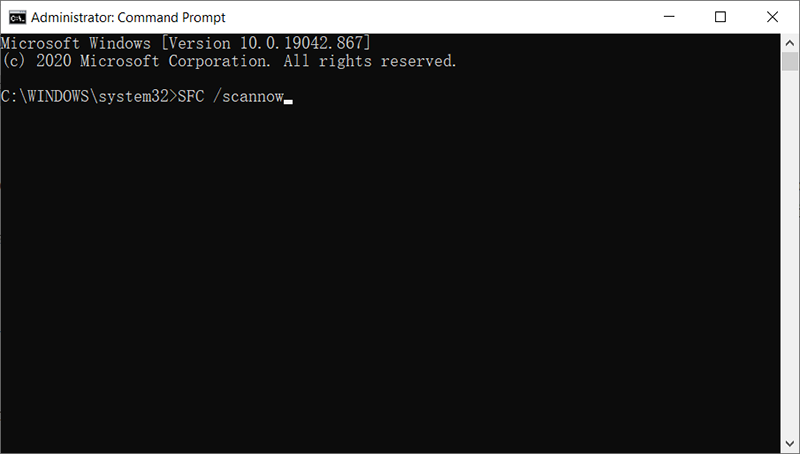
Step 3: Reboot the computer to see whether the problem is solved.
DISM:
If SFC fails to work, you could use another working tool, DISM, which many users run when encountering the problem of corrupted system files. It is usually used to fix some thorny problems that SFC can’t. To check whether this method can work, use the following steps:
Step 1: Enter Command Prompt in the search bar, right-click it and select Run as administrator.
Step 2: Type the following command to check whether there are any problems.
This step is aimed at informing the user whether it’s necessary to proceed with the next step. Use this command line only when corruption does exist.
Step 3: Type in the following command line and then press Enter.
This step might well take several minutes. To make a complete scan, you should not interrupt it.
Step 4: Type in the following command and then press Enter.
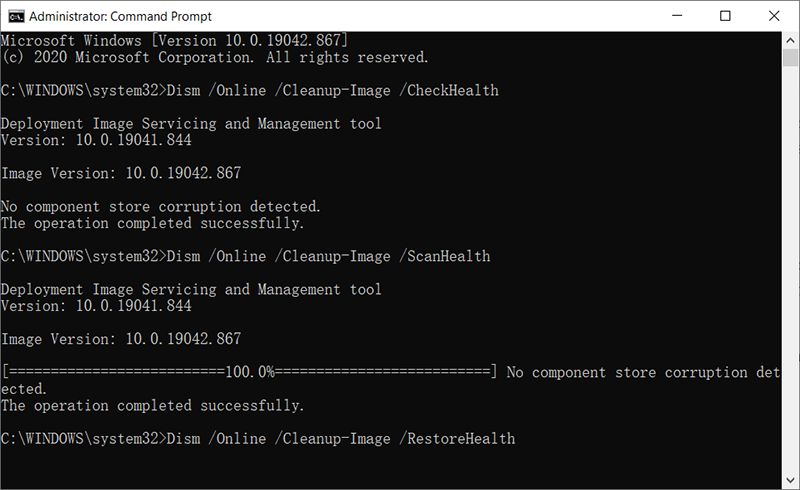
Step 5: After the process is complete, reboot your PC to see whether this solution works.
Recover Data On Windows Using Bitwar Data Recovery
Do you have files that are lost due to error code 0x0000017 on Windows? Or could it be that you didn’t back up your vital data before completely resetting the system?
You can recover your precious data with our Bitwar Data Recovery, an efficient and reliable program. Refer to the following steps to learn how it works:
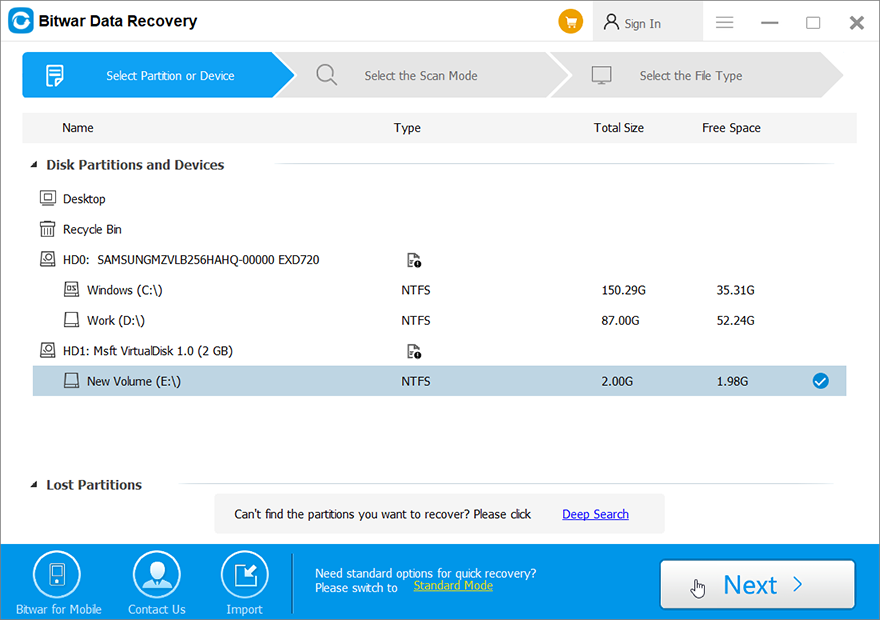
Step 1: Download Bitwar Data Recovery from Bitwarsoft Download Center.
Step 2: After installing the software, open it, choose the drive where the lost files were stored, followed by clicking the Next button.
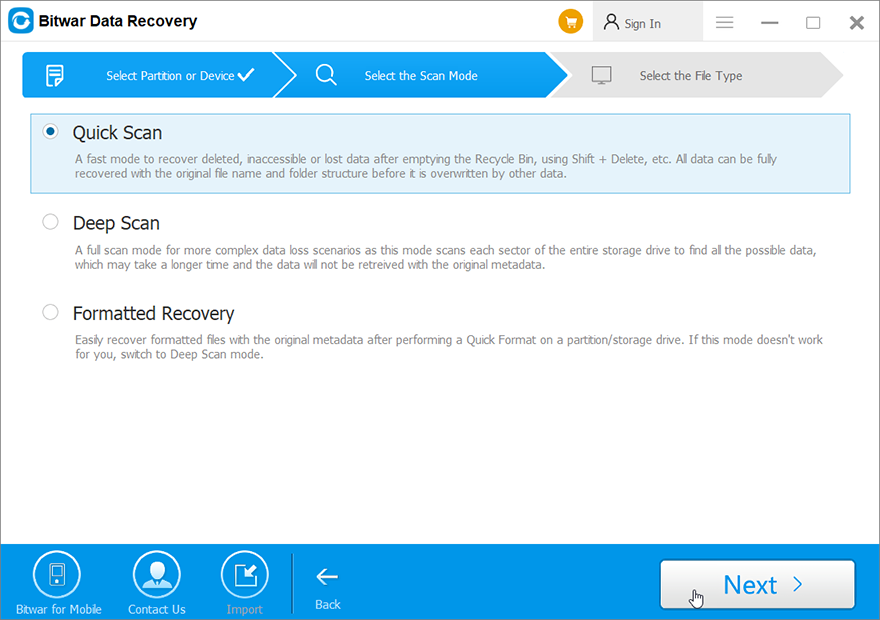
Step 3: Select a scan mode in this stage. We would like to recommend Quick Scan, which is capable of retrieving most of the lost files. If it fails to work, you could come back to this stage and then select Deep Scan.
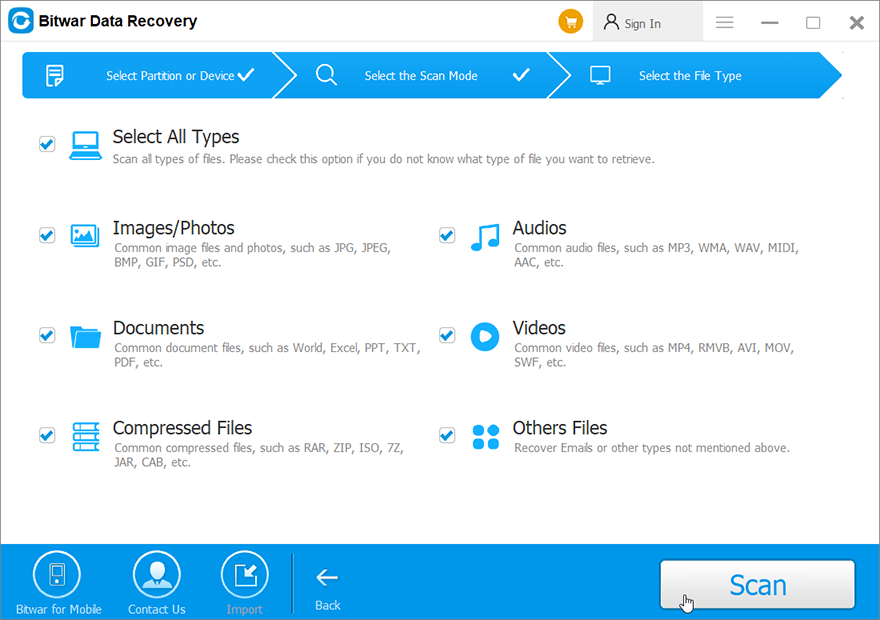
Step 4: Select the file types you want to recover and then press the Next button.
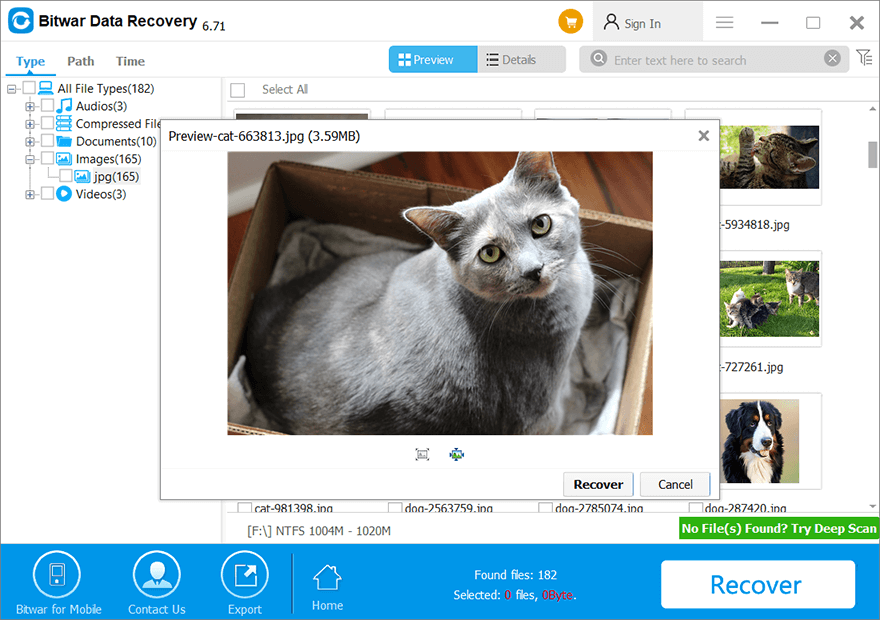
Step 5: Preview the files you want and then press the Recover.
Conclusion
This article has provided a list of methods that you can use to fix the 0x0000017 error many users might encounter in Windows systems. Since the cause of error varies, you could try out other methods If one method fails to work.
After the error has been fixed, if you find that there is any data loss issue in the wake of the BSOD error, you can recover your lost files by using our Bitwar Data Recovery.
Previous Article
4 Effective Methods To Fix Folders Turned Into Shortcuts Summary: The 0x0000017 error on Windows systems sends a signal that there is not enough space on your PC's hard...Next Article
5 Best Methods for Fixing the Critical Process Died Error Summary: The 0x0000017 error on Windows systems sends a signal that there is not enough space on your PC's hard...
About Bitwar Data Recovery
3 Steps to get back 500+ kinds of deleted, formatted or lost documents, photos, videos, audios, archive files from various data loss scenarios.
Learn More


