How To Change Account Username In Windows 10?
Sometimes, users may need to change the account username on Windows 10 for a variety of reasons. But whatever the reason it is, Windows 10 contains different settings to change the account name displaying in sign-in screen and the OS.
Tip: An error message saying “No mapping between account names and security IDs was done.” will pop up when you try to open a file after renaming a user account username using a modern app. It seems that the error appears only for the Microsoft account, not for the local user account. If you receive this error, you can restart your computer once, then restore it to an earlier date.
Now, let’s go through the several methods to change the account username in Windows 10.
Table of Contents
Change Account Username Using Settings
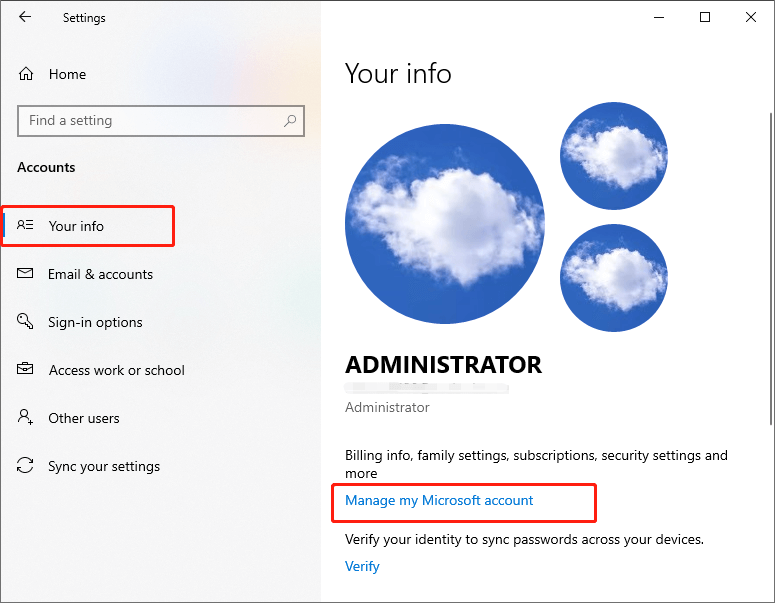
Step 1: Open Settings and select Accounts.
Step 2: Click Your info, and then click Manage my Microsoft account.
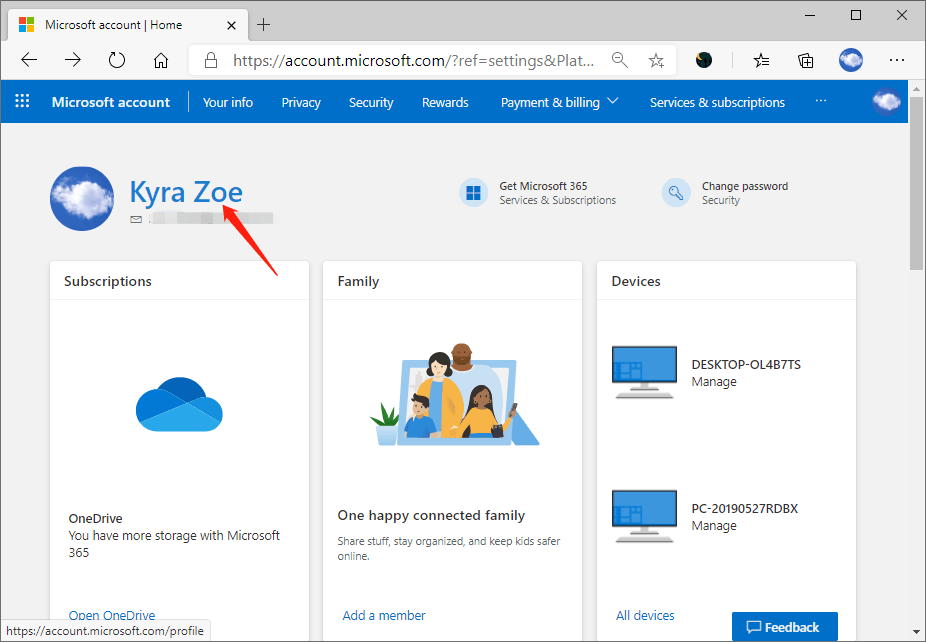
Step 3: Sign in your account, and click your username.
Step 4: Click the Edit name under your current name.
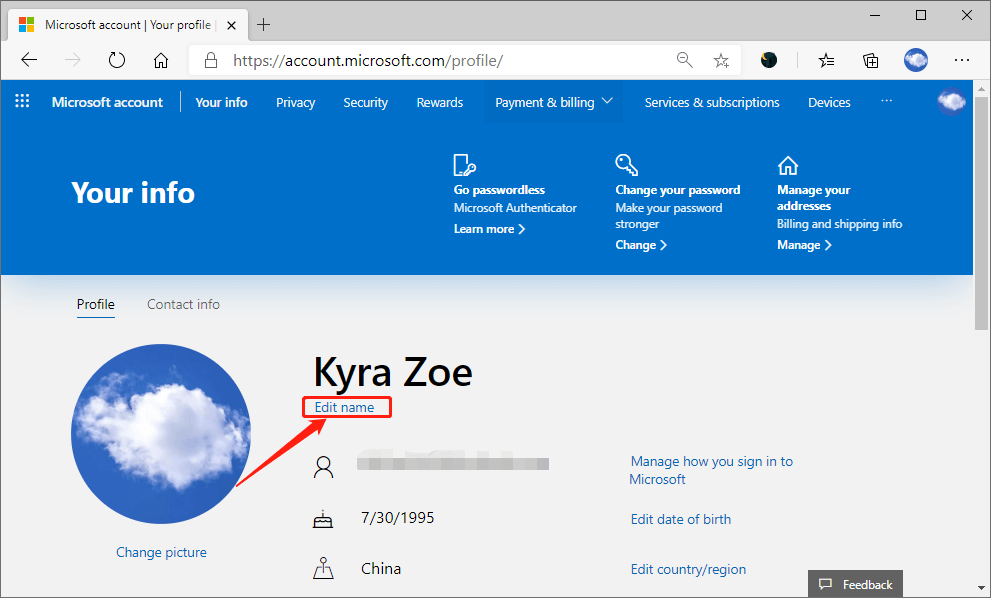
Step 5: Enter a new account name you want, and confirm the verification. Then click Save.
Finally, restart your PC, and the sign-in screen will show the new username.
Reminder: Changing the account username online using the above method will also change the name of any services connected to the Microsoft account, including Outlook, OneDrive, Microsoft 365, Xbox Live, etc.
Change Account Username Using Computer Management
Step 1: Type Computer Management in the Search box and hit Enter
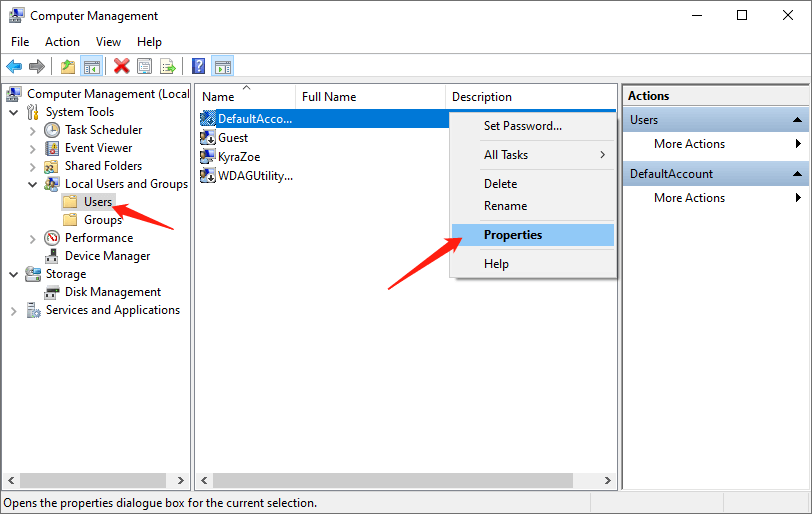
Step 2: Expand the System Tools, and double click the Local Users and Groups, and then click Users.
Step 3: Choose an account whose name you want to change. Right-click it and select Properties.
Step 4: In the General tab, you can enter a new account name in the Full name field.
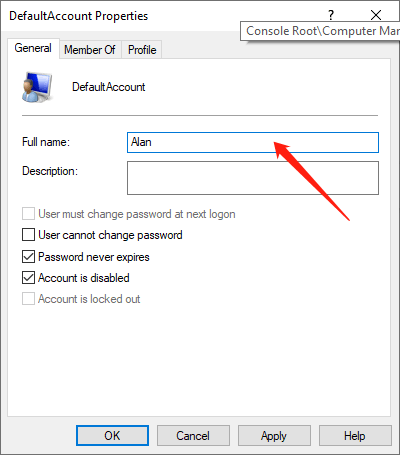
Step 5: Please click the Apply button and then click OK button to save the change.
Change Account Username Using Netplwiz
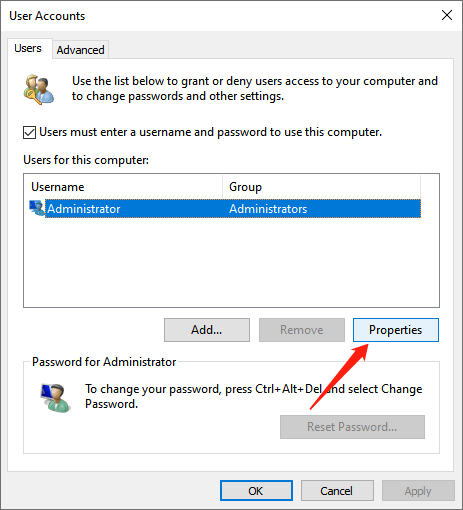
Step 1: Type netplwiz in the Start Search box and hit Enter to open User Accounts page.
Step 2: Under the Users tab, choose the account that you want to change the name, and select Properties option.
Step 3: In the General tab, you can change the User name and Full name you want.
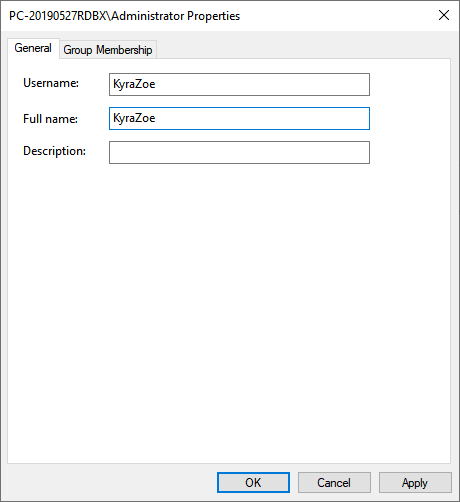
Tip: If you only want to show a nickname but nor your real name, do not fill “Full Name” field.
Step 4: Click Apply and then click OK to save the change.
You have several ways to change the account name in Windows 10, but any available options will also change the name of the profile folder in the Users folder.
With the above methods, changing the account username in Windows 10 becomes more effortless. You can try them whenever you need.
Previous Article
How To Change Or Remove Local Account Password? Summary: We've known that it's easy to set and change Microsoft account password. Changing account username is easy as well....Next Article
All Available Ways To Open Folder Options In Windows Summary: We've known that it's easy to set and change Microsoft account password. Changing account username is easy as well....
About Bitwar Data Recovery
3 Steps to get back 500+ kinds of deleted, formatted or lost documents, photos, videos, audios, archive files from various data loss scenarios.
Learn More


