How To Show, Hide, And Assign Drive Letter In Windows?
A drive letter is a single letter character A to Z assigned to a computer drive or drive partition. Drive name and drive letter are two ways to identify drives in Windows 10 File Explorer.
If you cannot see the drive letter of one or more drives in File Explorer, it might be because File Explorer is configured to hide drive letters, or the drive does not have a drive letter.
Table of Contents
Show Or Hide Drive Letter
Step 1: First, open the Folder Options. There are many ways to open Folder Options in Windows 10. You can open File Explorer and click the File menu, and then click Change folder and search options.

Step 2: Then, click the View tab, and check the box of Show drive letters option to show the drive letters. Uncheck the option if you want to hide the drive letters.
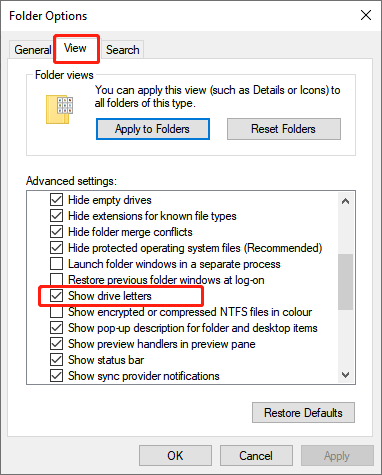
Step 3: Finally, click the Apply button to save the changes.
After doing the above steps, if the drive letter still does not appear to a specific drive or partition, it may be because the drive or partition is not assigned to it. Therefore, you need to assign or remove the drive letter.
Assign Drive Letter
Assign Drive Letter Using Disk Management
Step 1: Type Disk Management in Start search box and press Enter to open Disk Management.
Step 2: Then, right-click the drive, which doesn’t have a drive letter, or you want to assign a drive letter for. And then, choose “Change Drive Letter and Paths” option.

Step 3: Click the Change button and select a different letter to replace the current one from the drop-down box.
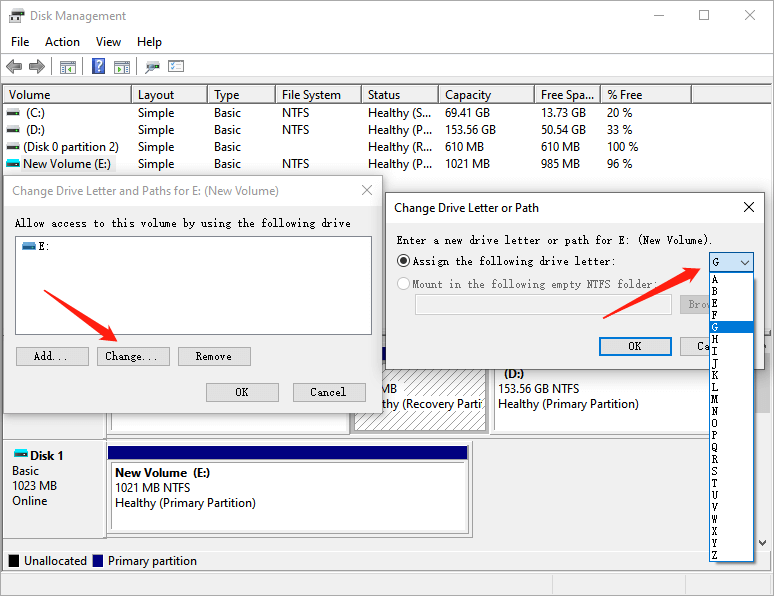
Step 4: Click the Remove if you need to remove the drive letter.
Assign Drive Letter Using PowerShell
Using PowerShell is another easy way to assign the drive letters.
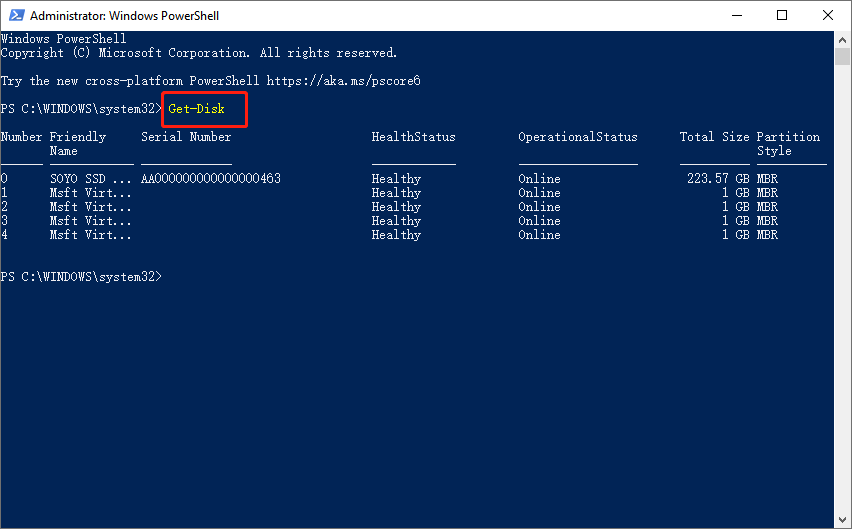
Step 1: Type PowerShell in the Start search box and select Run as Administrator option. Then click Yes when a confirmation window appears.
Step 2: Type in “Get-Disk” and press Enter to list available drivers.
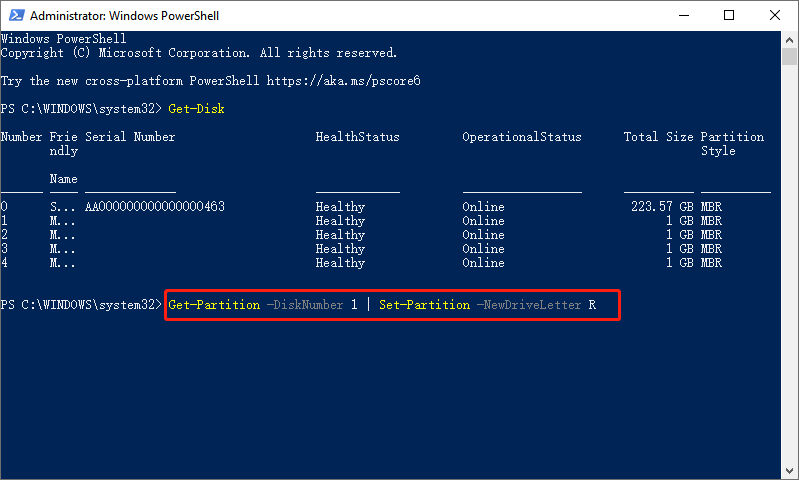
Step 3: Then type in the following command and press Enter.
Get-Partition -DiskNumber 1 | Set-Partition -NewDriveLetter R
Assign Drive Letter Using CMD
You can also use Diskpart in Command Prompt to change the drive letter in Windows 10.
Step 1: First, type in “CMD” in the Start search field and select Run as Administrator option. Then click Yes when a confirmation window pops up.
Step 2: Type in “diskpart” and press Enter. Then type in the “list volume” command and press Enter.
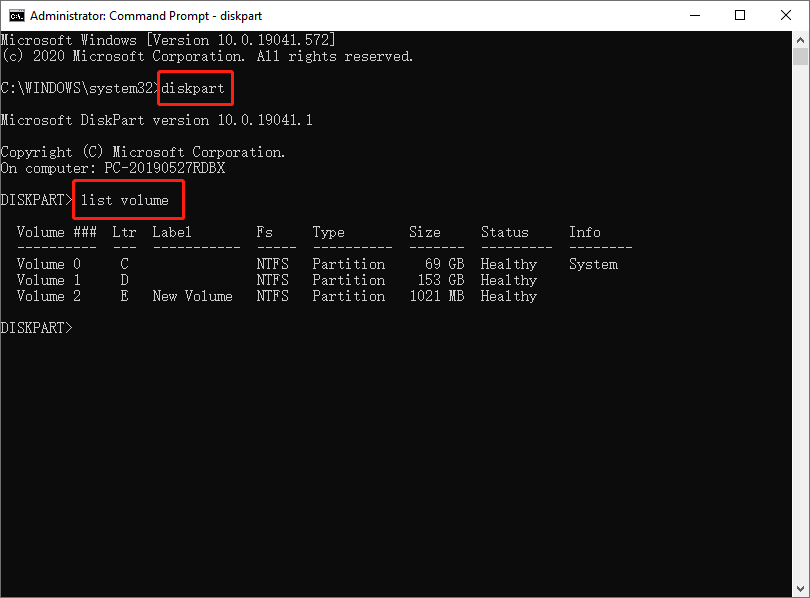
Tip: Here, you should know the number of the simple volume for which you want to change, remove, or assign a drive letter.
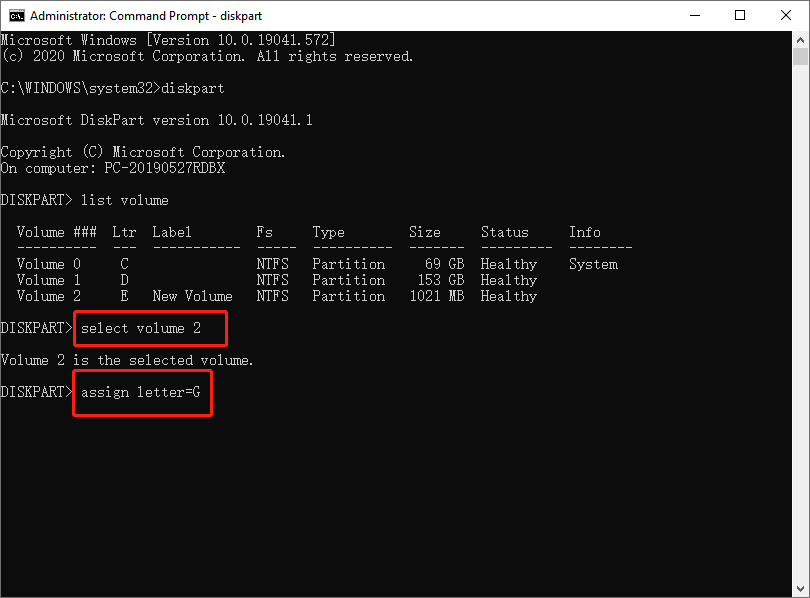
Step 3: Type in “select volume 2” and press Enter to select the drive or volume to assign the drive letter.
Step 4: Then type in “assign letter=G”, and press Enter.
It is not recommended to change or remove the drive letters of drives where you install programs. If the drive letter of a drive where you install Windows 10 has been changed, the program may not start.
Final Words!
After following the above methods, you can easily show, hide and assign drive letter in Windows. Thus, do not hesitate to have a try.
Previous Article
Quick Fix: CHKDSK Cannot Open Volume for Direct Access Error Summary: To make it easier to identify the drive, File Explorer displays the drive name next to the drive name...Next Article
What Is Winsock? All You Need To Know Summary: To make it easier to identify the drive, File Explorer displays the drive name next to the drive name...
About Bitwar Data Recovery
3 Steps to get back 500+ kinds of deleted, formatted or lost documents, photos, videos, audios, archive files from various data loss scenarios.
Learn More


