ローカルアカウントのパスワードを変更または削除するにはどうすればよいですか?
Windows10でローカルアカウントのパスワードを変更するのは簡単です ローカルアカウントのパスワードを設定する。コンピューターに重要なファイルがない場合、またはセキュリティについて心配しない場合、Windows10にはアカウントパスワードを削除するための複数の方法も用意されています。
目次
ローカルアカウントのパスワードを変更または削除する
コントロールパネルの使用
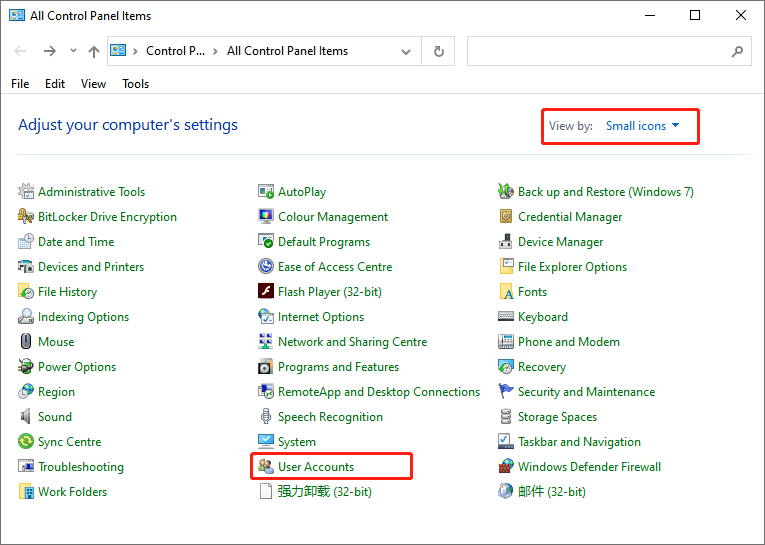
Step 1: Type コントロールパネル [検索の開始]フィールドで、を押します 入力します.
ステップ2:「見る者" に 小さなアイコン、次に選択します ユーザーアカウント.
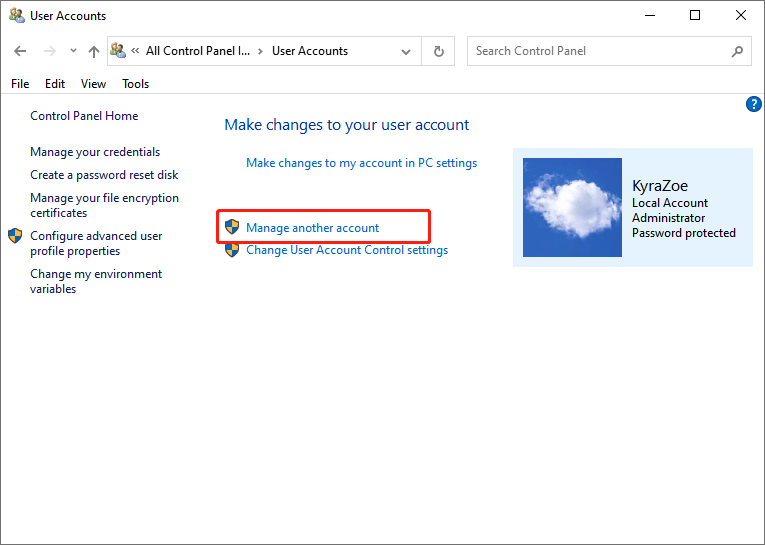
Step 3: Select 別のアカウントを管理します ここ。
手順4:変更するローカルアカウント名をクリックします。アカウントがローカルの場合、アカウント名のすぐ下に同じものが表示されます。
ステップ5:選択 パスワードを変更する.
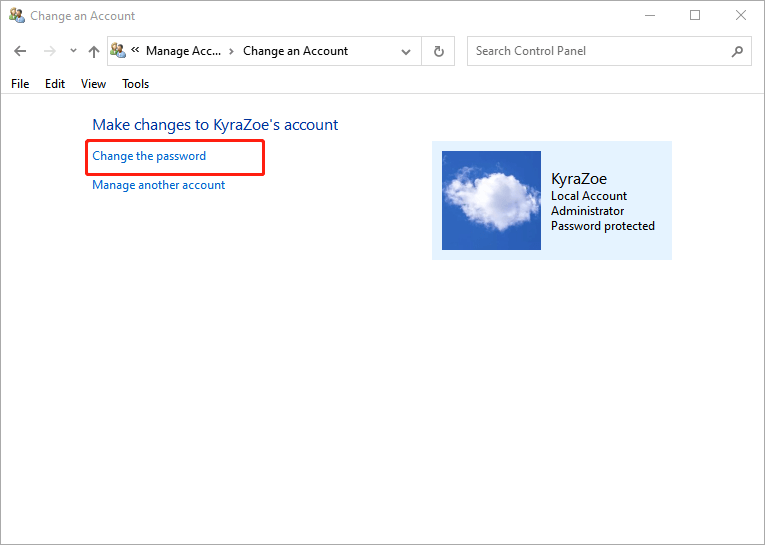
ヒント:パスワードを変更する リンクはパスワードを削除するためにも機能します。
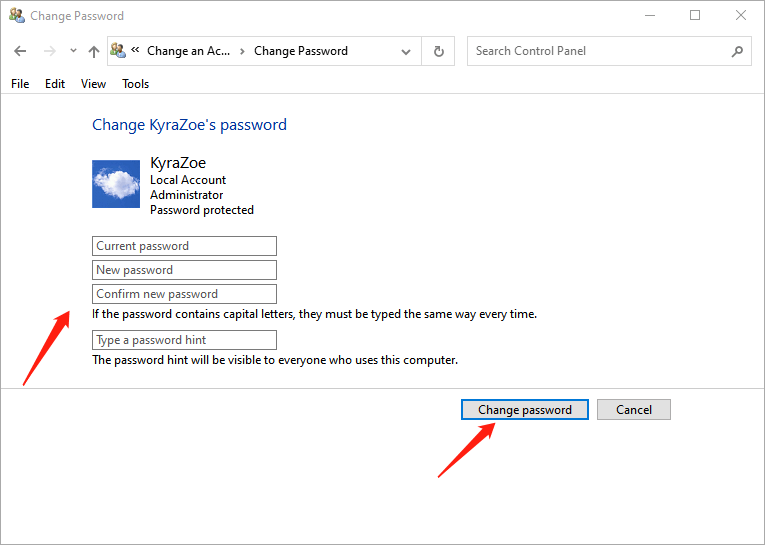
手順6:現在のパスワードを入力し、新しいパスワードを入力して、再入力します。次に、パスワードのヒントを入力し、をクリックします パスワードを変更する それを保存します。
PCコンピュータ管理の使用
Step 1: Type コンピューター管理 [検索の開始]フィールドで、を押します 入力します.
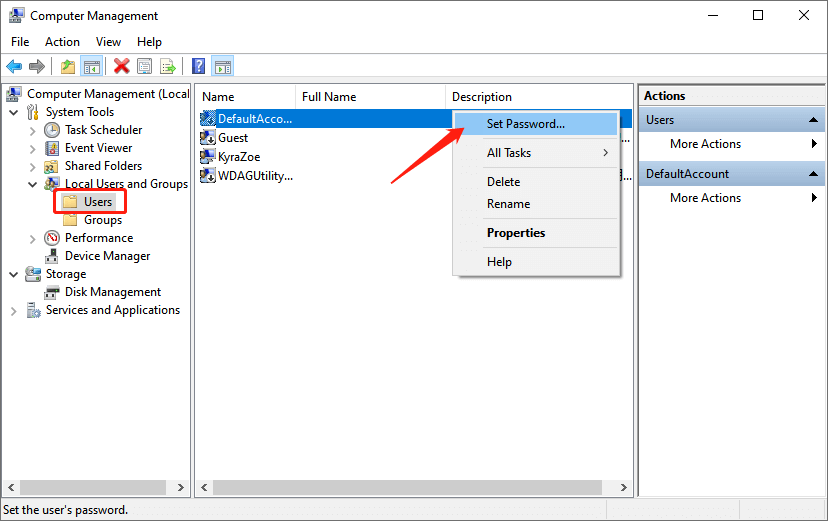
ステップ2:クリック システムツール 展開します ローカルユーザーとグループ.
ステップ3:目的のユーザーを右クリックして、 パスワードを設定してください.
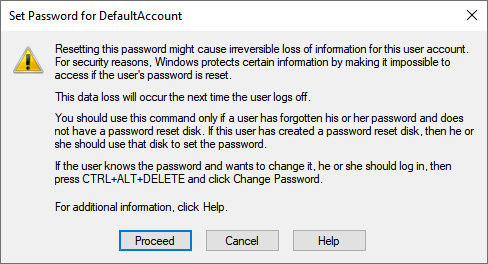
ステップ4:クリック 続行 when the confirmation window pops up.
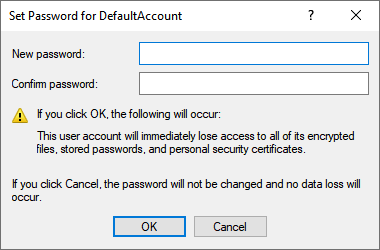
ステップ3:新しいパスワードを入力し、新しいパスワードを確認します。最後に、をクリックします [OK] それを保存します。
PC設定の使用
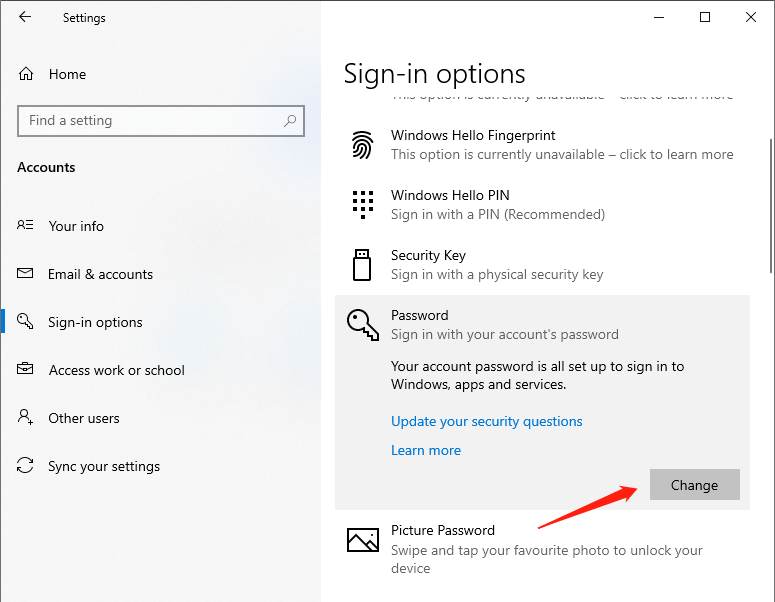
ステップ1:を押します Windows + I 設定を開きます。次に、をクリックします アカウント.
ステップ2:選択 サインインオプション。クリック パスワード セクションを展開して展開し、[ 変化する ボタン。
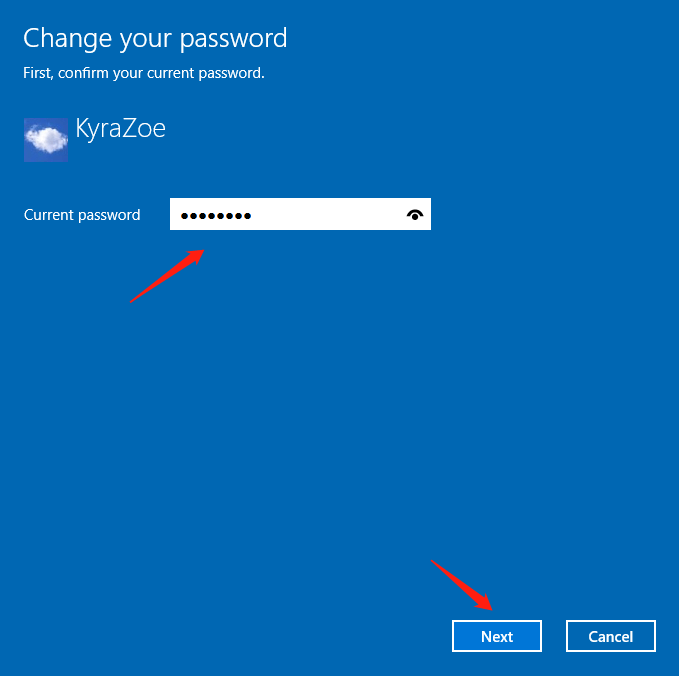
ステップ3:入力します 現在のパスワード、をクリックします Next 先に進みます。
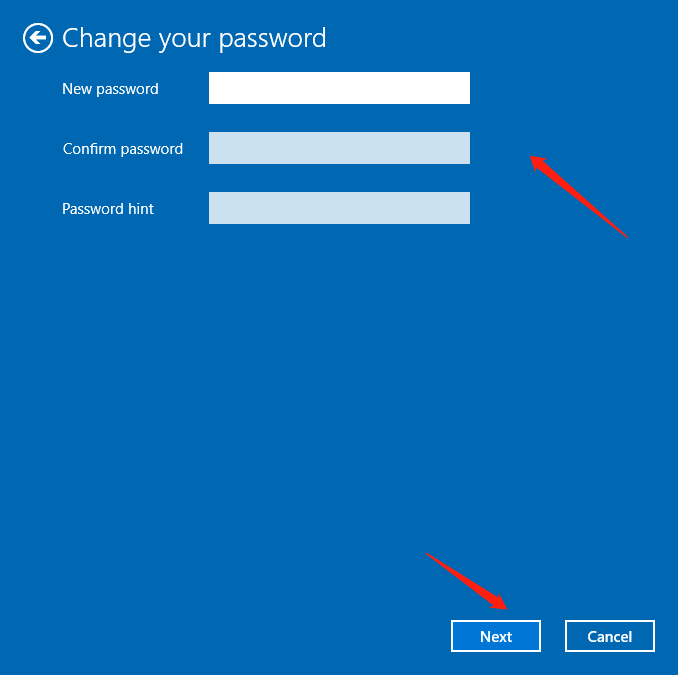
ステップ4:入力し、新しいパスワードを再入力し、パスワードのヒントを入力して、[ Next 変更を保存します。
Netplwizの使用
ステップ1:を押します Windows + R 実行ボックスを起動します。次に、入力します Netplwiz 開くには ユーザーアカウント 窓。
手順2:パスワードを変更するユーザーアカウントを選択します。次に、をクリックします パスワードを再設定する.
ステップ3:入力し、新しいパスワードを再入力し、パスワードのヒントを入力してから、 Next 変更を保存します。
ヒント: パスワードを削除するには、「新しいパスワード" と "新しいパスワードを確認" 分野 空欄 上記の方法で。
これらの手順を完了すると、ローカルアカウントのパスワードを変更または削除できます。パスワードを削除すると、パスワードなしでWindows10にアクセスできます。しかし、それはある程度安全ではありません。不便なため、パスワードを削除したいとします。その場合は、指紋リーダーやPINパスワードを使用した生体認証など、より安全で高速な認証方法に切り替えることをお勧めします。
前の記事
Effective Methods On How To Run CHKDSK On Startup Summary: Using Windows 10 with a password is one of the most secure ways to keep the device and files...次の記事
How To Change Account Username In Windows 10? Summary: Using Windows 10 with a password is one of the most secure ways to keep the device and files...
Bitwar データ復旧について
3 つのステップで、さまざまなデータ損失シナリオから削除、フォーマット、紛失した 500 種類以上のドキュメント、写真、ビデオ、オーディオ、アーカイブ ファイルを取り戻します。
詳細はこちら


