6 Solutions to the Error of System_Thread_Exception_Not_Handled
Summary: The error of System_Thread_Exception_Not_Handled is a common Windows issue that usually happens during boot time. Though it can also occur even if you are in the process of your work. In most cases, this issue creates a lot of inconveniences. In addition to the common cause of malfunctioned drivers, there are other culprits such as system incompatibility and memory conflicts. Whenever then error occurs, the computer shuts down, makes a bleep, and pops up with a blue screen. Based on the system configuration, your computer may restart itself. But the vexing part of the issue is that no matter how many times you try to reboot your PC, you will repeatedly see the BSOD. So, in this article, we will explain to you several effective solutions to it. Besides, if there are any data loss problems relating to this issue, you could always turn to Bitwar Data Recovery for help.
Table of Contents
How to Fix the Error of SYSTEM_THREAD_EXCEPTION_NOT_HANDLED
Solution 1: Reinstall Display Drivers
Display drivers are one of the most common causes of this error. You need to uninstall them and then reinstall the latest version of the display drivers. If you can log in to Windows, skip to step 6. But if you can’t, start with step 1.
Step 1: Boot your computer into safe mode.
Step 2: After entering the safe mode, navigate to Troubleshoot > Advanced options > Command Prompt. A command prompt window will appear. Type in the following command and then press Enter.
BCDEDIT /SET {DEFAULT} BOOTMENUPOLICY LEGACY
Step 3: Type in Exit and then press Enter. Click on Continue.
Step 4: Reboot your system and keep pressing F8 ( or Shift + F8) before the Windows logo appears. After that, the AdvancedBootOptions menu will pop up.
Step 5: Select SafeMode with Networking and then press Enter. After that, the computer will boot into Safe Mode.
Step 6: Press Windows key + R. In the Run dialog, type in devmgmt.msc and then press Enter.
Step 7: In the Device Manager window, double-click on Display adapters to expand it. Right-click on your display driver, and then choose Uninstall device.
Step 8: Click on Delete the driver software for this device and then click on OK. After rebooting your PC, video drivers will be reinstalled automatically.
Solution 2: Uninstall Recently Installed Third-Party Programs
As seen in several cases, an incompatible software application may trigger the issue of System_Thread_Exception_Not_Handled. If you installed any third-party programs just before the error happened, you could try uninstalling them to fix the issue.
Use the steps below to uninstall any recently installed programs.
Step 1: Press Windows + R keys at the same time to launch the Run box.
Step 2: Type in Control Panel and then click on OK.
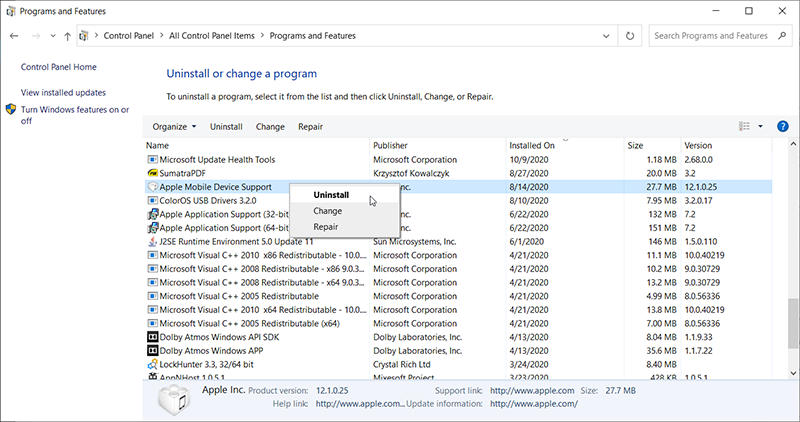
Step 3: Navigate to Programs and Features to see all programs installed on your computer.
Step 4: Click on the Installed On button, which will sort out all installed programs by date.
Step 5: Now, right-click on the incompatible programs to uninstall them.
Solution 3: Check and Repair Windows System Files
Having corrupt system files is another common culprit you should consider. You can use the CHKDSK tool to solve the issue. To do so, use the following steps:
Step 1: Right-click on the Start Menu button.
Step 2: Select Command Prompt (admin).
Step 3: In the Command Prompt window, type in the following command and then press Enter:
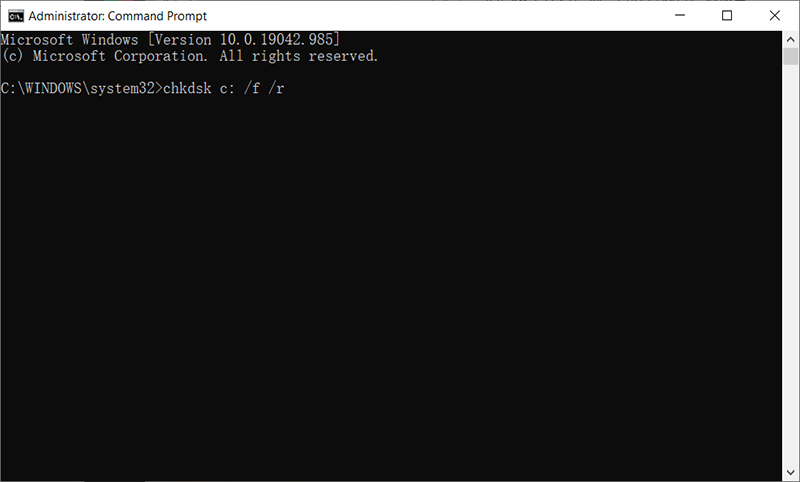
Step 4: It might take some time for the process to finish. After it’s done, reboot your computer and check whether the error is solved.
Solution 4: Disable Fast Startup
Many users reported that the fast startup feature provided by Windows could lead to the error of System_Thread_Exception_Not_Handled. It’s a feature that greatly reduces the time it takes for the system to boot up. Since disabling the fast startup feature will not affect your computer, you could try using this method to check whether the issue is fixed.
Step 1: Press Windows + R key to open the Run box.
Step 2: Type in Control Panel and then click on OK.
Step 3: Click on Power Options from the Control Panel.
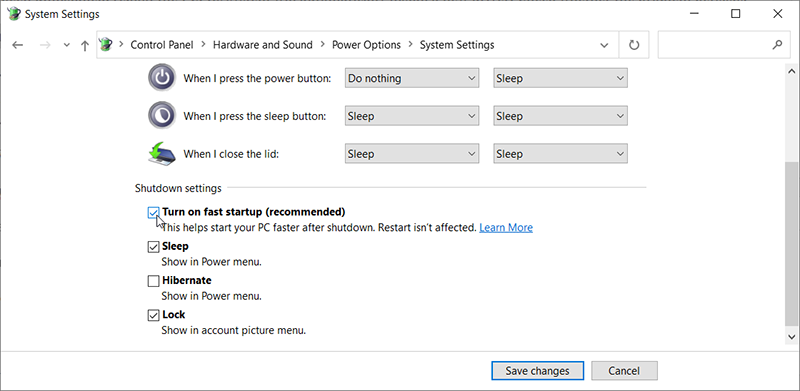
Step 4: Click on Choose what the power buttons do and then Change settings that are currently unavailable.
Step 5: Uncheck the box next to the option of Turn on fast startup (recommended).
Solution 5: Run DISM command
If the error of System_Thread_Exception_Not_Handled is caused by corrupt or missing files, you can the aforementioned SFC commands to fix it. But if the error persists, you can try using the DISM command to solve it. Refer to the following steps to learn how to use it.
Step 1: Right-click on the Start Menu button and then select Command Prompt (Admin).
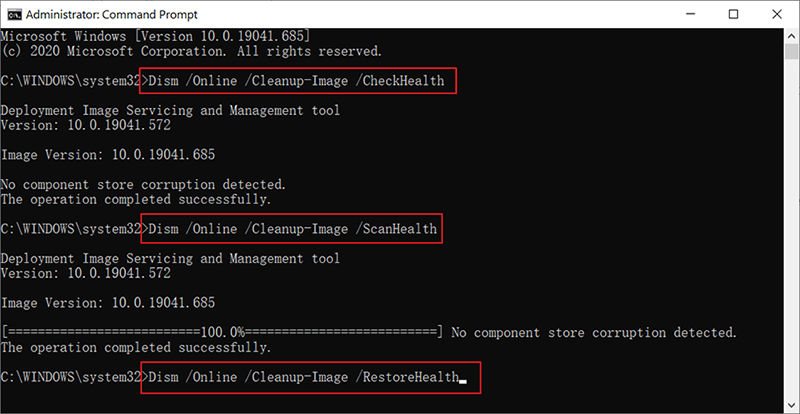
Step 2: In the Command Prompt window, type in the following commands and press Enter at the end of each line:
Dism /Online /Cleanup-Image /CheckHealth
Dism /Online /Cleanup-Image /ScanHealth
Dism /Online /Cleanup-Image /RestoreHealth
Step 3: After the process is done, reboot your computer to check whether this solution works.
Solution 6: Reset your PC
Resetting our PC is reckoned as the last resort for this issue but there is no doubt that it’s efficient and able to fix most of the BSOD issues, including the one discussed in this article. Refer to the following instructions to learn how to reset your PC.
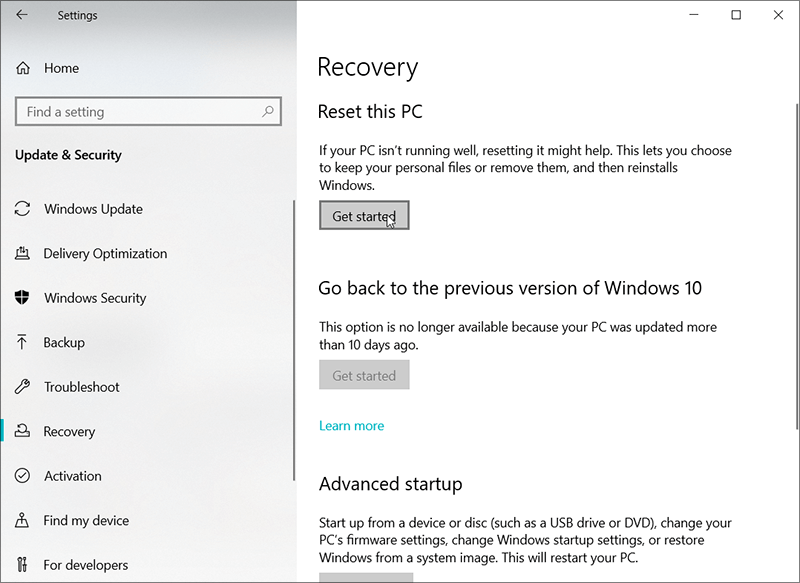
Step 1: Press Win + I to open Settings.
Step 2: Navigate to Update & security > Recovery.
Step 3: Click on Get started under the section of Reset this PC.
Step 4: Click on either Keep my files or Remove everything, depending on whether you want to prevent your files from being wiped out. However, no matter which way you choose, all of your settings will revert to their defaults, and apps on the PC will be uninstalled.
Step 5: Click on Just remove my files or Remove files and clean the drive if you select Remove everything in the previous step. Cleaning the drive takes longer but will ensure that files will be permanently deleted, making recovery almost impossible.
Step 6: Click on Next if a message pops up warning you that you won’t be able to roll back to a prior version of the operating system. Click on Reset when you are prompted.
Step 7: Your computer will then reboot and take several minutes to reset itself. Click on Continue when prompted.
How to Recover Lost Files Using Bitwar Data Recovery
As seen in many cases, the error of System_Thread_Exception_Not_Handledmight corrupts the system files, leading to a data loss issue. But with the help of the right tool, you might be able to recover all the lost files. Although there are a plethora of recovery tools you can find on the Internet, Bitwar Data Recovery is among the best when it comes to recovering lost files resulting from tricky computer issues. Refer to the following steps to learn how it works like magic.
Step 1: Visit our official website, download Bitwar Data Recovery, and then install it.
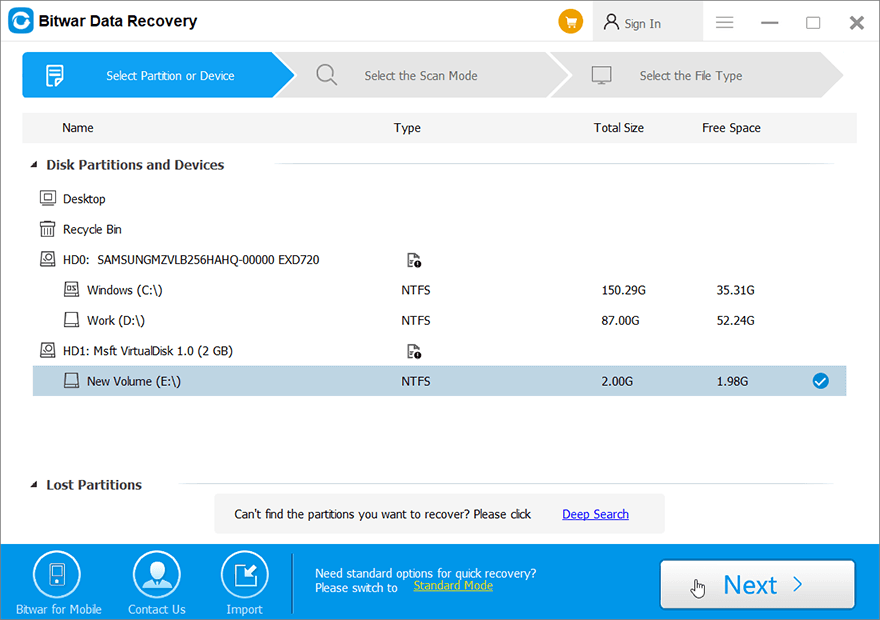
Step 2: Open the program and select the disk drive where the missing files were stored and click on Next.
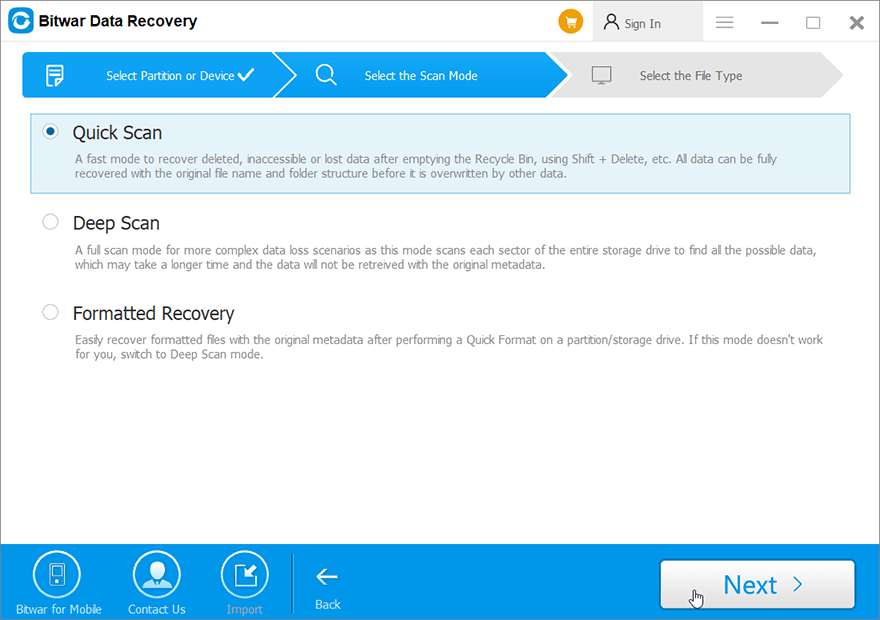
Step 3: Select a scan mode in this stage. We would like to suggest that you use Quick Scan, which is capable of retrieving a healthy number of lost files. If it fails to recover the files you want, you can re-run the software and select Deep scan, which is more effective.
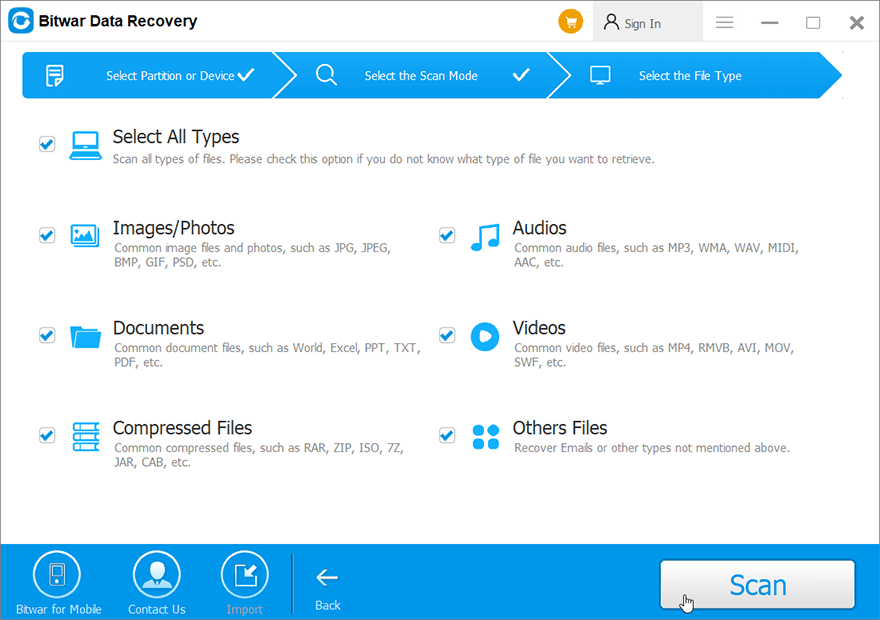
Step 4: Choose the types of files you want to recover and click Next.
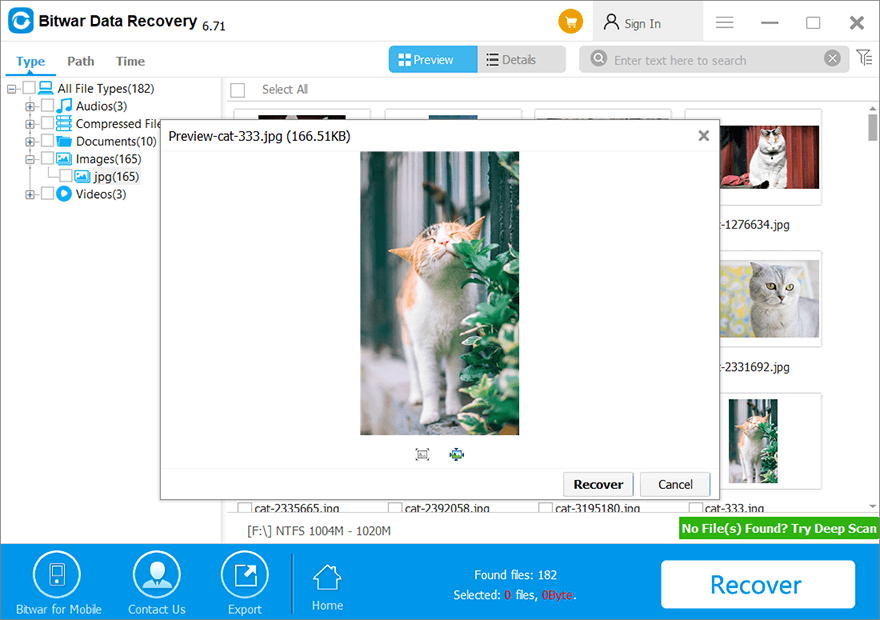
Step 5: Preview the wanted files to check their intactness. Choose those files and then click Recover to start the recovery.
Important: To ensure that all the lost files you want will be recovered in an intact state, you should save those recovered files to other drives except for the one where the lost files were stored.
Conclusion
If you have enough knowledge about the error of System_Thread_Exception_Not_Handled, it is not tricky to solve. In this article, we have explained several effective solutions to this BSOD issue. Besides, if you have lost any data because of this error, you can always turn to Bitwar Data Recovery for help.
Previous Article
7 Effective Solutions to the Reference by Pointer Error Summary: The error of System_Thread_Exception_Not_Handled is a common Windows issue that usually happens during boot time. Though it can also...Next Article
How to Solve the Unexpected Store Exception BSOD Error in Windows 10 Summary: The error of System_Thread_Exception_Not_Handled is a common Windows issue that usually happens during boot time. Though it can also...
About Bitwar Data Recovery
3 Steps to get back 500+ kinds of deleted, formatted or lost documents, photos, videos, audios, archive files from various data loss scenarios.
Learn More


