Las 4 mejores soluciones para reparar una carpeta parpadeante con un problema de signo de interrogación en Mac
Resumen: El siguiente artículo mostrará las mejores soluciones para arreglar la carpeta parpadeante con el problema del signo de interrogación en Mac y recuperar datos de la unidad usando Software de recuperación de datos Bitwar para Mac!
Tabla de contenido
Problema de Mac: Carpeta parpadeante con signo de interrogación
A veces, durante el inicio o el inicio del sistema, la carpeta de actualización de Mac con un signo de interrogación aparecerá sin previo aviso. Impide que los usuarios de Mac accedan a la carpeta y esto debe solucionarse de inmediato para evitar la pérdida de datos. El error también evitará que el sistema Mac encuentre el sistema de carpetas o el disco duro porque los errores de hardware y software también ocurrirán durante el inicio o la carpeta de archivos seguirá parpadeando en su sistema.
Supongamos que usted es el usuario desafortunado que se encontró con este error, ¡todo lo que necesita es seguir las soluciones guiadas a continuación para solucionar el problema lo antes posible!
Razones para parpadear una carpeta con un signo de interrogación en el sistema Mac
Hay muchas razones por las que se produce el error, así que consulte la lista a continuación:
- Disco duro físicamente dañado o corrupto.
- Versión de sistema operativo desactualizada.
- Realice el inicio del sistema en la unidad del sistema externo.
- La unidad interna de Mac se reemplazó incorrectamente.
Las mejores soluciones para reparar una carpeta parpadeante con un error de signo de interrogación
Solución 1: elija la unidad de inicio manualmente
Tan pronto como aparezca el error durante el arranque o inicio del sistema, espere a comprobar que arranca. Luego, vaya a las preferencias del sistema para elegir nuevamente el disco de inicio.
Otra situación es que el sistema Mac no muestra el signo de interrogación parpadeante, entonces debes seleccionar el inicio manualmente. Todo lo que necesita es reiniciar el sistema Mac, continuar presionando y manteniendo presionada la tecla Opción en el teclado.
Solución 2: elija el disco de inicio en el modo de recuperación
Supongamos que la solución uno no es efectiva, luego siga los pasos a continuación para realizar la recuperación de macOS y volver a seleccionar la unidad de inicio.
Paso 1: Forzar el cierre su sistema Mac manteniendo presionado el botón fuerza durante unos segundos.
Paso 2: Cuando el sistema Mac se haya reiniciado, mantenga presionado Dominio + R llaves juntas. Entonces liberar estas claves cuando veas el Manzana aparece el logotipo.
Paso 3: Asegúrese de que ventana de utilidad macOS Aparece para garantizar que haya iniciado Mac en modo de recuperación. Mientras que para las versiones anteriores de Mac, se mostrará Utilidad Mac OS X.
Paso 4:Elige el Manzana logotipo en la pantalla izquierda y elija el disco de inicio opción.
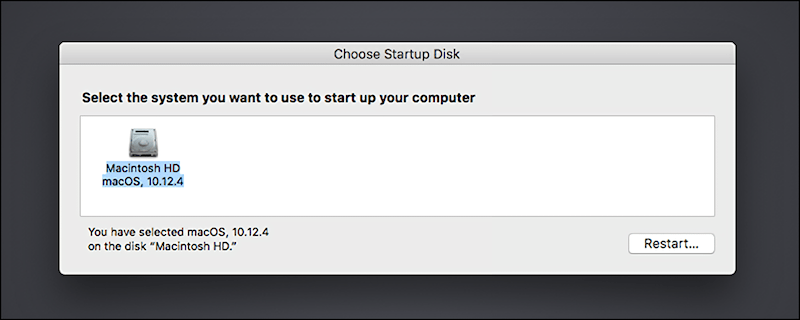
Paso 5:Elige el Disco duro instalado en el sistema operativo.
Recuerde que cuando presiona el botón de reinicio, el sistema Mac puede iniciar el inicio sin ningún signo de interrogación parpadeante.
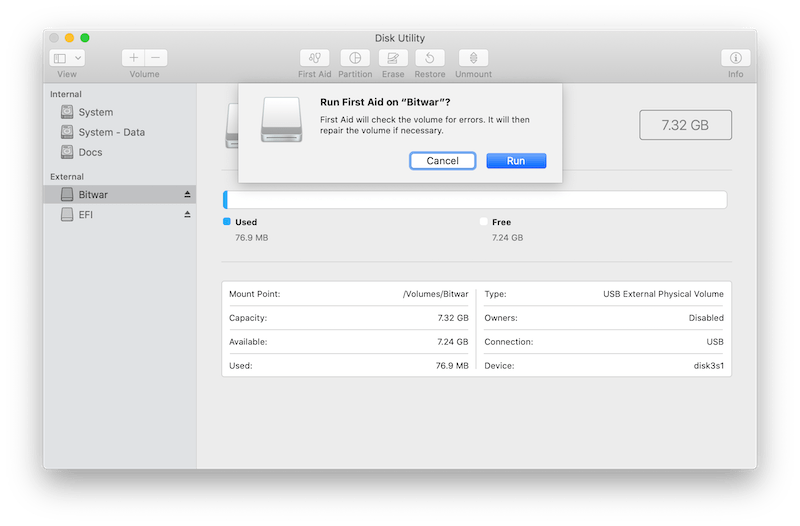
Solución 3: Repare la unidad de inicio usando la Utilidad de Discos
Paso 1: Elegir Utilidad de Discos en el modo de recuperación de macOS desde Utilidades.
Paso 2: Elegir unidad de inicio desde la utilidad de disco. Por cierto, Mac puede nombrar la partición como Mac OS o Macintosh HD.
Paso 3: Haga clic en Primeros auxilios opción y presione Correr opciones para corregir el error durante el inicio de la unidad.
Paso 4: Salidadesde elUtilidad de Discos y proceder a Utilidades de macOS.
Paso 5: navegue hasta el Manzanamenú y luego alDisco de inicio.
Paso 6: Reiniciar su sistema mac y verifique si el problema está solucionado o no.
Solución 4: vuelva a formatear la unidad de inicio y reinstale el sistema operativo
Antes de continuar con esta solución, primero debe recuperar sus datos importantes con la herramienta de recuperación de datos de Mac para evitar cualquier pérdida de datos después de la solución.
Recuperar datos con la herramienta de recuperación de datos de Mac
guerra de bits Software de recuperación de datos para Mac es una herramienta de recuperación eficiente que puede restaurar diferentes datos desde dispositivos de almacenamiento internos o externos, como discos duros externos, tarjetas SD, unidades flash u otros.
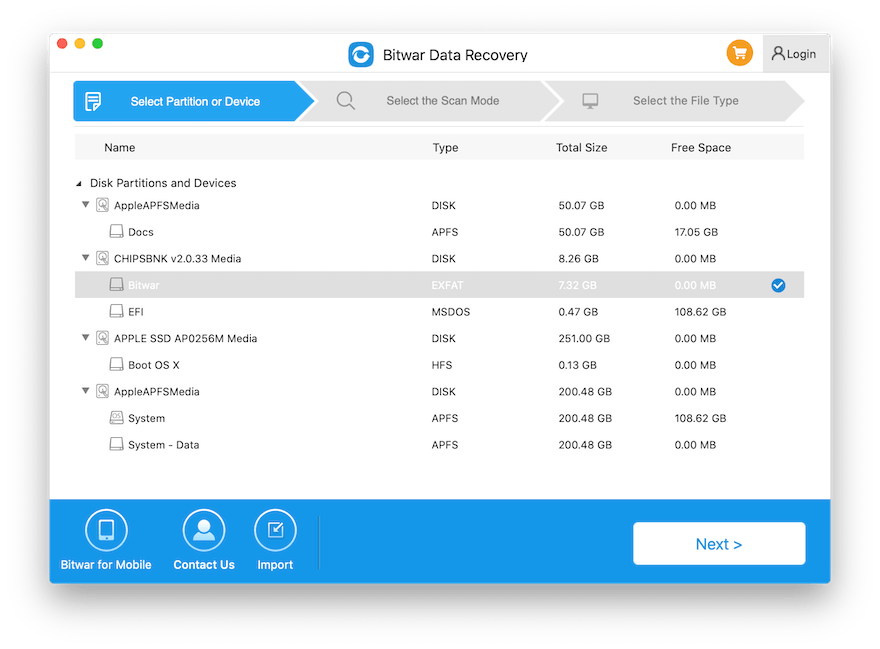
Paso 1: Ir a Centro de descargas de Bitwarsoft y descargar el último software de recuperación de datos en su dispositivo mac.
Paso 2: Abierto la herramienta de recuperación y seleccione la unidad o partición que desea recuperar. Luego haga clic en el Próximo botón.
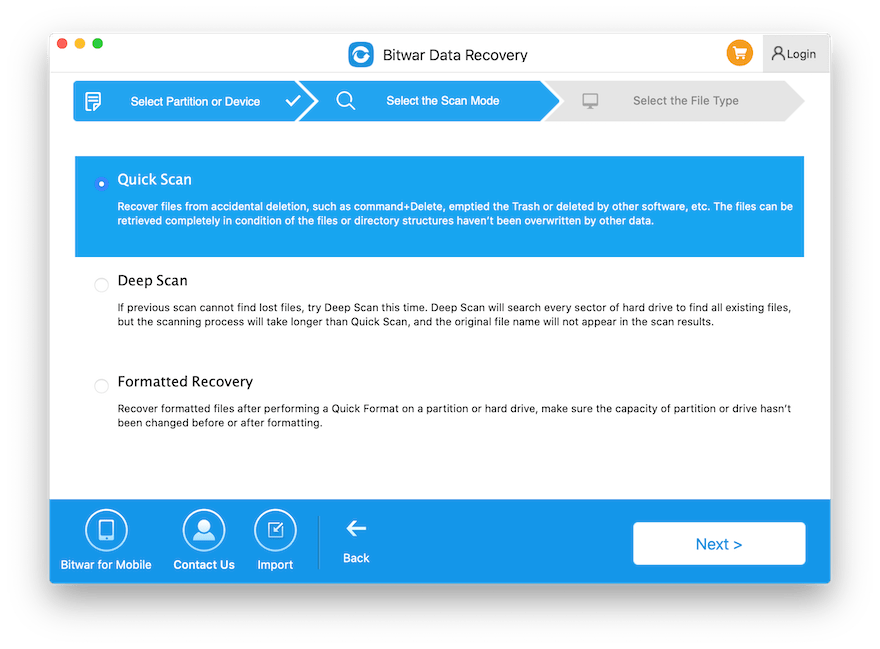
Paso 3:Seleccione el modo de escaneo y haga clic en el Próximo botón.
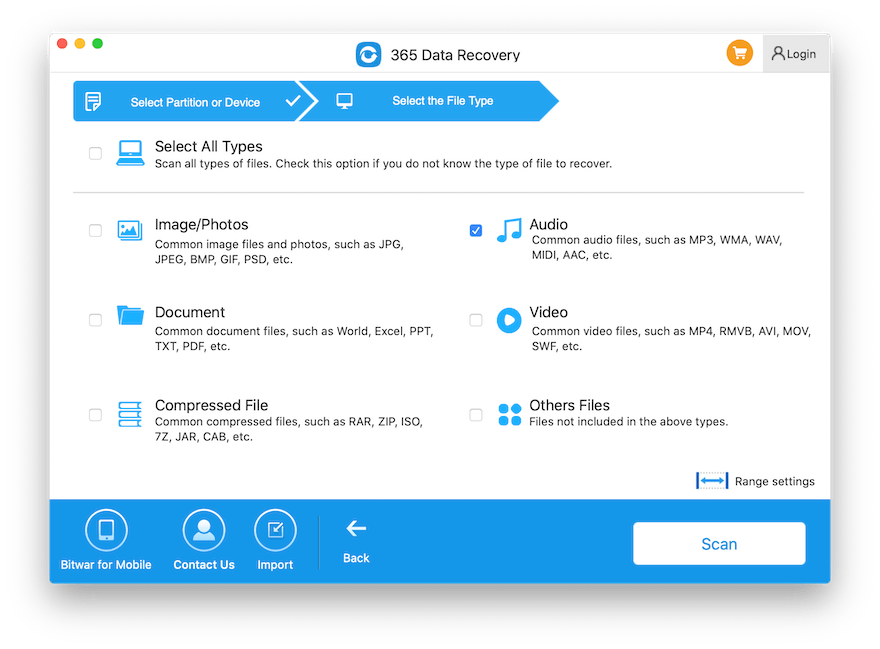
Paso 4: Elija el requerido tipo de archivo y haga clic en el Próximo botón nuevamente.
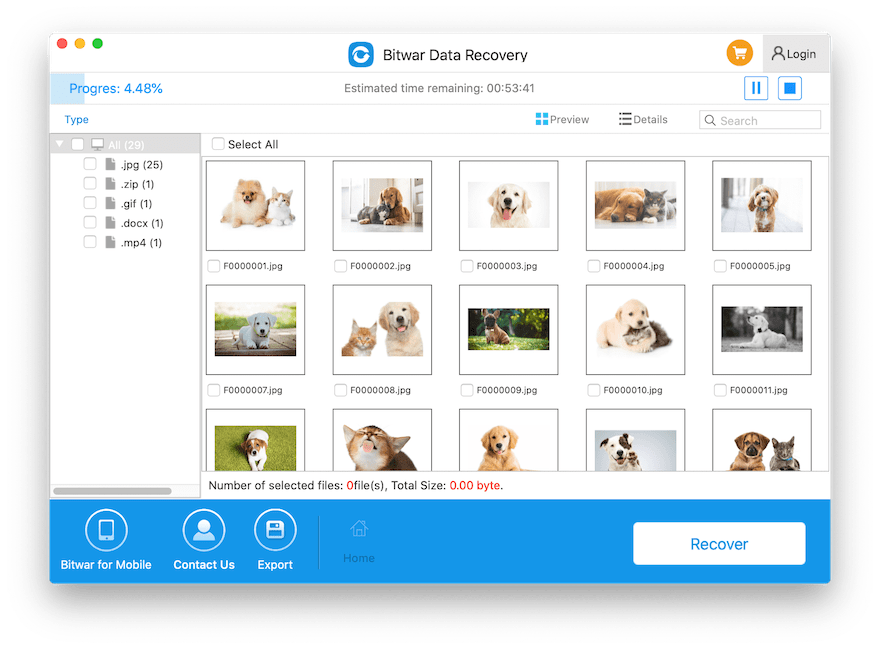
Paso 5: Mire a través del resultados del escaneo y haga clic en el recuperar para realizar la recuperación de datos.
Parte 1: reformatear el archivo de inicio
Paso 1: inicia tu Mac en modo de recuperación y elige el Utilidad de Discos de Utilidades.
Paso 2:Elige el unidad de inicio de Utilidad de Discos y haga clic en el Borrar botón del menú.
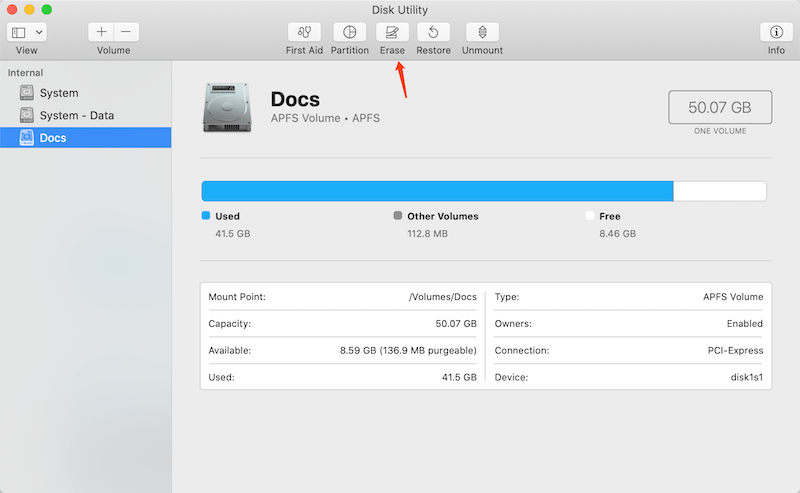
Paso 3: Pon el nombre como Macintosh HD y escriba la información necesaria.
Parte 2: reinstalar Mac OS
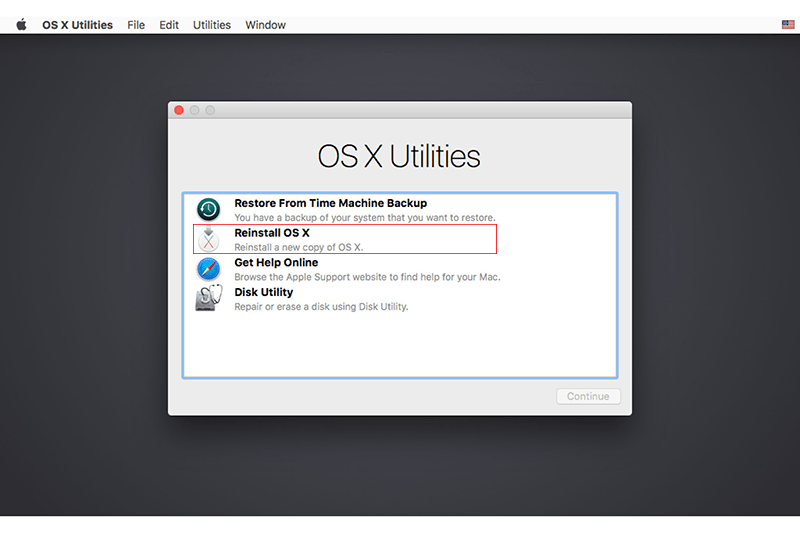
Paso 1: Elegir Utilidad macOSs en el recuperación modo.
Paso 2: Elegir Reinstalar MacOS del menú.
Paso 3: Elegir Continuar y siga las instrucciones guiadas para elegir el requerido Disco y Comienzo el proceso.
¡Resuélvelo inmediatamente!
Hay muchas razones para la carpeta parpadeante con signo de interrogación Se producirá un error en su dispositivo Mac, pero cuando lo encuentre, siga las soluciones guiadas anteriores para solucionarlo lo antes posible y hacer una copia de seguridad de sus datos con Recuperación de datos de Bitwar Programas para Mac para evitar cualquier tipo de pérdida permanente de datos!
Artículo anterior
4 Efficient Recovery Ways to Recover Deleted Notes on Mac Summary: The article below will show the best solutions to fix the flashing folder with question mark issue on Mac...Siguiente artículo
7 Recovery Methods to Restore Folders Disappeared From Desktop On Mac Summary: The article below will show the best solutions to fix the flashing folder with question mark issue on Mac...
Acerca de Bitwar Data Recovery
3 Steps to get back 500+ kinds of deleted, formatted or lost documents, photos, videos, audios, archive files from various data loss scenarios.
Más información


