Full Guide to Force Delete Files/Folders on Windows/Mac
Основная: If you are having trouble when force deleting files/folders or force deleting recycle bin on Windows 10, 8, 7 or Mac, this article will serve you very well, as it describes all the proven solutions for you to get rid of the annoying files or folders finally, and what if you have mistakenly deleted some wanted files or folders, we also comprise the best data recovery software for you to recover the data.
Deleting files/folders is one of the most common actions computer users do every day. Mostly it goes as intended, and those deleted files/folders either go to the Recycle Bin or perish from the computer.
However, users sometimes come across an issue that specific files/folders won’t get deleted. Situations like: the file are in use; Access is denied; another program uses the file; the file is corrupted or unreadable. Since a certain file in this peculiar state can sometimes amount to gigabytes, you could have a hard time trying to tackle the problem when you want to free up drive space. To help users fix the problem, we lay out 12 solutions as below and please take your time to learn how to force delete files/folders.
Оглавление
How to Force Delete Files/Folders on Windows XP, 7, 8, and 10
Solution 1: Terminate Associated Process/Program
In most cases, users can’t delete a file because a process is currently using the file. If you know there is a process that has opened the file, terminate the process, and try deleting the file again.
A trickier situation, in this case, is that the process currently using the file might be a hidden one. Then, what users need to do is to find out the process and terminate it, which can be done by using Task Manager. Refer to the steps to learn how to force delete files/folders or force delete recycle bin on Windows 10,7,8 and XP in this way.
Шаг 1: Right-click on the Start menu и выберите Диспетчер задач.
Step 2: Under the Performance tab, Click on Open Resource Monitor.
Step 3: Click on the CPU Вкладка.
Step 4: In the Associated handles section, enter the name of the file in the search field.
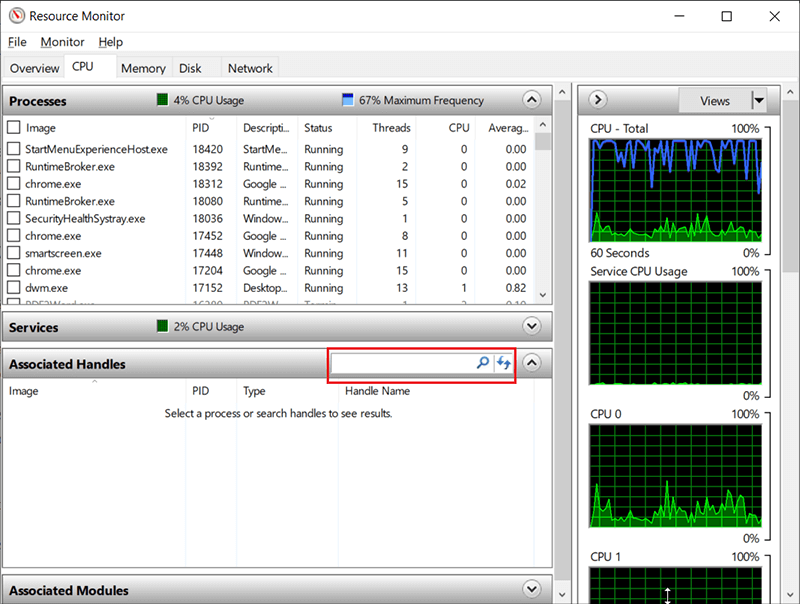
Step 5: Right-click on the process and then click on End Process.
Step 6: Try deleting the file again.
Solution 2: Replace the Undeletable File
This is a simple method for deleting an undeletable file using a notepad.
Шаг 1: Create a notepad and enter a few random letters.
Step 2: Click on the Файл tab, select Save As вариант.
Step 3: Navigate to the location where the undeletable file is.
Step 4: In the Save As window, expand the drop-down menu next to Save as type, and then select All Files.
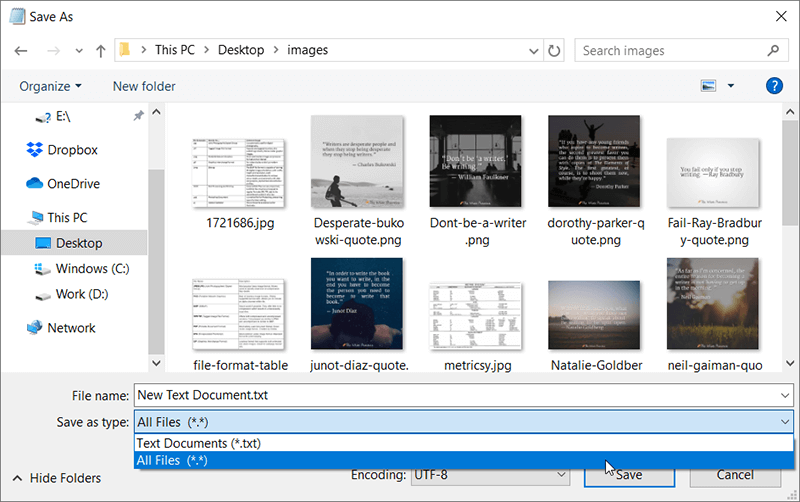
Step 5: Select the undeletable file. Notice that the file name of the notepad will be replaced with the name of the undeletable file.
Step 6: Click on Экономить, and then click on Yes after a confirmation dialogue has popped up.
Step 7: Now, you can try again to delete the files.
Solution 3: Use Safe Mode
Restarting the computer is a simple but rather effective way to shut down the hidden process that is currently using the file. After the rebooting, use the third-party tool to unlock it. In most cases, this combined solution should work. If it doesn’t, users can try booting into Safe Mode to force delete files/folders by using the steps:
In Windows XP & 7
Шаг 1: Shut down the computer, and then press the power button to turn it on.
Step 2: After the computer has been powered on, immediately press F8 repeatedly until you see the Advanced Boot Options screen.
Step 3: Use the arrow icon to select the Безопасный режим, and then tap Enter.
In windows 8, 8.1 and 10
Шаг 1: Press Победа + Р to type in MSConfig.
Step 2: Navigate to Boot > Boot Options.
Step 3: Check off Safe boot > Apply > OK.
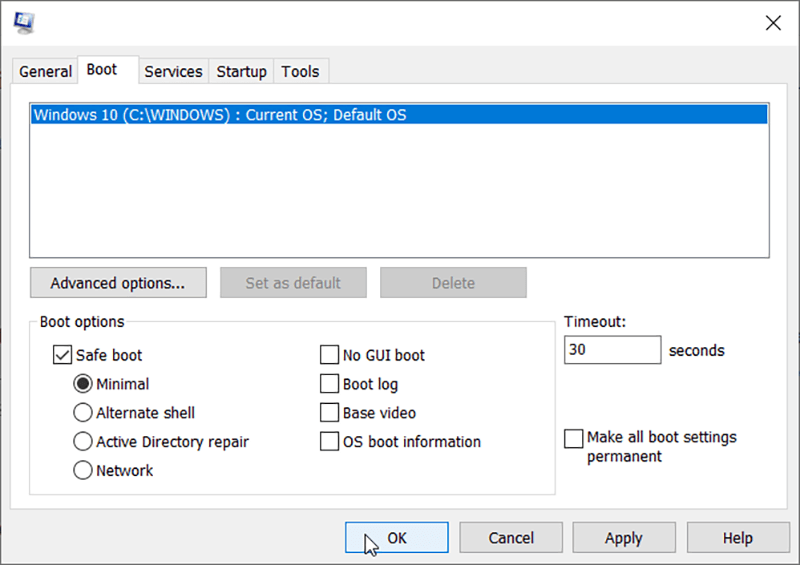
Step 4: Click on Restart.
After the PC is in safe mode, you can use Проводник to find the file and delete it.
Solution 4: Force Delete in Windows Command
Because the traditional way of deleting files/folders in Windows by using File Explorer can’t deal with some files/folders that limit user control, a more powerful tool, cmd, should work for this kind of deletions. Refer to the steps to learn how to force delete files/folders using CMD:
Шаг 1: Press Win + Q and type in CMD.
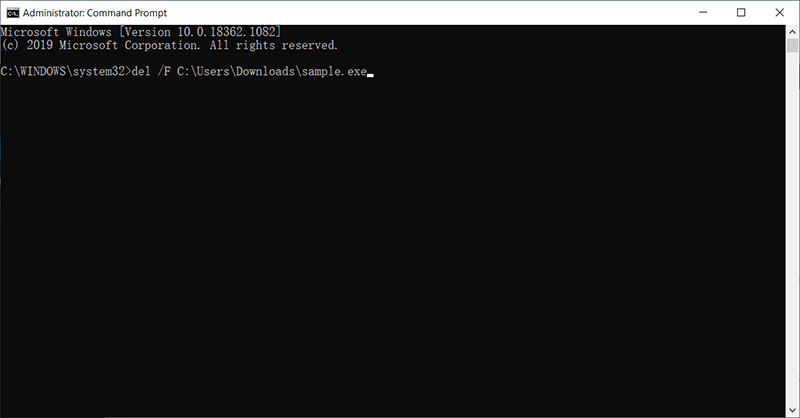
Step 2: Right-click on the program and select Run as administrator.
Step 3: If you want to force delete a single file, type in: del /F C:\Users\Downloads\sample.exe (Replace the file path with yours)
Step 4: If you want to force delete a folder, type in: rd/S/Q: \Users\Downloads (Replace the folder path with yours)
Information about Del command
- /F: Force deletion of read-only files
- /P: Enable prompts for confirmation before deleting the specified file.
- /S: Delete specified files from the current directory and all the subdirectories it contains. It will display the names of files being deleted.
- /Q: Enable quiet mode. Prompt for confirmation will not be displayed.
Solution 5: Unlock the File Using a Third-Party Tool
Some third-party tools can sever the connections between the locked file and all other processes that are currently using it and hence enables you to delete it. Powershell is one of the free and prevalent tools that aim to help users unlock files. So you can use Powershell to force delete a file/folder. To unlock a file, use the following guide:
Шаг 1: Download the program from the official website and install it.
Step 2: Right-click on the locked file and select What’s locking this folder?
Step 3: Click on Unlock It! button to unlock the file.
Step 4: Try deleting the file again.
Примечание: If there were thousands of files stored in one folder and you can’t figure out which files are not removable. The best way to force deleted files/folders is by using the third-party tool to unlock the entire folder and then delete it. After that, all of the files will be deleted together with the folder.
Recover Accidentally Deleted Files Using Bitwar Data Recovery
What if sometimes when users force delete a photo, file, video and some other kinds of unwanted data using a third-party tool, they can recover those files via Recycle Bin. But that method doesn’t work for users who delete a file by using CMD, pressing Shift + Delete, or simply emptying Recycle Bin. In these kinds of scenarios, to recover the deleted files, you can rely on Восстановление данных BitWar, which can retrieve those deleted files in minutes. Refer to the steps to see how it works magic.
Шаг 1: Visit the official website of Bitwar Data Recovery. Download and Install it on your computer.
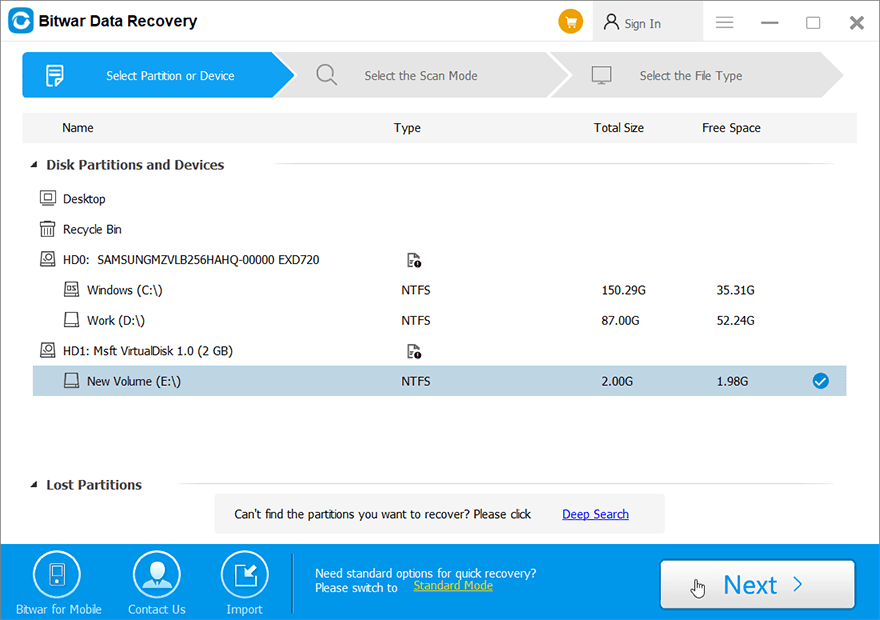
Step 2: Launch the software, select the disk drive where the files had been before they got deleted and then click on Следующий.
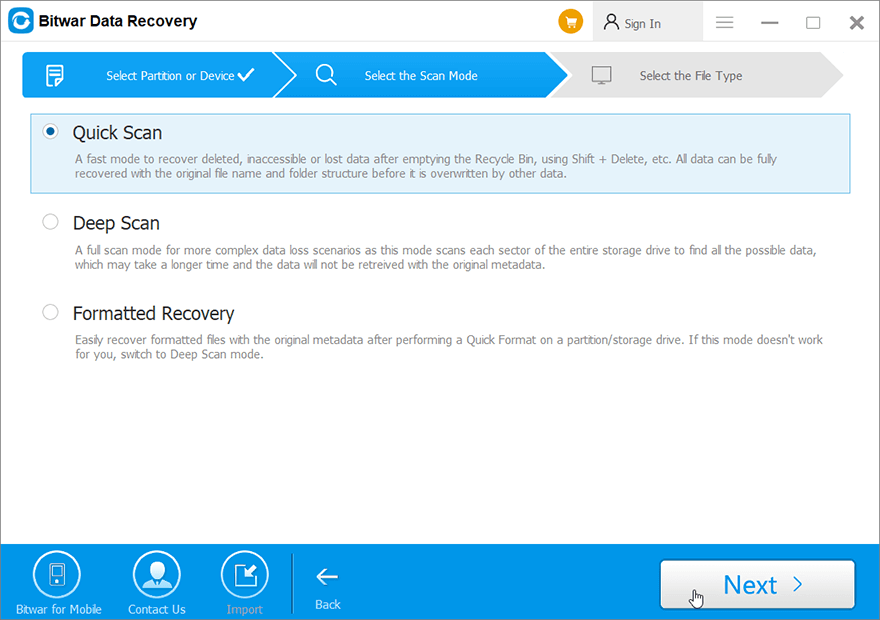
Step 3: In this stage, we should select a scan mode. Quick Mode will serve you better. It only costs a few minutes to scan all the sectors of an ordinary drive. If this scan mode fails to work on the disk, you can try Deep Scan next time.
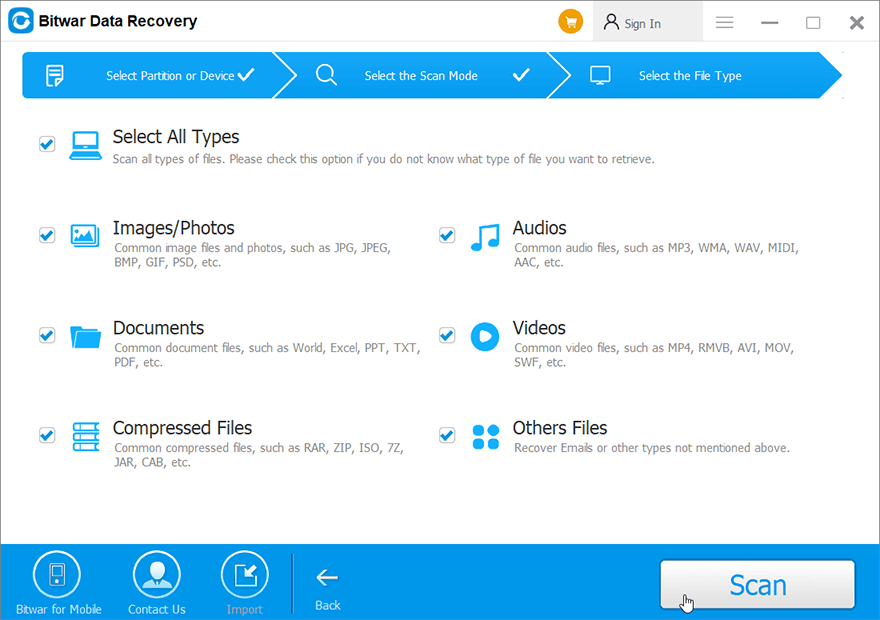
Step 4: Select file types and then click on Scan.
Step 5: Double-click on a file to preview it. Select wanted files and click on оправляться to recover them.
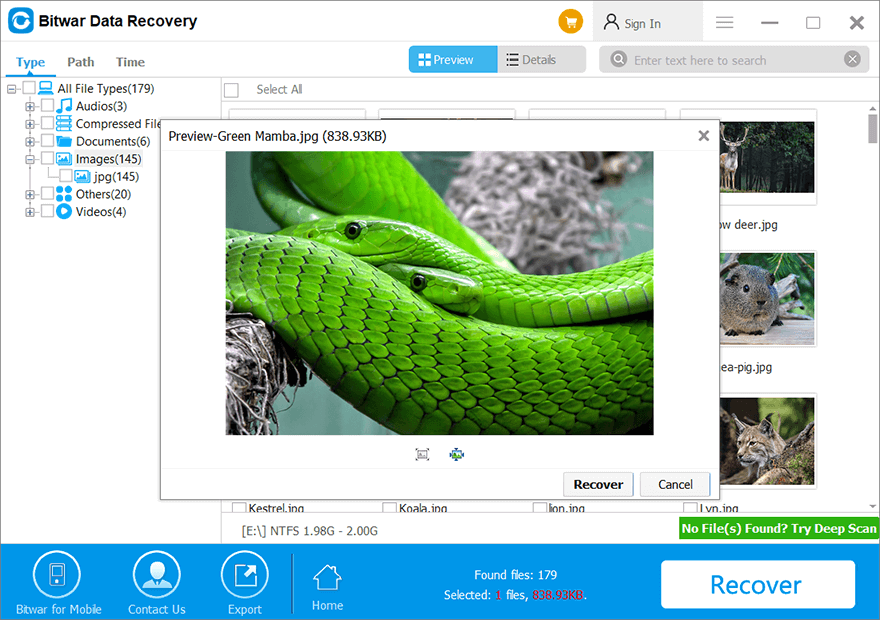
Примечание: To avoid the risk of overwriting your deleted files, files to be recovered should not be saved to the original disk drive that contained those deleted files.
How to Force Delete Files/Folders on Mac
Way 1: Secure Empty Trash
One way to force delete a file on Mac is to remove it permanently with Secure Empty Trash. Follow the steps:
Шаг 1: Click on and hold the Trash icon in Dock.
Step 2: Click on Trash while holding the command key. Select it when empty Trash turns to secure empty Trash.
Step 3: Click on the Finder tab and select Secure Empty Trash.
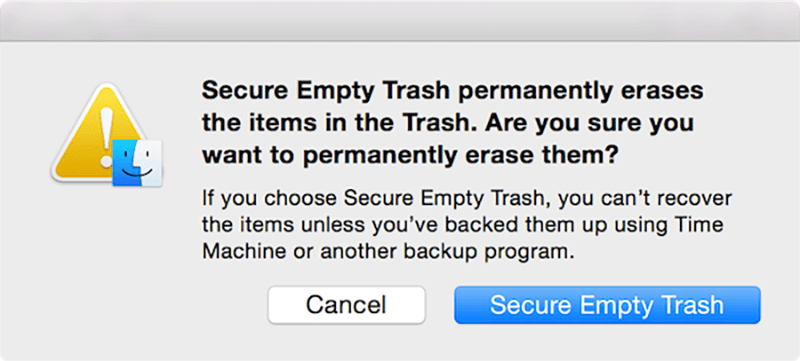
Примечание: This method works only on previous macOS versions but for macOS 10.15 Catalina, the Apple has turned off the secure empty trash feature, whereas, you’ll need to force empty the trash using Terminal (Jump to Way 7).
Way 2: Quit Associated Process
If you want to delete a file in use, a direct way to address the problem is to find the associated process and close it. To find what the process is, use the following steps:
Шаг 1: Navigate to Applications > Utilities, and launch the Activity Monitor.
Step 2: Under the CPU или Memory tab, look for the process that uses the file.
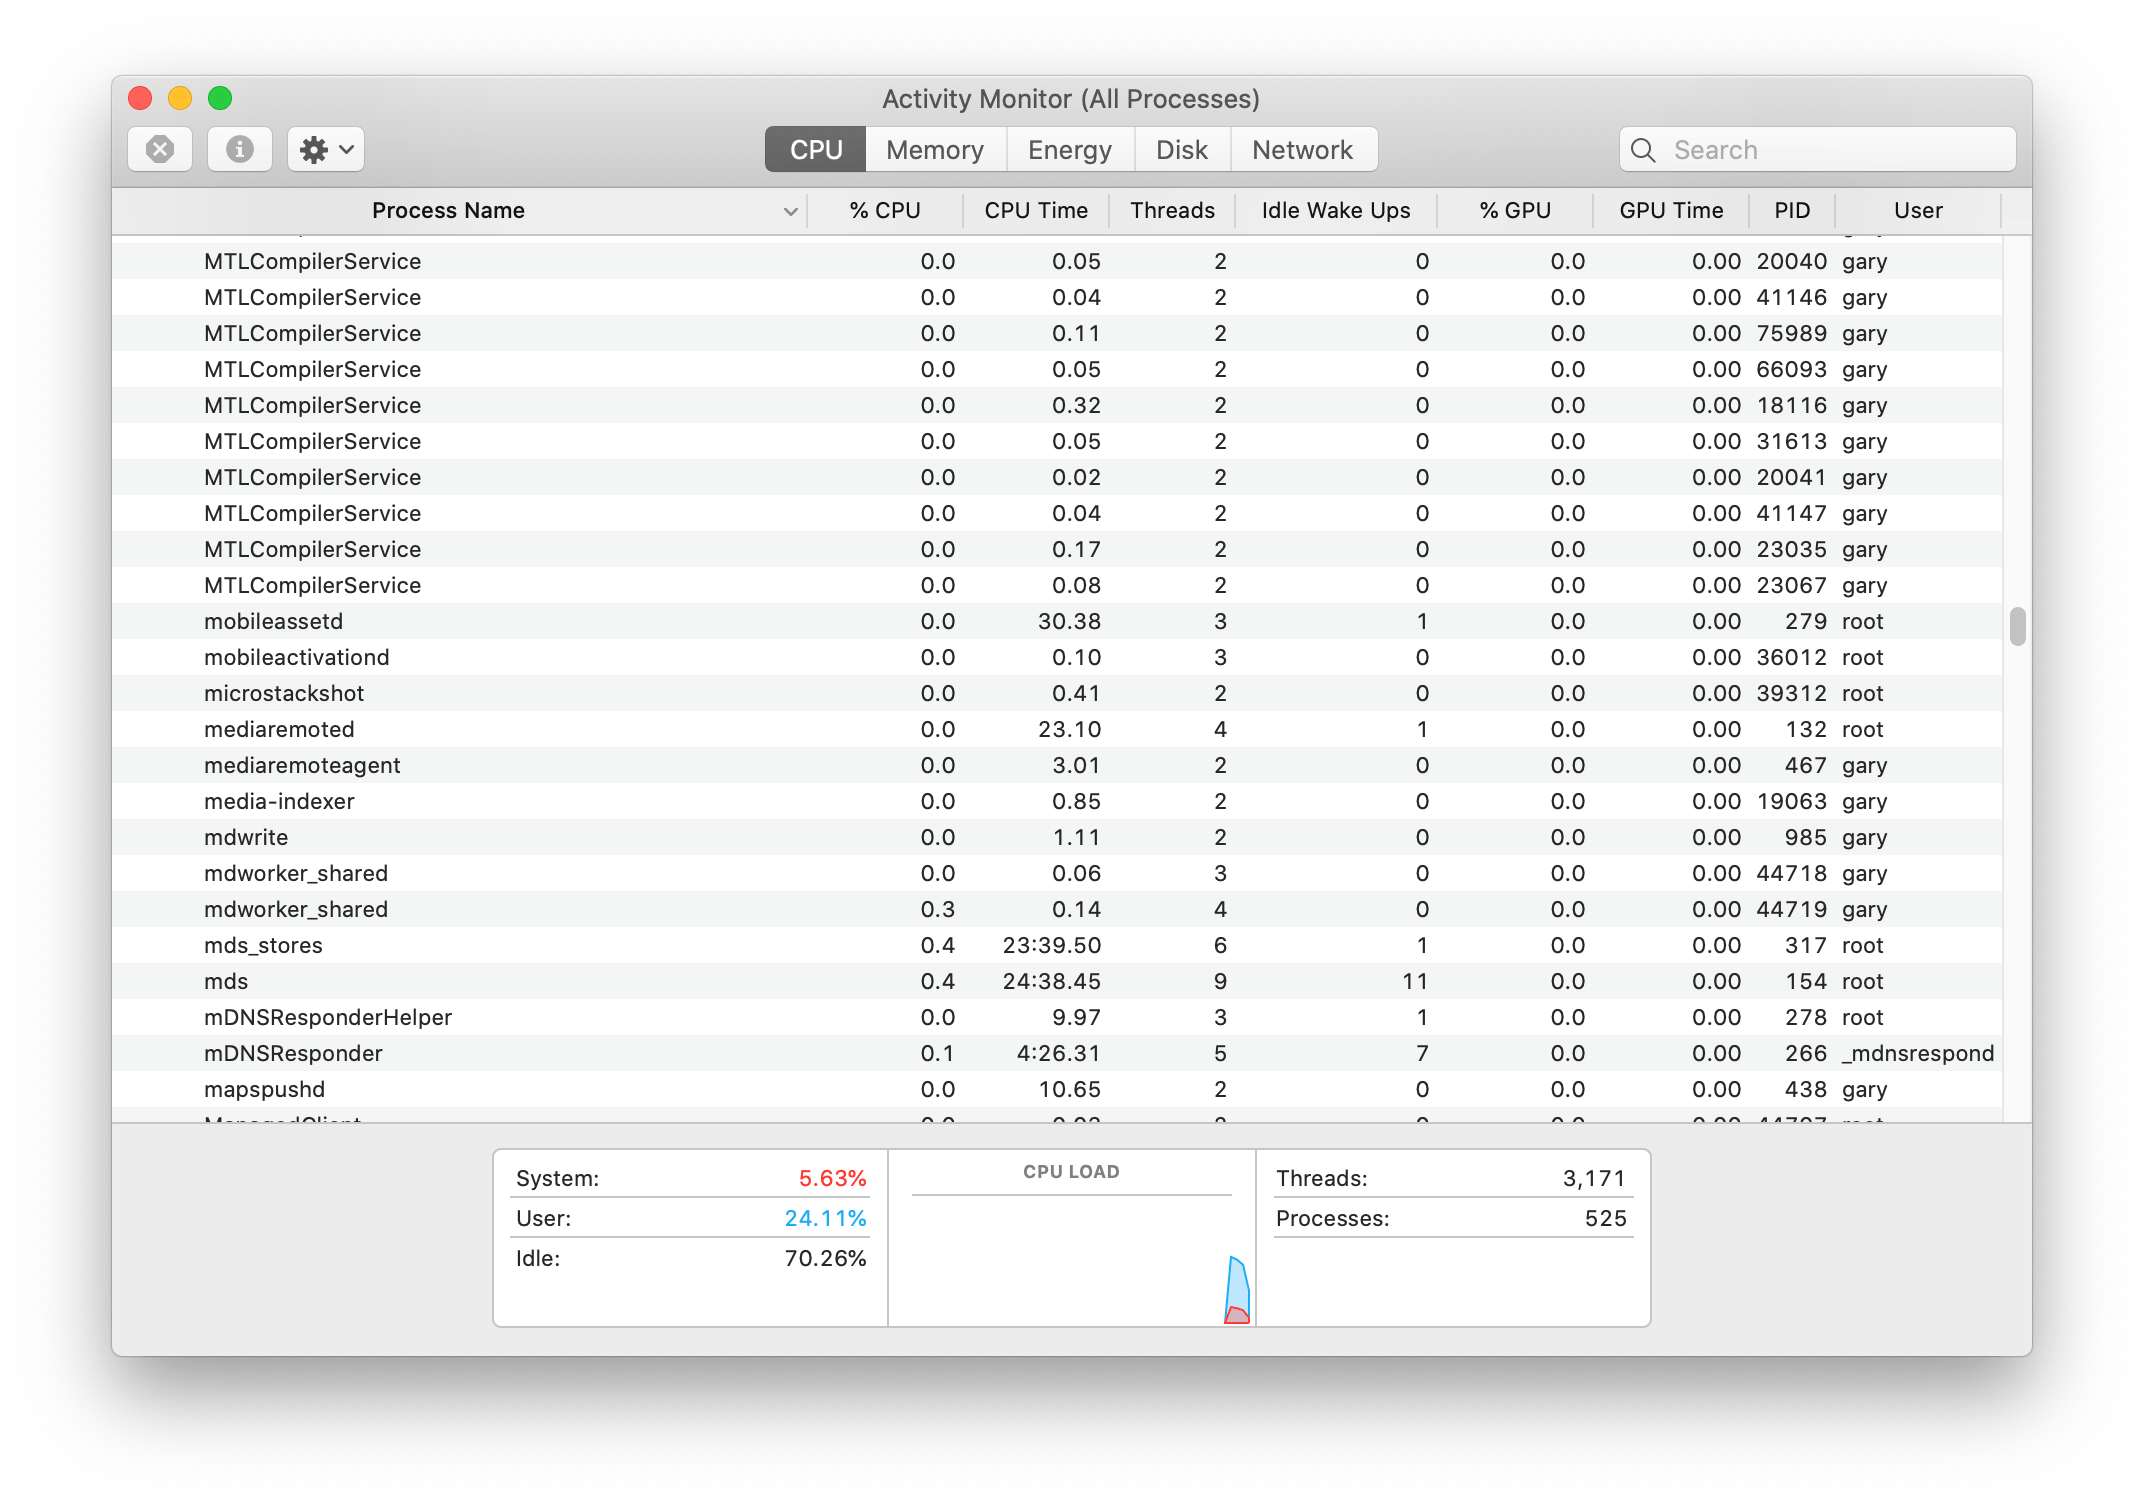
Step 3: Select the process and then click on the Quit Process icon.
Way 3: Unlock the Undeletable File
If you are running into the file is locked issue when you want to delete a file, you need to unlock it. Use the steps:
Шаг 1: Control-click the undeletable file in Finder.
Step 2: Choose the Get info option from the menu.
Step 3: Expand the Общий раздел.
Step 4: Uncheck Locked.
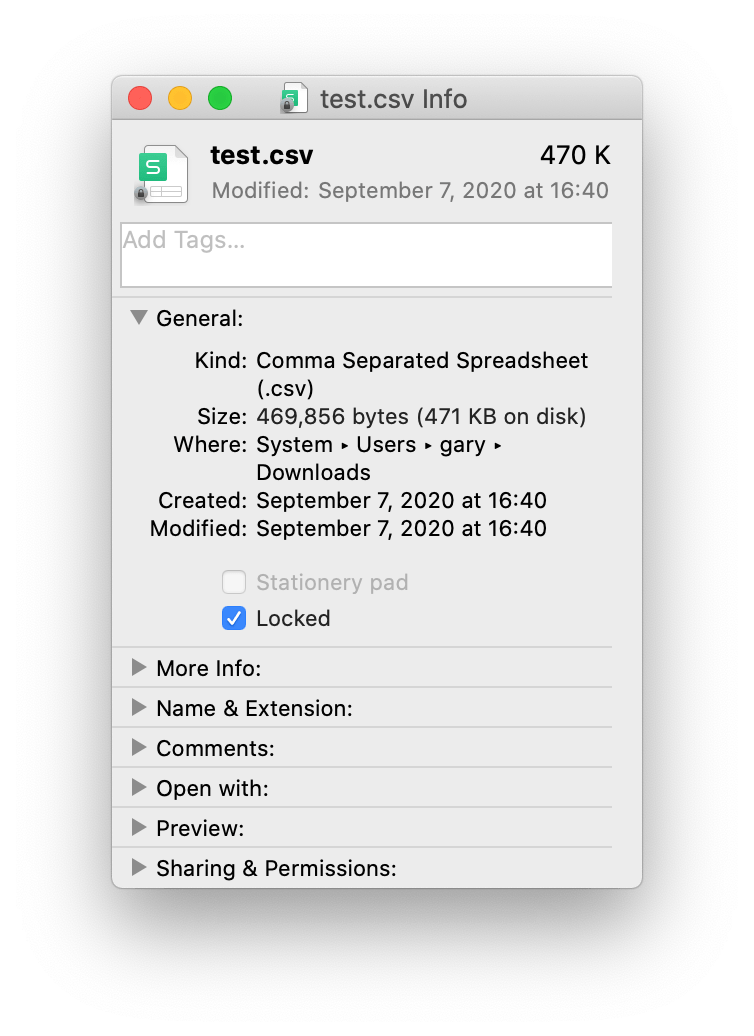
Заметка: If the Locked checkbox is greyed out, skip the rest of the solution and refer to the next solution, because it means you don’t have the permission to modify the undeletable file.
Unlock a file using Terminal
Шаг 1: Click on the Spotlight icon and then enter Terminal to launch the tool.
Step 2: Type in the command and drag the file to the Terminal command to fulfil the file path, after that press enter: chflags nouchg /filelocation (Replace /filelocation to your file’s).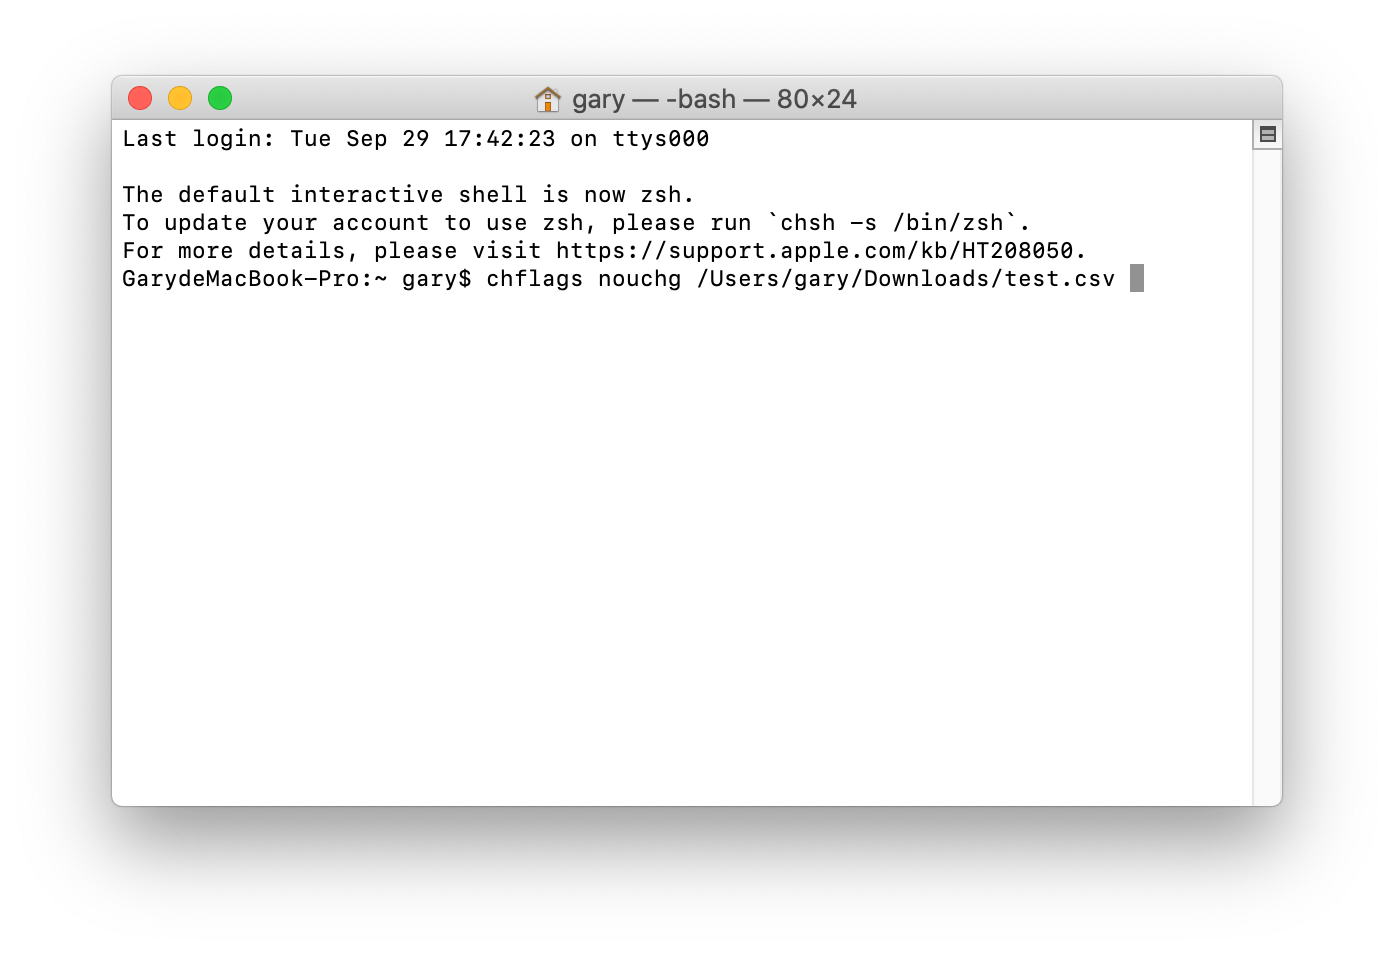
Step 3: Try deleting the file again.
Way 4: Use Safe Mode
Шаг 1: Left-click on the Apple icon to open the menu and select Перезапуск from the drop-down menu.
Step 2: After the computer starts, immediately press and hold the Shift key.
Step 3: Release the Shift key until the computer screen shows a gray Apple logo and progress indicator.
![]()
Step 4: Login the account, and go to the location of the undeletable file, move it to the Trash.
Step 5: Empty the Trash and restart the computer to exit safe mode.
Way 5: Create a Temporary User Account
Шаг 1: Go to system preferences.
Step 2: Look for the Accounts preference pane, create a new user account and note down the password.
Step 3: Select the undeletable file and move it to the shared folder located in the Users folder.
Step 4: Log out from your regular account and log in to the new account, and then move the file into Trash.
Step 5: Return to your regular account, and then delete the new account.
Way 6: Get Permission to Modify a File
Sometimes a file won’t get deleted because you don’t have the permission to modify it. This problem can happen in two ways:
- The file is being locked, and you haven’t got the permission to unlock it.
- Every time you try to delete the file an error message prompts up.
To get permission to modify a file and force delete files/folders, use the steps:
Шаг 1: Hold Control key and then left-click the file and select Get Info.
Step 2: In the Get Info window, look for the Sharing & Permissions section and then expand it.
Step 3: In this section, you can see all the user accounts with their respective privileges.
Step 4: If there is a padlock icon lying on the lower-right corner, click on it, and then enter your admin password.
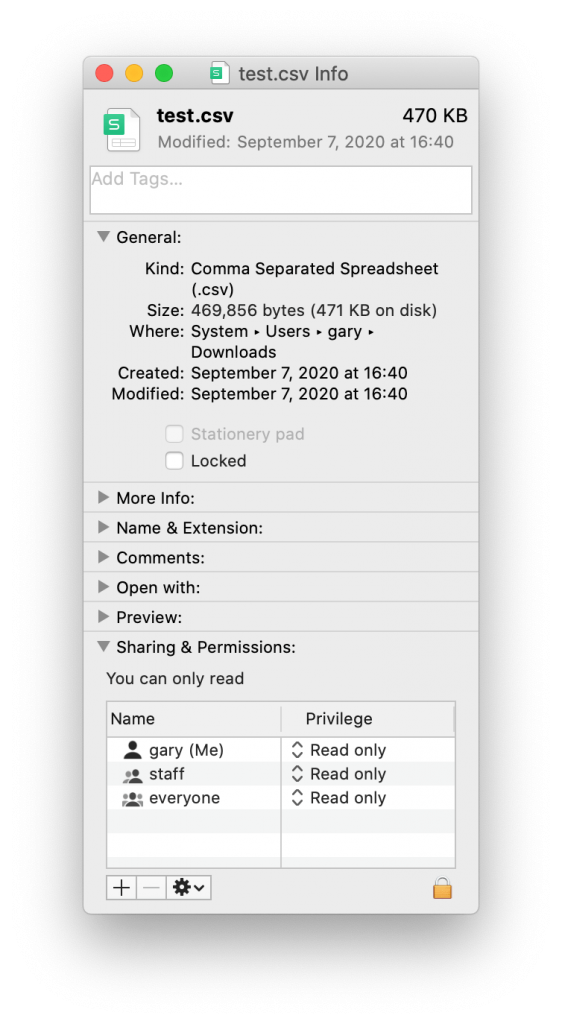
Step 5: Find your user account on the list, click on the set of arrow icons next to it, and then select Read & Write from the drop-down menu.
Step 6: Try deleting the file again.
Way 7: Use Terminal Commands
If you have Read & Write permissions and the file is unlocked, but you still can’t delete the file, then you can use Terminal commands to delete it. Notice that files deleted in this way will be permanently removed from the computer, and there is no way to retrieve them back.
Since Terminal allows users to delete some system files that are directly related to macOS, make sure that the absence of the file you are going to delete will not result in any computer failure. If you’re not sure whether removing the file will impact the system, you either leave it along or make a full backup to ensure you could restore the computer if it failed.
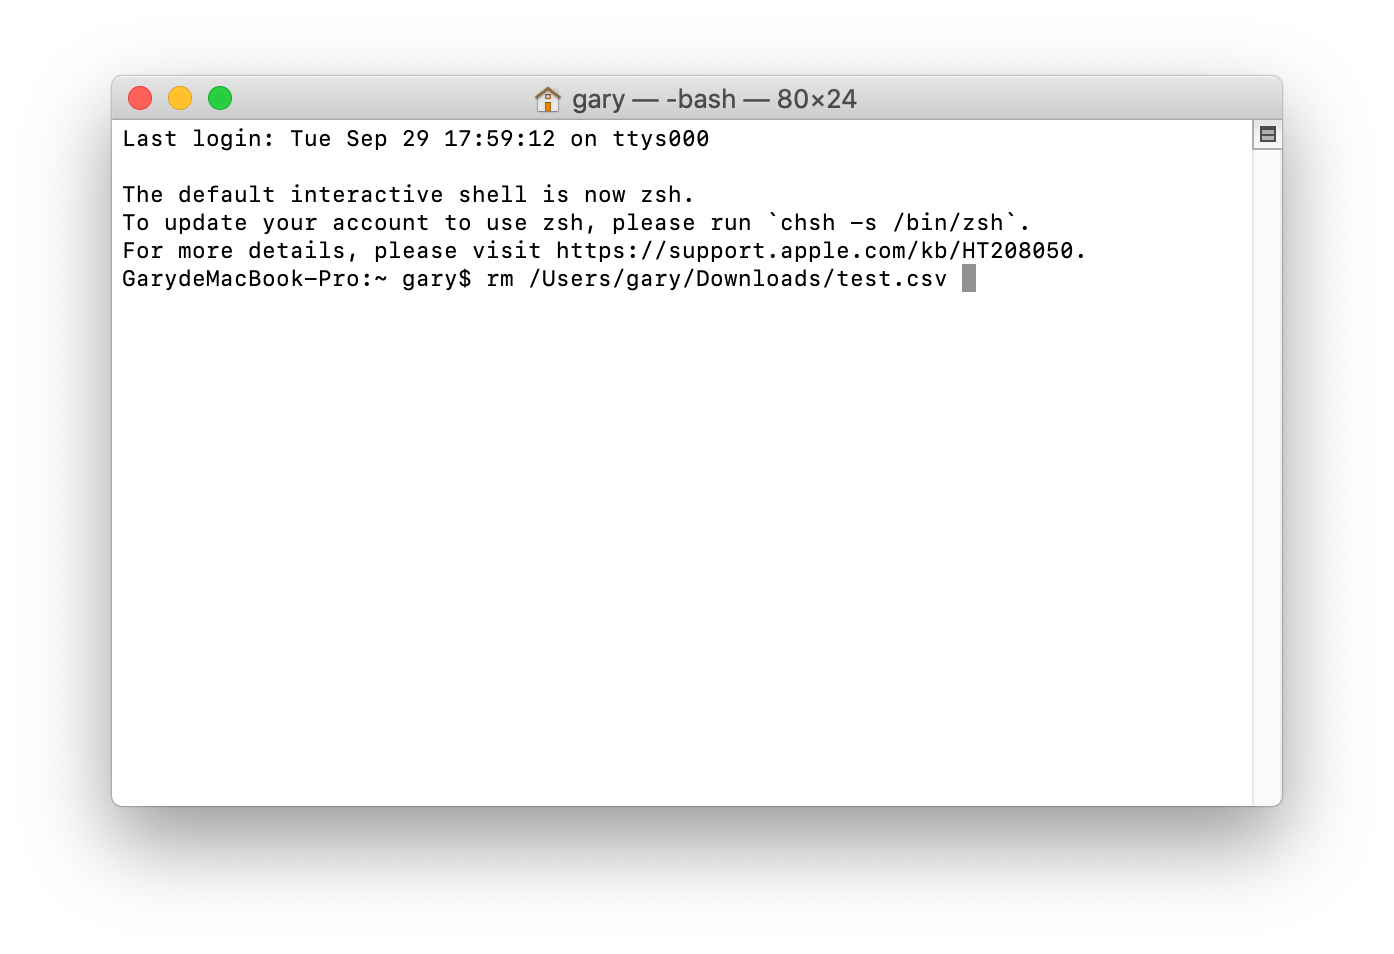
Refer to the following steps to force delete files/folders using Terminal:
Шаг 1: Navigate to Application > Utilities > Terminal, and then open Terminal.
Step 2: Type in the following command but don’t press the Enter key: rm
Step 3: After typing the rm, please press the Space key to leave a blank space behind the command and then drag the file onto Terminal, and you will see the path is automatically added. After that, hit on the Вводить key to delete the files.
Since the above-written command only works on files, if you want to delete a folder, you need to enter a different command.
- To delete an empty folder, Enter the command: rmdir /folderpath
- To delete a folder and all the subdirectories, Enter: rm -R /folderpath
Заметка: You should drag the folder to the Terminal window to add the folder path behind the command.
Closing Remarks
After using one or some of those above-written solutions, you might have succeeded in force delete files/folders. While knowing how to force delete files/folders could be helpful in many scenarios, it will be more useful to your computer if you install a trustworthy antivirus that can prevent your computer from attacks by spyware, malware, or viruses that plant undeletable files.
Besides, if you lose or inadvertently delete essential files on your computer, don’t panic, with the help of Bitwar Data Recovery, to recover files from the computer is relatively easy.
Предыдущая статья
How To Delete Pages From PDF Without Adobe Summary: If you are having trouble when force deleting files/folders or force deleting recycle bin on Windows 10, 8, 7...Следующая статья
How To Save PowerPoint Slide As Image Summary: If you are having trouble when force deleting files/folders or force deleting recycle bin on Windows 10, 8, 7...
О восстановлении данных Bitwar
3 Steps to get back 500+ kinds of deleted, formatted or lost documents, photos, videos, audios, archive files from various data loss scenarios.
Узнать подробнее


