AndroidデバイスでUSBデバッグを有効にする方法
最終更新日: 2021-09-15
まとめ:USBデバッグモードを有効にする方法に混乱しているユーザーは、次のコンテンツを参照して学習できます。
目次
Android4.1以下
デフォルトでは、 開発者向けオプション メニューはこれらのバージョンで利用できます。 2つの一般的なパスを以下に示します。
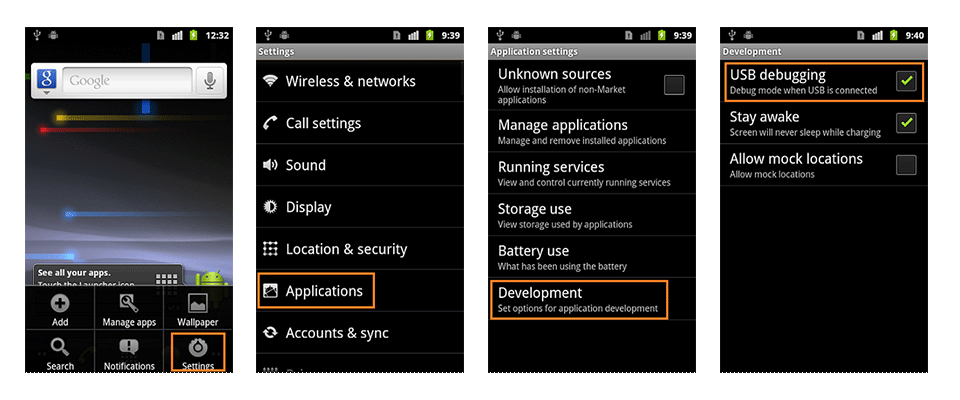
Android 2.0-2.3.x
設定>アプリケーション>開発> USBデバッグ
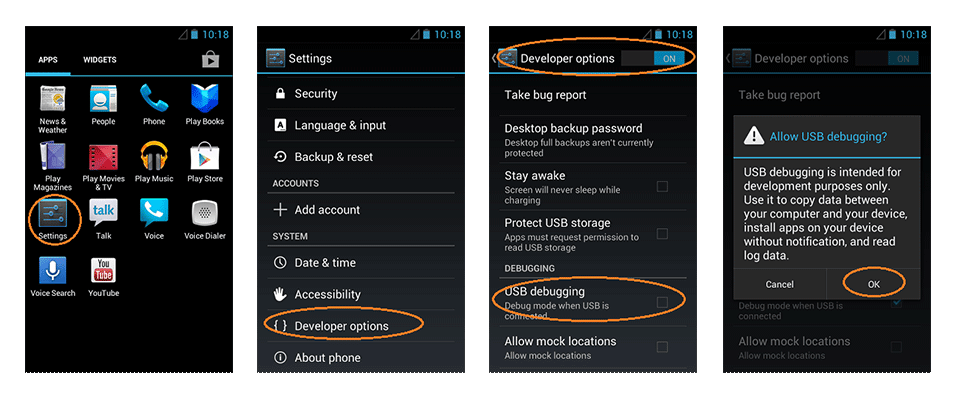
Android 3.0- 4.1.x
設定>開発者向けオプション> USBデバッグ
Android4.2以降
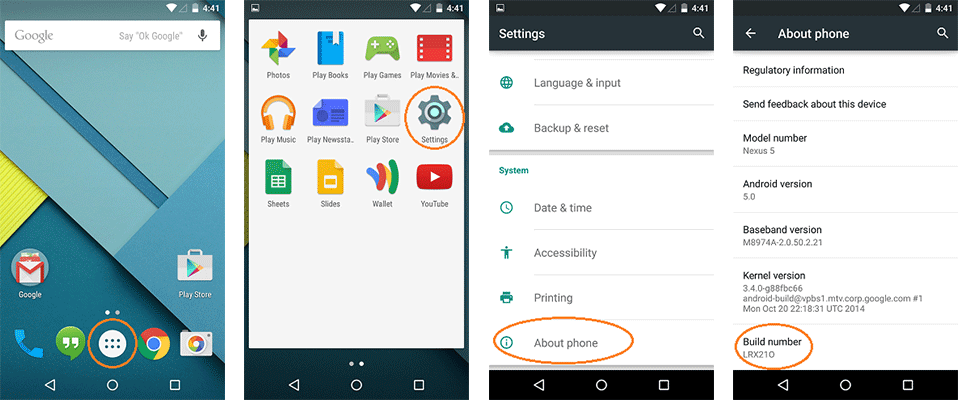
ステップ1:に移動します [設定] > 制度 > 電話について >一番下までスクロール>タップ ビルド番号 7回。次に、ディスプレイの下部にプロンプトがポップアップ表示され、開発者になったことを通知します。
ステップ2:前のページに戻り、 開発者向けオプション その上 電話について.
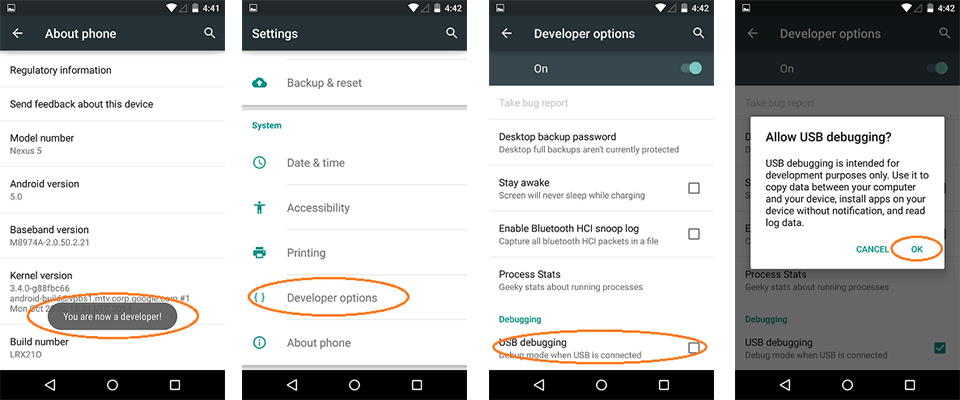
ステップ3:下にスクロールして有効にする USBデバッグ.
USBデバッグモードは、たとえば電話をルート化したい開発者やユーザーを対象とした強力な機能です。 Androidスマートフォンのルート化に向けた最初のステップを実行した後、次のリンクをクリックして、残りのルート化手順を学習します。
Android スマートフォンを root 化する方法 (PC を使用)
Android スマートフォンを root 化する方法 (PC なし)