Watermark Photo
Summary: The user guide below will allow users to learn the tutorial on adding watermark to photo by using the Watermark Photo tool in Bitwar Watermark Expert.
Table of Contents
Video Tutorial
Watermark Photo
The Watermark Photo tool enables software users to add watermark to photo easily and supports batch add watermark to multiple photos at the same time!
Watermark Photo Interface Button
Steps to Add Watermark To Photo
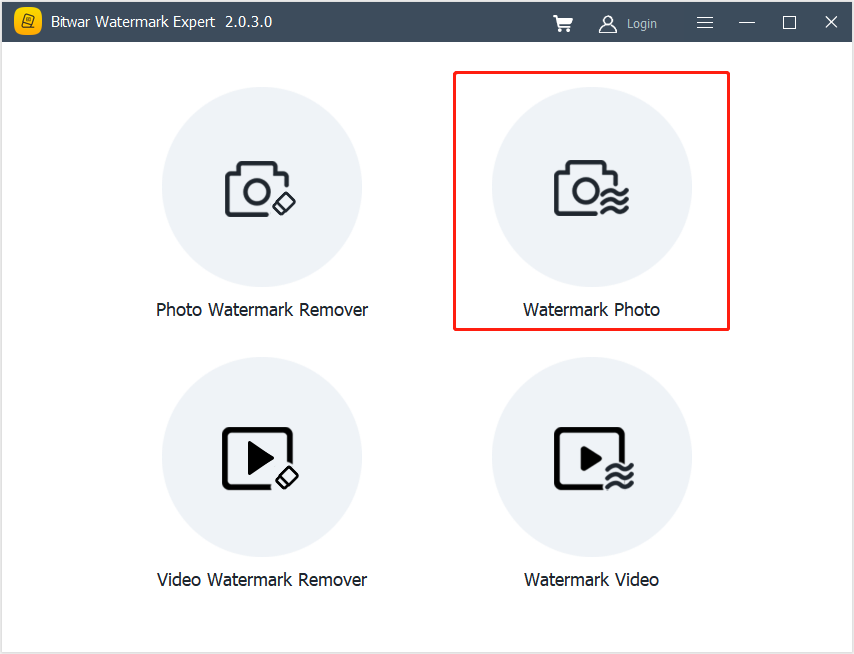
1. Launch Bitwar Watermark Expert and select the Watermark Photo from the main interface.
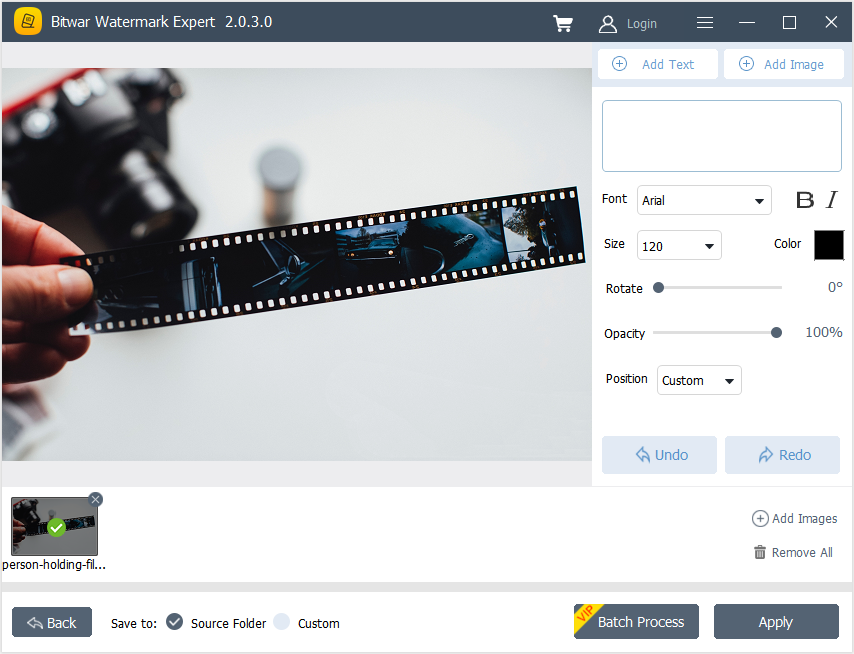
2. Drag and click Add Photo icon to add the photo into the software for adding watermark.
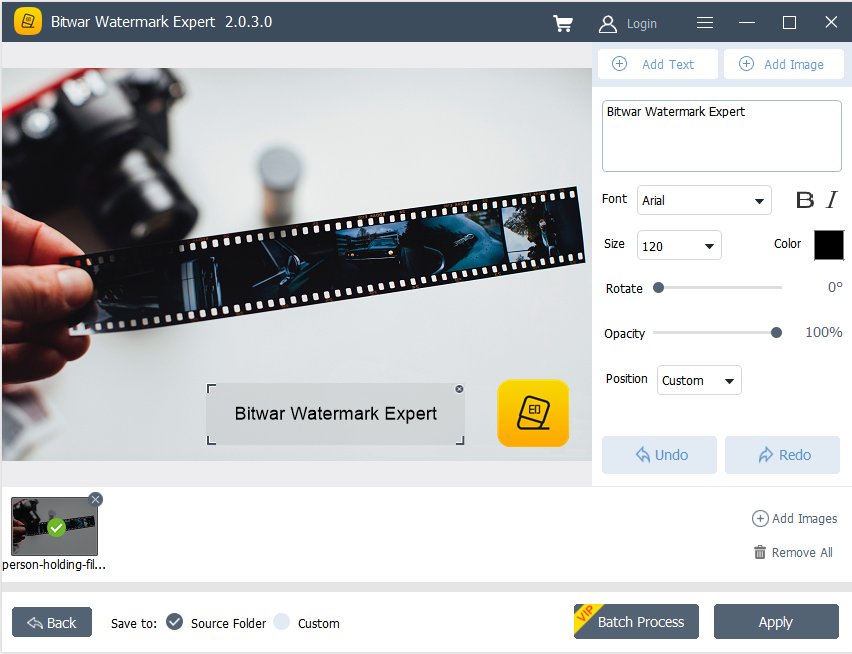
3. Select Add Text or Add Image to watermark the photo. Moreover, users can edit or change the design of the watermark by changing the font, size, rotate, opacity, and others.
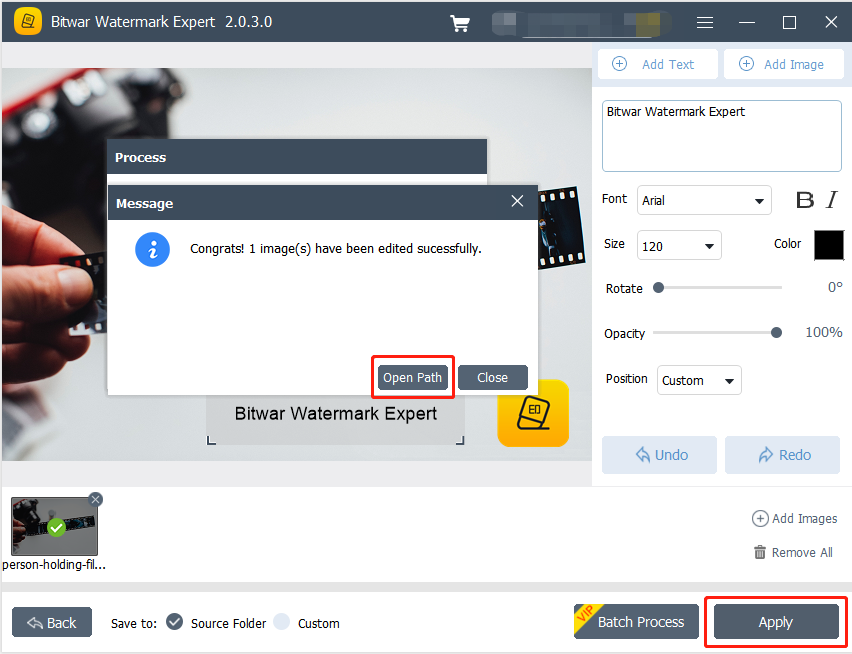
4. Click Apply and wait for a moment for the process to finish. Then, click Open Path to view the photo in the file directory folder.
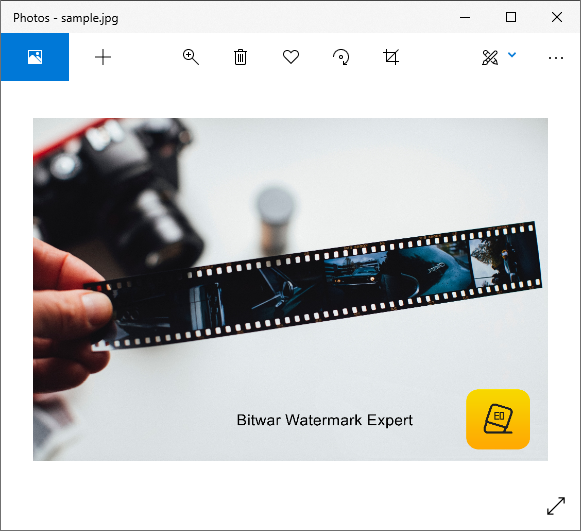
5. Preview the result of the new photo in the file directory folder!
Steps to Batch Add Watermark to Photos
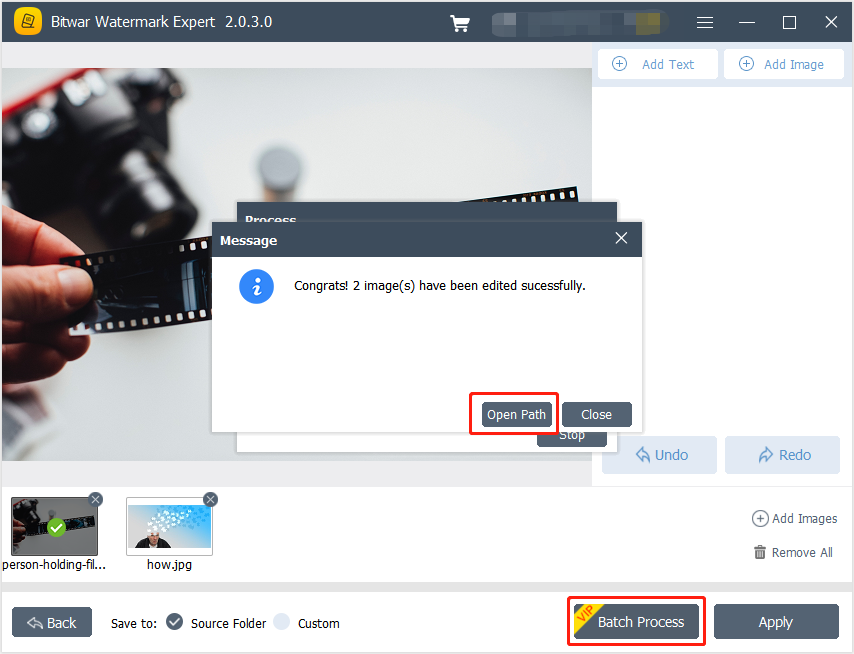
Open Watermark Video from the software and Add all the photos into the software. Design the watermark just as mentioned above on all the photos and click Batch Process to add the watermark to all the photos. Then, click Open Path again and Preview all the new photos in the file directory folder.
For the Next Tutorial on Watermark Video, please click on the link below!


