


Table of Contents
Lock Option on Windows 10
The lock option on Windows 10 is a built-in function that helps users to lock Windows 10 computers by using a mouse click. Moreover, it is quick and easy to access if you add the lock option to your Windows 10 taskbar or start menu.
Windows users need to create a shortcut first for the lock option in order to add the lock option to the taskbar by pining the shortcut to both the Start menu and taskbar.
Steps to Add Lock Option to Windows 10 Taskbar and Start Menu
Step 1: Right-click on the desktop and click New then Shortcut.
Step 2: Type in the command: Rundll32.exe user32.dll,LockWorkStation, and press Next.
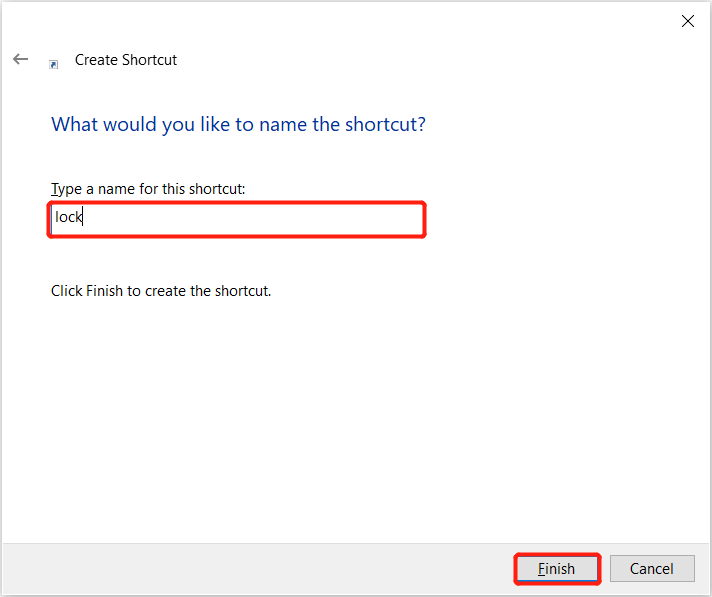
Step 3: Give the shortcut name as Lock and click Finish to create the Lock shortcut.

Step 4: Right-click the Lock shortcut and choose Pin to Start or Pin to Taskbar to add the lock option to the taskbar and start menu.
Add Lock Option Now!
Follow the guided steps above and you can add the lock option to your Windows 10 taskbar or start menu easily with no trouble!