


Summary: Since macOS High Sierra (macOS 10.13), the system partition may not be accessed by any other third-party software, those who want to use Bitwar Data Recovery for Mac to scan the system partition should at first disable the SIP. For users who don’t know how to do so, this article will delineate the steps you need to take.
Table of Contents
1. Disable System Integrity Protection for Non-M1 Mac
Step 1: Reboot the Mac device into Recovery Mode by pressing Command + R at the same time. Release the key until you see the screen below.


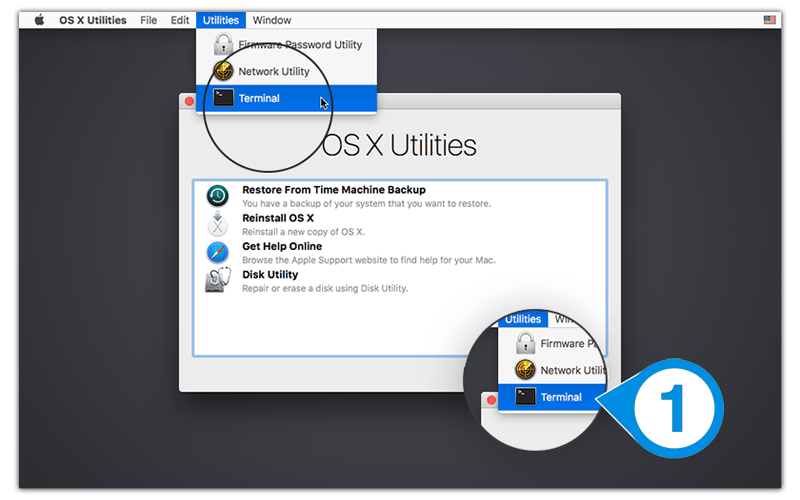
Step 2: Move to Utilities and Run the Terminal App.

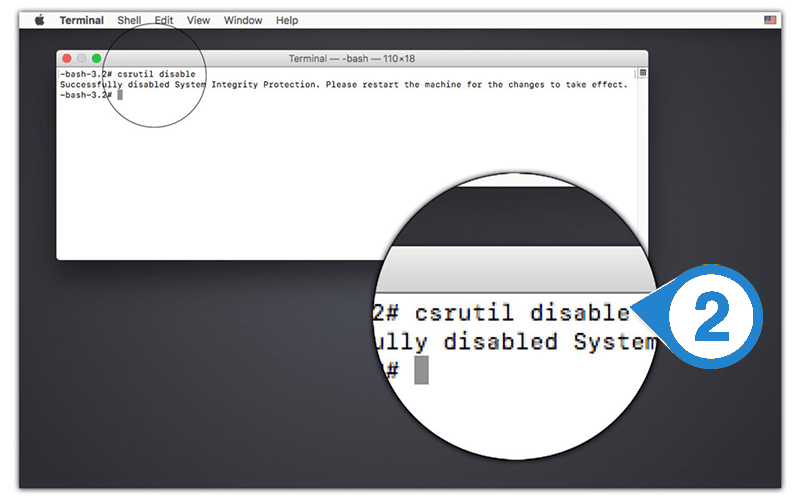
Step 3: Now, type the csrutil disable in Terminal Window, and then press Return to disable the SIP.
Step 4: After entering the command, click on the Apple Icon and Choose to Restart Mac Device.
2. Disable System Integrity Protection for M1 Mac
Step 1: Reboot the Mac device into Recovery Mode by pressing the Power button until you see the Options Screen shows up. Hit on the Continue Button.

You can now re-launch Bitwar Data Recovery for Mac and select the System Partition to be continued with the data recovery.
3. Way to Enable System Integrity Protection
Once the recovery is complete, please remember to enter the Recovery Mode to enable the SIP again.
To enable it, please type csrutil enable in the Terminal window and restart your Mac computer. Note: If M1 Mac asks you to confirm and enter the admin password, just follow the steps and finish enabling the SIP.