[Solved] USB Thinks It’s A CD Drive Issue
Summary: Have you ever come across a situation where your USB flash drive gets detected as a CD drive connected to your computer? Well, this strange situation can happen to every USB flash drive. When you encounter this problem after opening the drive, you get the below error message: There is no disk in the drive. Please insert a disk into drive. Through this article, we will explain to you why your USB thinks it is a CD drive and how to recover all your data using Bitwar Data Recovery when you come across this problem.
Table of Contents
What Are the Causes of USB Thinks It’s a CD Drive
After this issue has happened, you are basically restricted from accessing the data stored in the erroneous drive. Besides, there are two cases that can help you get your head around the causes of USB thinks it’s a CD drive.
Case 1: Connect your USB flash drive to any other computer device and check if it works or not. If the USB is recognized as the CD drive again, check the USB flash to see whether there is a switch on it.
In earlier times, USB flash drives used to stimulate as CD drives accompanied with a specified switch. If the switch of the USB is toggled to a particular side, it means that the drive is showing as a CD drive. To remove it from the USB stick, just move the switch to the other side.
Case 2: In case there is no such switch on your USB, it means that the USB flash drive is recognized as an empty CD ROM due to internal drive errors. This issue not only takes place in the case of USB flash drives but can also occur in storage devices like memory cards, SD cards, and HDD’s.
The simplest way to overcome this concern is by formatting the erroneous drive. However, it can become a little complicated as formatting can cause permanent data loss. Therefore, recover all your vital data from the USB flash drive and then perform formatting.
How to Recover Lost Data Using Bitwar Data Recovery When the USB Thinks It’s a CD Drive?
Among several data recovery software in the market, we recommend using only Bitwar Data Recovery software as it’s both effective and efficient. This software houses a user-friendly interface, which makes this tool pretty convenient to use. Besides, it is capable of recovering any kind of data from any sort of external/internal storage time in comparatively less time.
Step 1: Download Bitwar Data Recovery tool from the Bitwarsoft Download Center.
Step 2: After downloading, launch the recovery tool and choose the USB that thinks it’s a CD drive, followed by pressing Next.
-3.png)
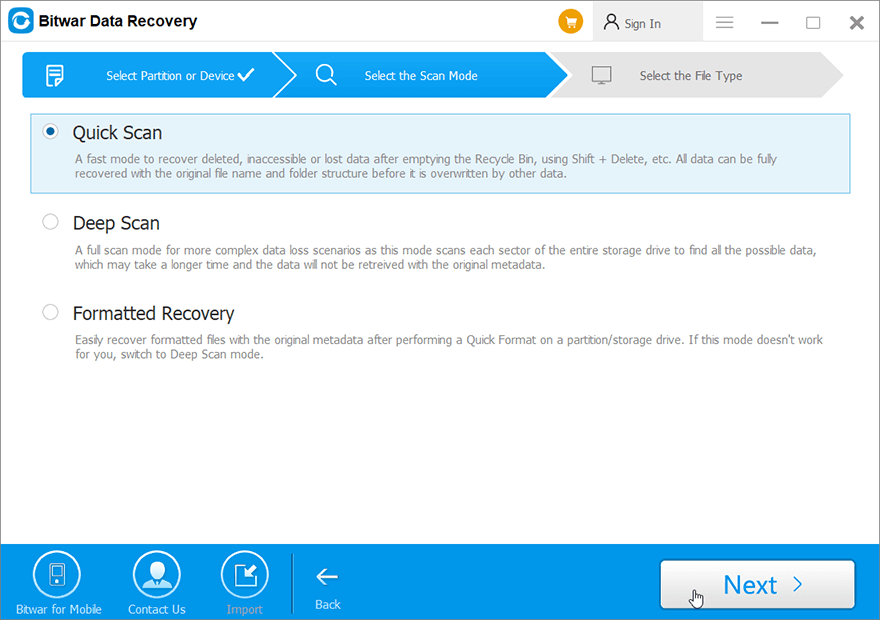
Step 3: Now, select the scan mode. You can choose the Quick Scan mode, which is capable of recovering the most lost files. If this scan mode doesn’t work, you could come back to this stage and then select Deep Scan. After selecting the scan mode, click on the Next button to proceed.
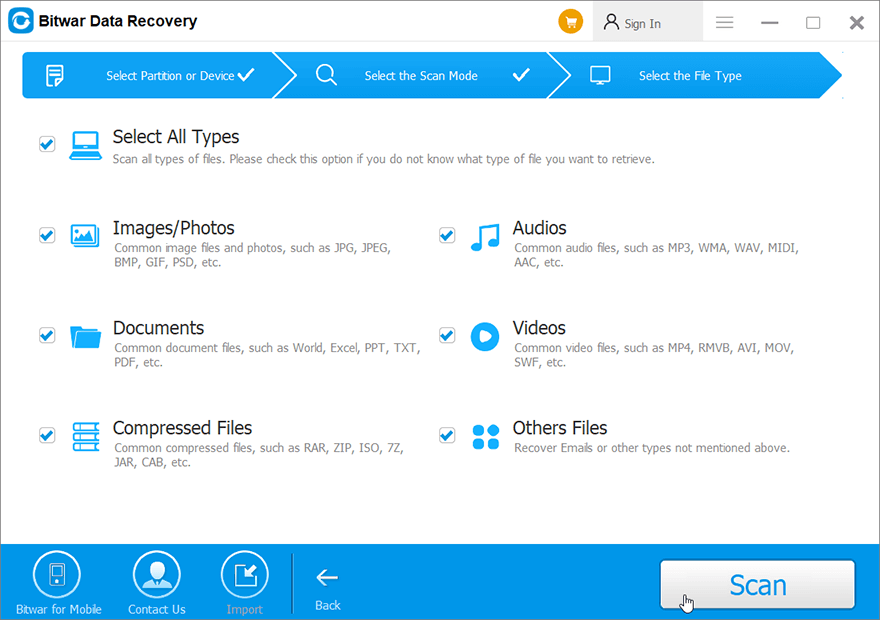
Step 4: Now, select the file types for the recovery and hit on the Next button.
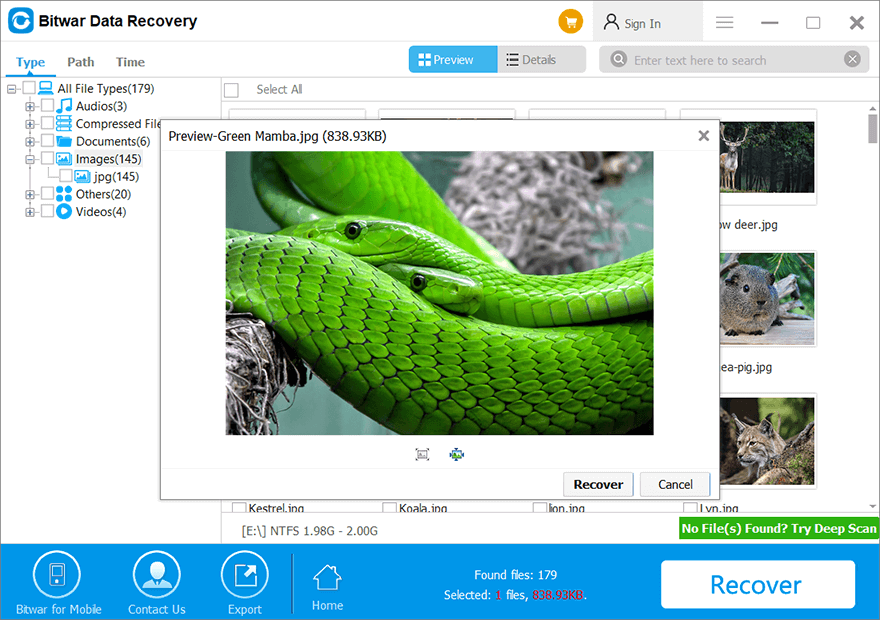
Step 5: Lastly, preview all the selected data and click on Recover to begin data recovery.
How to Fix the USB Thinks It’s a CD Drive Issue?
The best solution to the USB thinks it’s a CD drive issue is to format the faulty USB flash drive. Below we have listed several common methods of formatting a USB flash drive.
Method 1: Format a USB Flash Drive Using File Explorer
This is the easiest way that many users are used to. Use the following instructions to format a USB flash drive:
Step 1: Connect your USB flash drive to your PC and then press Win key + E to open File Explorer.
Step 2: Right-click the drive and select the Format option.
Step 3: Expand the File system drop-down menu and then select the exFAT option.
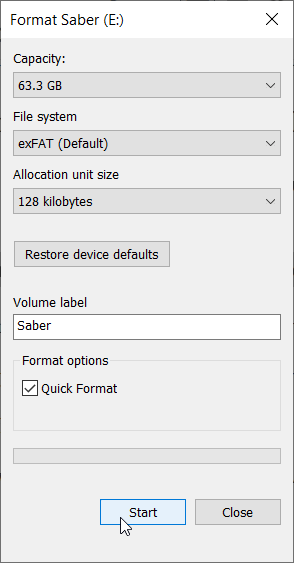
Step 4: Click the Start button.
Note: Unchecking the Quick Format means executing a full format. It brings about a thorough scanning and wipes out every bit of data on the USB flash drive. You will not be able to get back your data after selecting this option.
Method 2: Format a USB Flash Drive Using Diskpart
Diskpart is another useful tool that can be used to format a USB flash drive. To cap it off, the tool even works for the computer in which no exFAT options are available in File Explorer or Disk Management. But users should keep in mind that they should select the correct volume before doing a quick or full format on the USB flash drive:
Step 1: Type in Command Prompt in the search bar, right-click it, and then choose Run as administrator.
Step 2: Type in the below-written command lines in the same order and press Enter after each line.
- diskpart
- list volume
- select volume NUMBER (Replace NUMBER with the number of the USB flash drive)
- format fs=exFAT quick (Don’t enter quick if you want a full format)
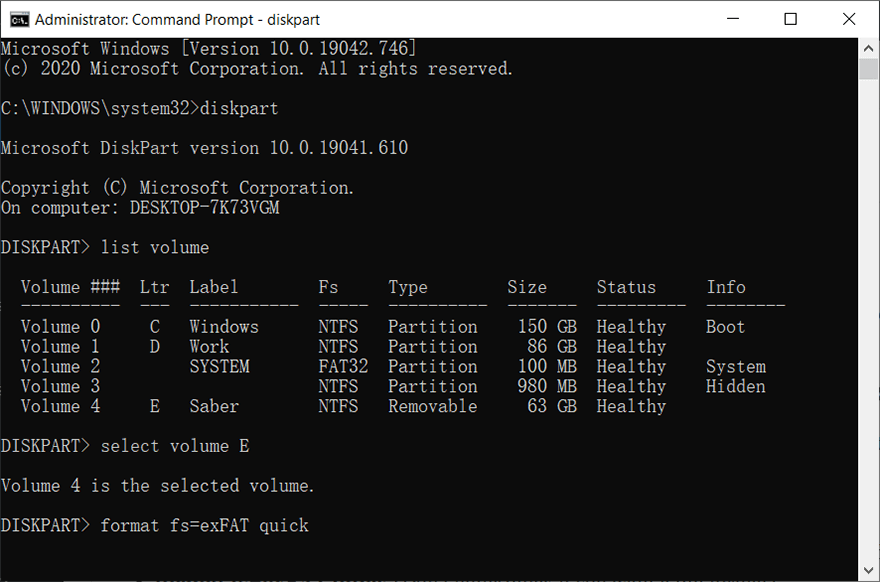
Note: You could replace exFAT with other format names if you want a specific file system. For instance, enter the command format fs=fat32 to format the USB flash drive into a FAT32 format storage medium.
Method 3: Format a USB Flash Drive Using Disk Management
This is a method similar to the one performed by using File Explorer, and here are the instructions you can follow:
Step 1: Press Wins + Q, type in Disk Management in the search bar and then open it.
Step 2: Right-click on the faulty USB flash drive and select Format.
Step 3: Expand the drop-down menu of the File System option and then select exFAT.
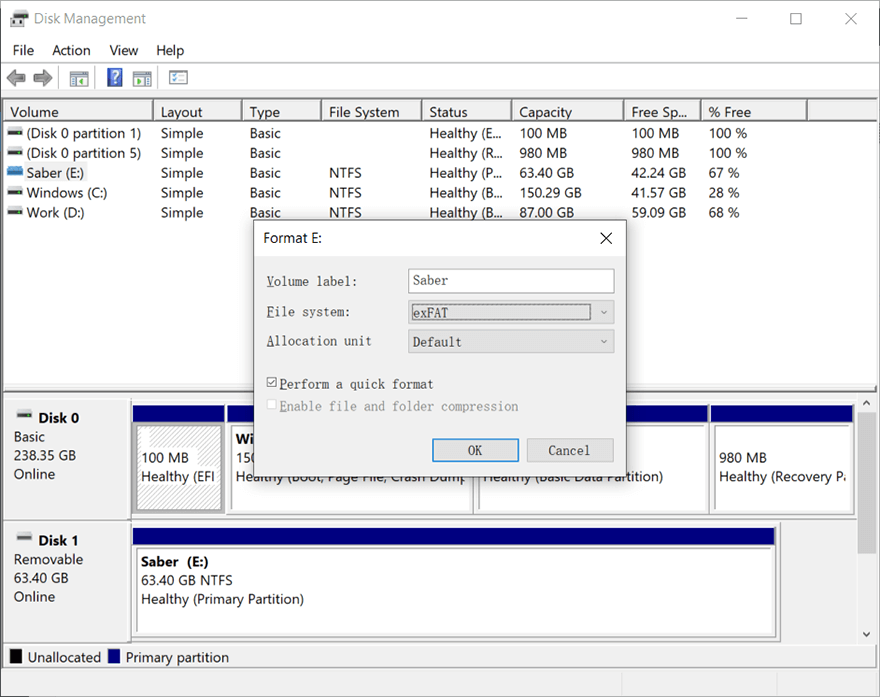
Step 4: Click on the OK button.
Method 4: Format a USB Flash Drive Using PowerShell (Windows 10 Only)
PowerShell is a task and configuration management platform which was first appeared in 2006; it’s powerful than Command Prompt that can be used to automate many different system administration tasks, and of course, for formatting a USB flash drive:
Step 1: Right-click on the Start menu at the lower-left corner and choose Windows PowerShell(Admin).
Step 2: Enter the following command to view the USB flash drive you want to format:
- Get-Volume
- Format-Volume -DriveLetter F -FileSystem exFAT (Replace F to the exact drive letter of your USB flash drive)
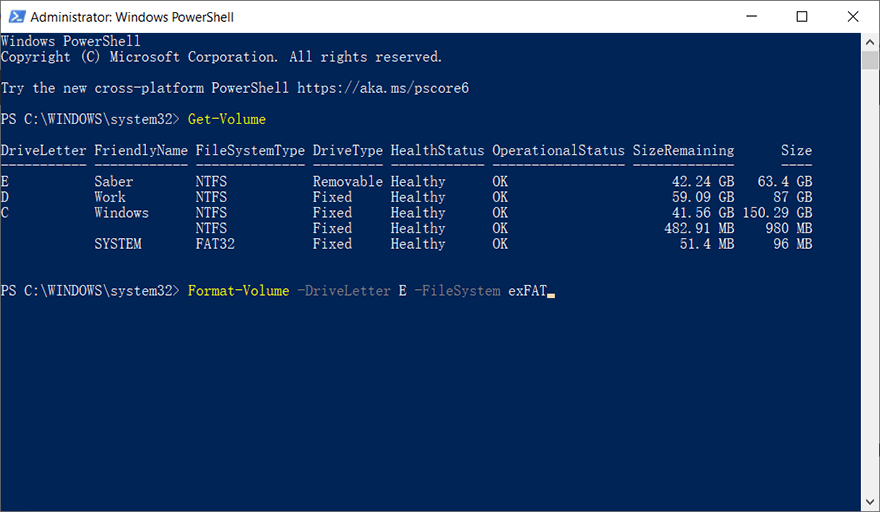
Note: In this method, bear in mind that after entering the format command, the computer will format the USB flash drive to exFAT immediately. By the way, if you want a FAT32 drive, just replace exFAT with FAT32.
Conclusion
The reasons like drive errors lead your USB to think that it’s a CD drive. When this problem occurs, there is no need to worry as all you need to do is to format your drive. But before you format your drive, make sure that you have transferred important data on it to other safe drives.
In case it contains some essential files, consider recovering. To recover your data, we recommend using only Bitwar Data Recovery as it provides 100% clean recovery in a short time. Besides, this capable recovery software can recover any kind of data from any type of storage device.
Previous Article
6 Solutions To Fix External Hard Drive Takes Forever To Load Issue Summary: Have you ever come across a situation where your USB flash drive gets detected as a CD drive connected...Next Article
7 Best Solutions To Fix The USB Shows 0 Bytes Issue Summary: Have you ever come across a situation where your USB flash drive gets detected as a CD drive connected...
About Bitwar Data Recovery
3 Steps to get back 500+ kinds of deleted, formatted or lost documents, photos, videos, audios, archive files from various data loss scenarios.
Learn More


