How To Recover Lost Files From a Hard Drive Affected By Bad Sectors
Table of Contents
What Are Bad Sectors?
Bad sectors on a hard drive go inaccessible or corrupted, resulting from various causes. Those tiny faulty clusters of storage space can’t respond to any requests from users, neither read nor write.
What Are the Causes Of Bad Sectors?
There are mainly two types of bad sectors, namely logical and physical. Refer to the following information to learn about each kind and its common causes.
Common causes of bad logical sectors: System crashes, virus infection, software conflicts, sudden shutdown, reboot Of computer, sudden power outage, etc.
Common causes of bad physical sectors: Overheat, dust, impact, wearing out, faulty blocks, overclocked PCI bus speeds, etc.
How to Repair Bad Sectors
CHKDSK Scan
Windows has a built-in tool called chkdsk, which can help you scan your hard drives for bad sectors, marking physical ones as bad and repairing logical ones to make them usable again. If the system thinks there’s a problem with one of the hard drives on the computer, it will automatically launch this tool when your computer boots up. But you’re also free to launch this tool manually whenever you wish.
Step 1: Right-click on the Start button and click on Command Prompt (Admin).
Step 2: Type in the following command and press Enter:
chkdsk C:/f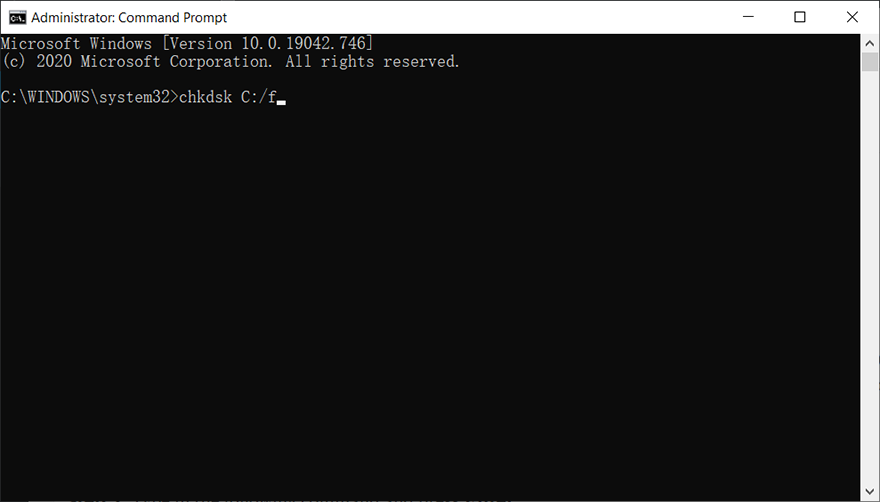
Note: Replace C with your drive letter.
Step 3: Wait for the process to finish.
Step 4: Reboot your computer to see whether the error persists.
Error Checking
If any problems with the CHKDSK tool that prevents you from running the tool, you can also use Error checking, a graphical version of Chkdsk.
Step 1: Press Windows key + E to open File Explorer.
Step 2: Right-click on the faulty disk drive and then click Properties.
Step 3: Click on the Tools tab.
Step 4: Click on the Check button within the Error checking section.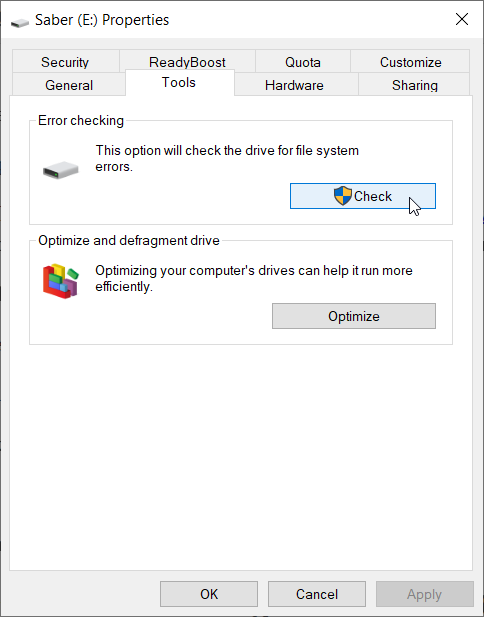
Step 5: Click on the Scan drive button to confirm your operation.
How To Recover Lost Files From a Hard Drive Affected By Bad Sector
In most cases, at the outset, users can follow the usual steps to run Bitwar Data Recovery and perform a quick scan:
Step 1: Download Bitwar Data Recovery from our official website and install it.
Step 2: Launch the software, choose the faulty disk drive where the lost files were stored, and click on Next.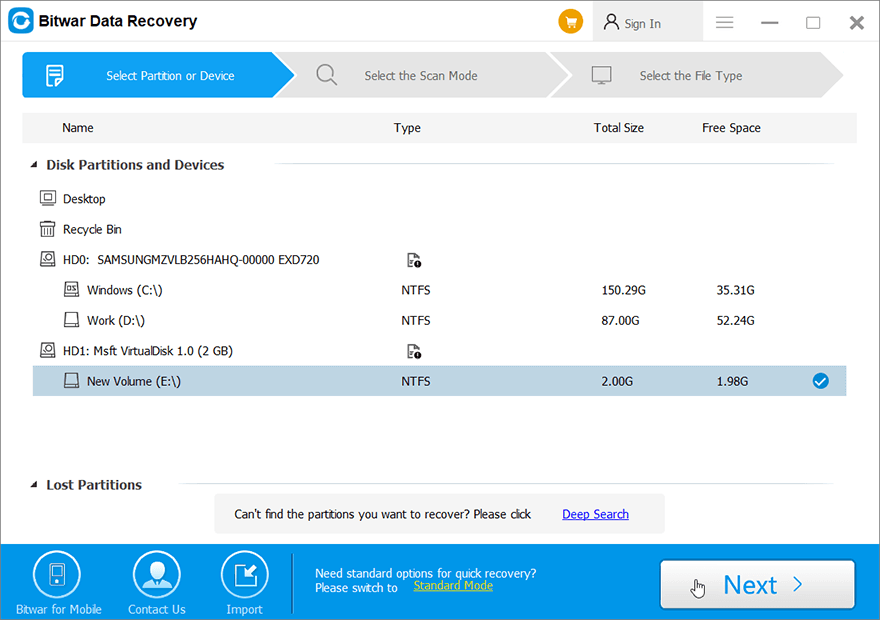
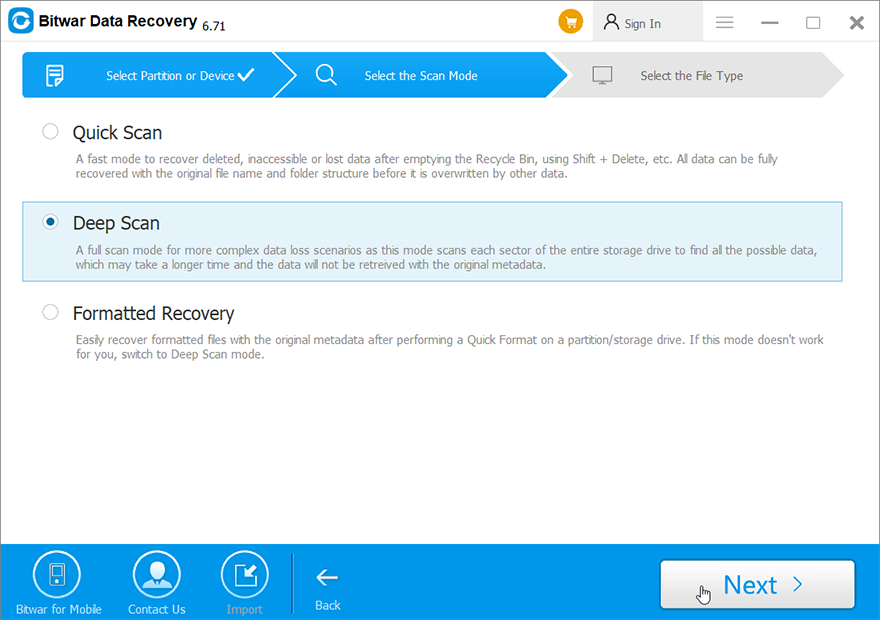
Step 3: In this stage, you can select a scan mode. We want to suggest Quick Scan, which can recover most lost files. If it fails, you can come back to this stage and then use Deep Scan, which is more effective.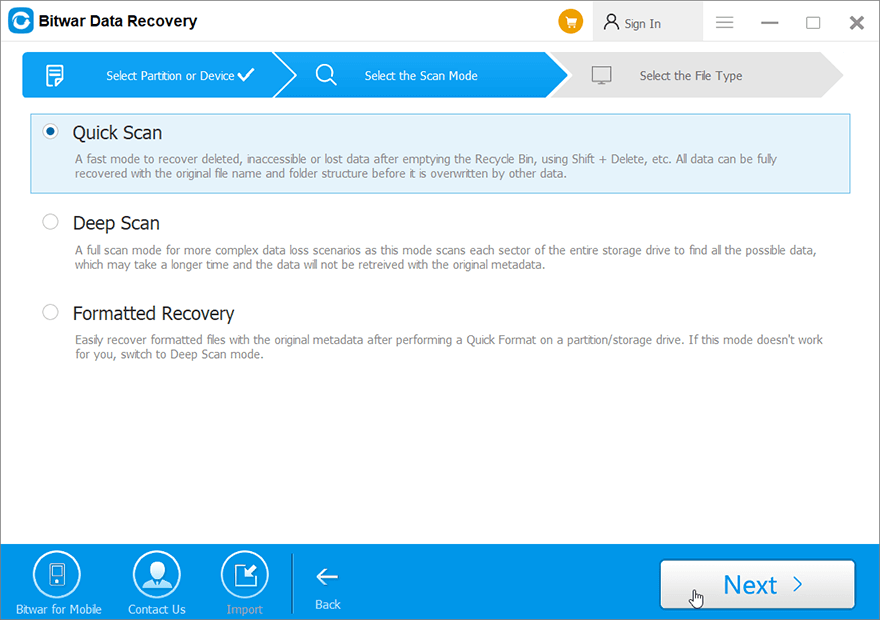
Step 4: Select desired file types and clicked on Next.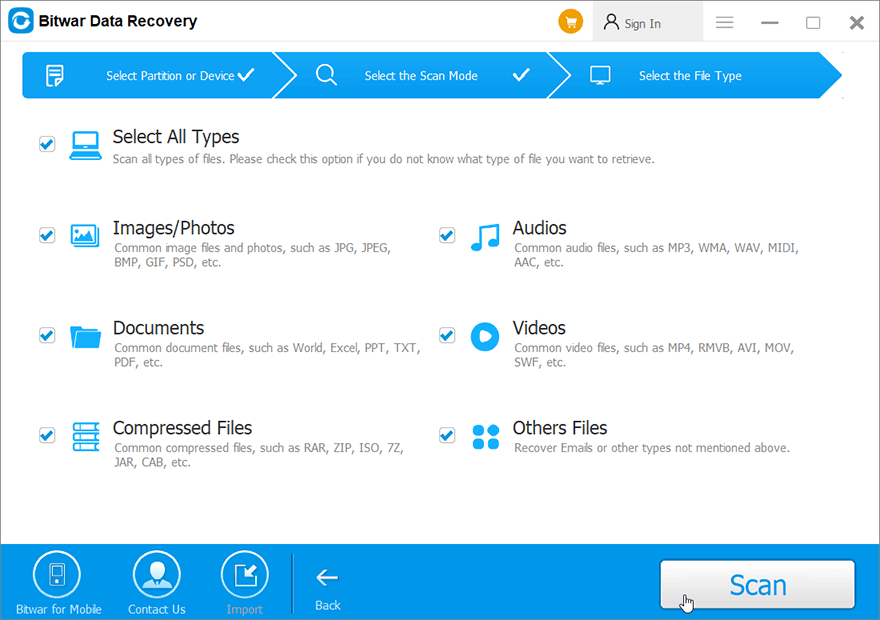
Step 5: Preview scanning results to check their intactness. Select the files you want and click on Recover.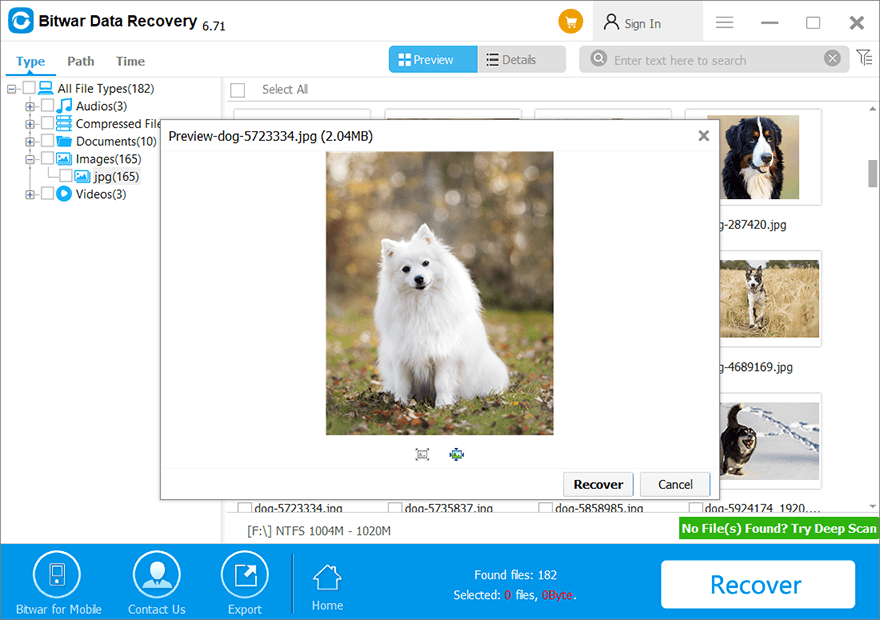
Important: Bear in mind that to avoid the risk of overwriting lost files that have yet to be recovered, you should save those recovered files to other disks except the one where the lost data were stored.
However, given that the faulty hard drive may be fraught with bad sectors, the progress bar on the final stage may freeze and refuse to go on anymore. The reason for this gridlock is that those bad sectors affecting the hard drive prevent the tool from scanning them.
In this case, you can use Range Settings, one of the features offered by Deep Scan, to get around those bad sectors and complete the recovery. For instance, if the progress bar on the final stage halts at 90% by using Quick Scan, you can set the tool to scan the part of the drive from 0% to 90%, as the following images show.
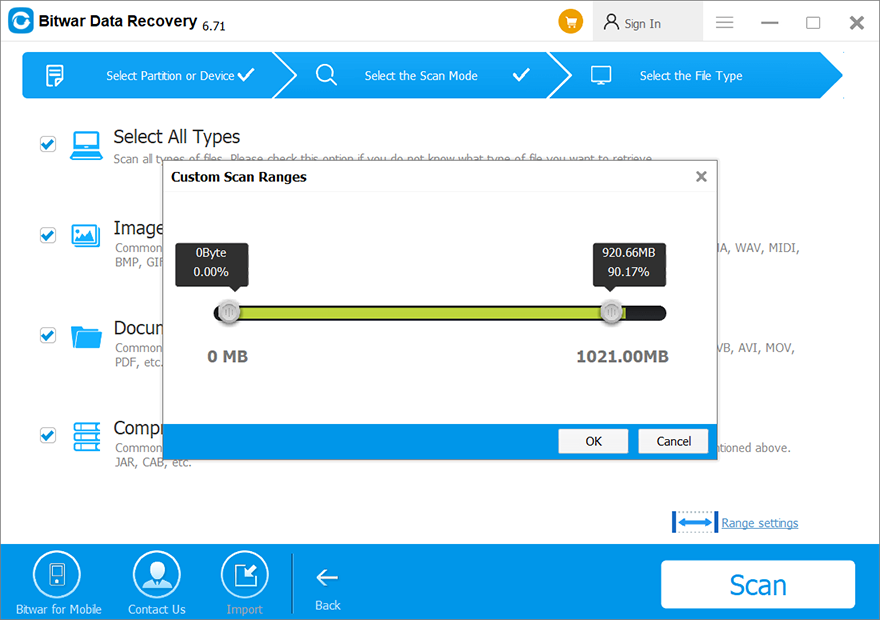
After successfully recovering lost data from this part of the faulty drive, you could decide whether or not to scan the remaining sectors. If the files you have recovered don’t include what you want, you could try to set the Range Settings again. This time you could tweak the tool to scan the drive from 91% to 100%; if it halts, re-run the device and review it from 92% to 100%. Repeat this process until the progress bar usually works, and the recovery is successful.
Video Tutorial
Check out this video to learn how to use the Range Settings feature:


